
Gizmo Expressions
The Orgvue scripting language, Gizmo, allows you to perform querying, calculations, aggregations and transformations on your data and save those expressions to a property for use in your analysis and visualization
For more details see the Gizmo Cookbook
This cookbook is a constantly growing collection of Gizmo expressions
It covers the basic grammar of the Gizmo language, common functions and optimization tips and advice
Typical use cases of Gizmo Expressions
Quickly get answers to complex questions, for example:
- What is the total revenue per employee of the sales department?
- What is the average age of all female program managers?
Create custom metrics using existing data, for example:
- ratio of front to back office staff
- benefits as a percentage of salary
Manipulate text and numbers, for example:
- increase everyone’s salary by 10%
- convert employees’ performance scores in numbers to A, B, C and D
Note: Compared to Filter Control, Search Box and various visualization options, Gizmo can be quicker to get an answer to complex and specific questions, and it further allows manipulation of the results
Data in Orgvue is stored as nodes which have properties. Expressions allow you to manipulate these node.property values. Gizmo is the language that is used to write these expressions
Expressions can be understood as the Orgvue equivalent of Excel formulas. Gizmo expressions can be written or stored in three different places:
- Gizmo Expression Editor: when you want to perform a calculation on-the-fly and then save that expression for use later
- As a dataset property via Settings: when editing a property within property manager in settings
- As a Pack Property: when you want to save an expression for use again in a specific pack to support analysis
Gizmo Expression Editor
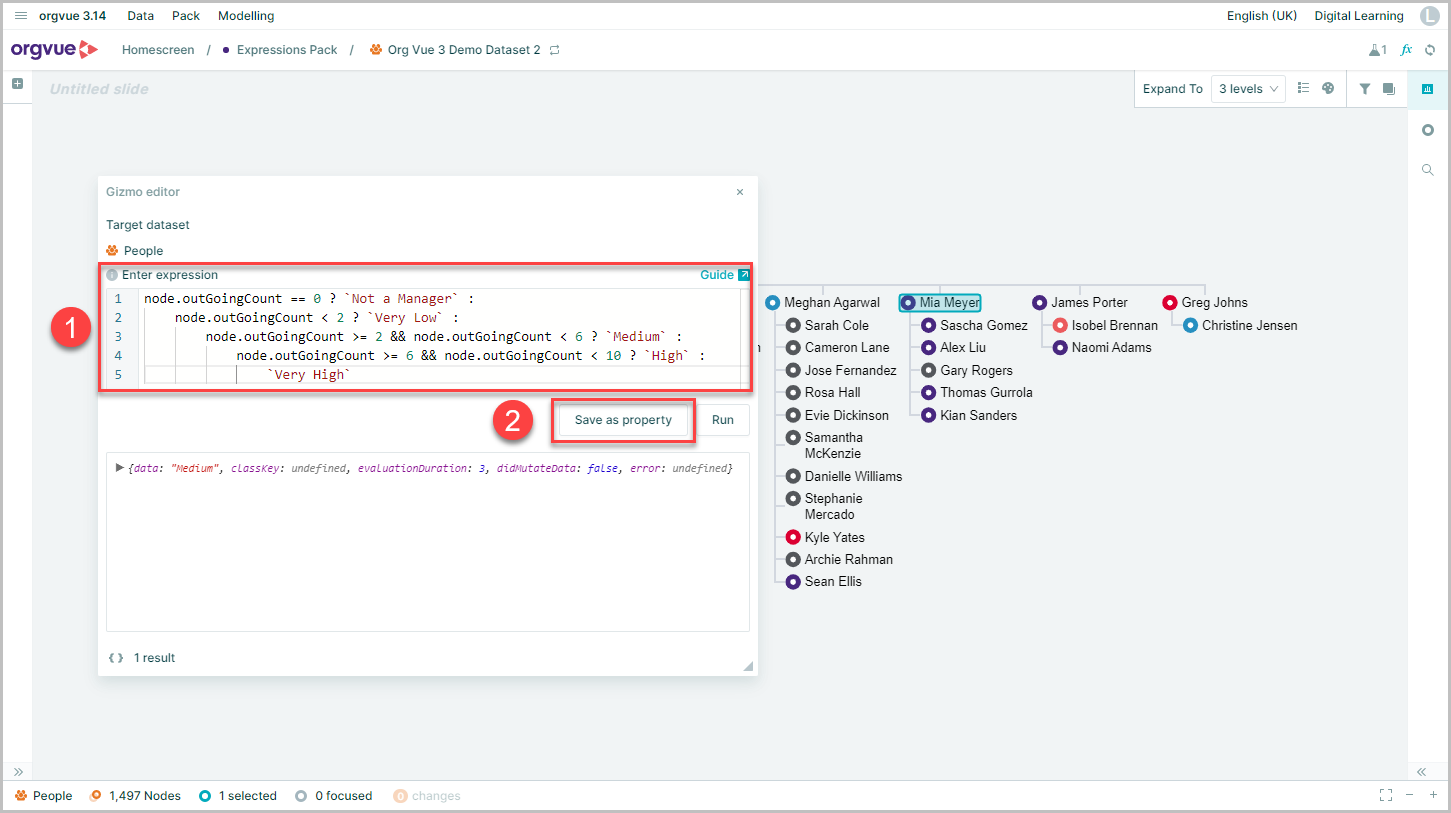
It is possible to enter expressions using the Orgvue scripting language, Gizmo, directly into the Orgvue workspace using the Gizmo editor window
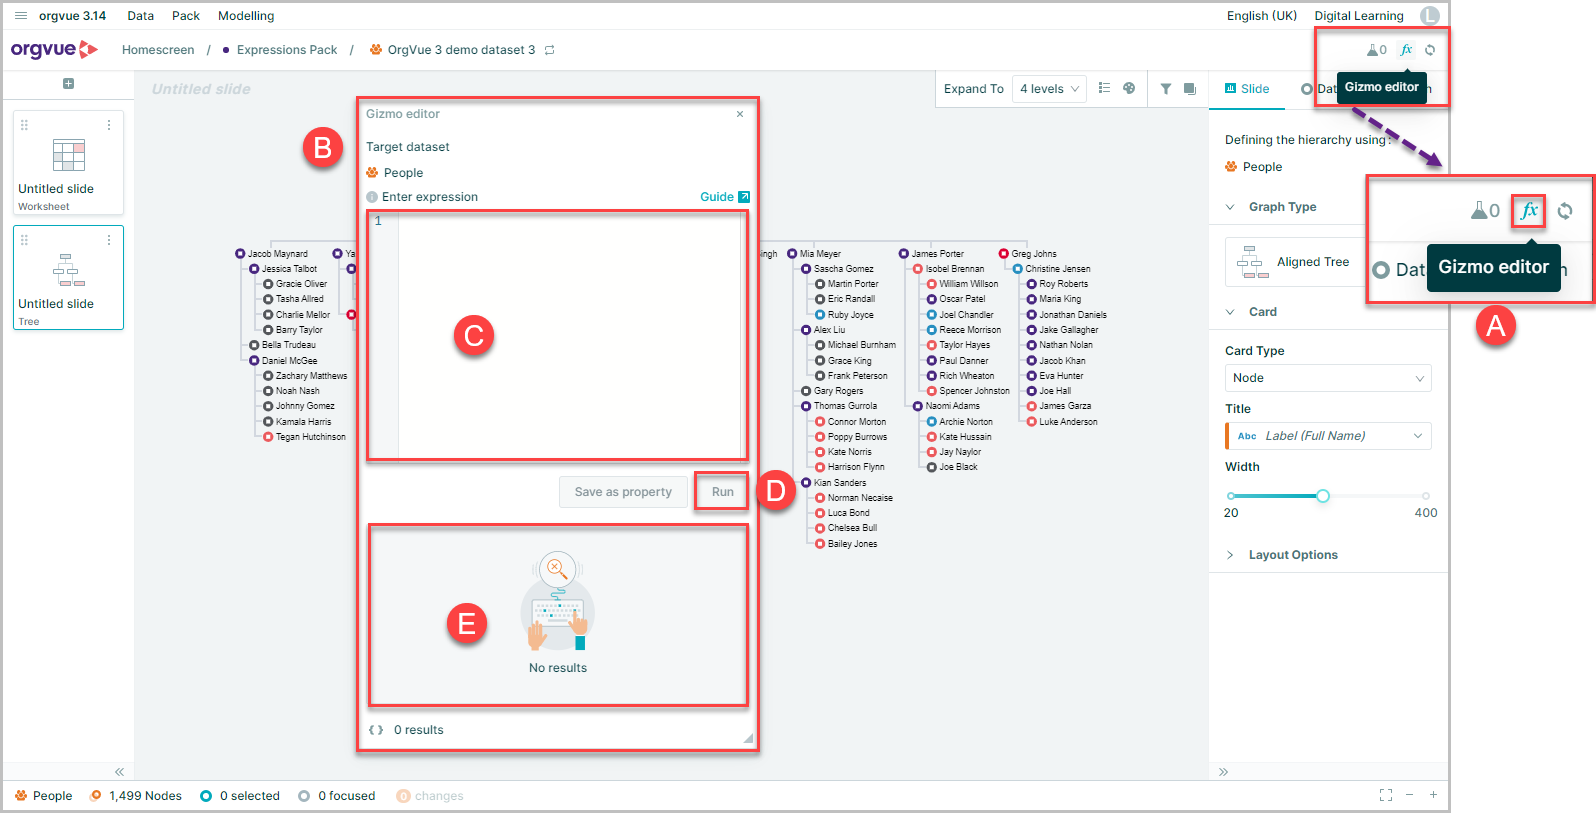
- A. The gizmo editor can be accessed using the formula button
- B. Which will open the Gizmo editor window
- C. It is then possible to enter the required expression in the upper expression window
- D. Select
RunorCTRL + Enter - E. To then see the results of the expression in the lower window
In order to view the expression result for a specific node, this node should first be selected in the tree slide or worksheet before running the expression
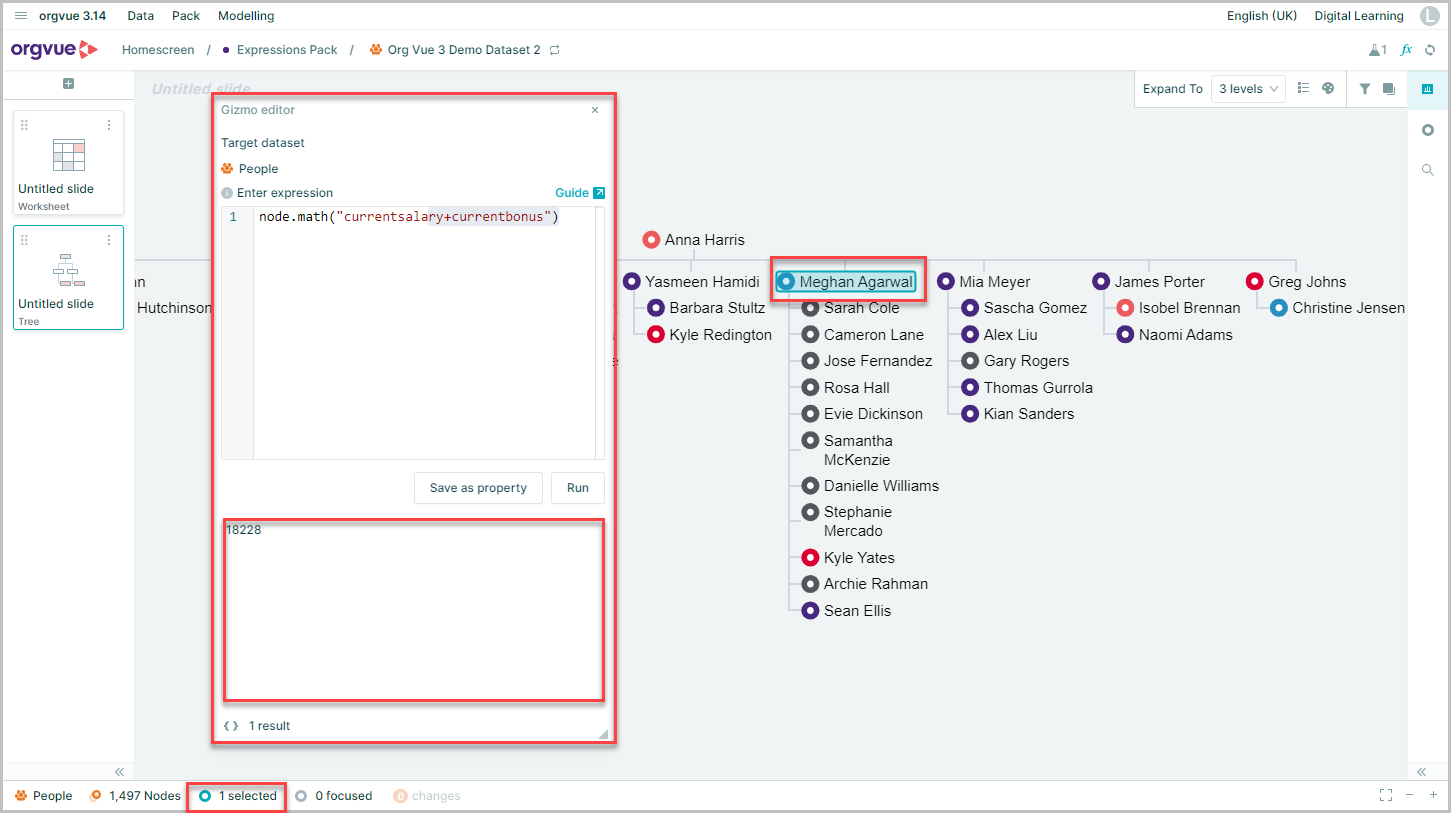
If no node is selected, the expression result will be returned for the root node
Formatting Gizmo
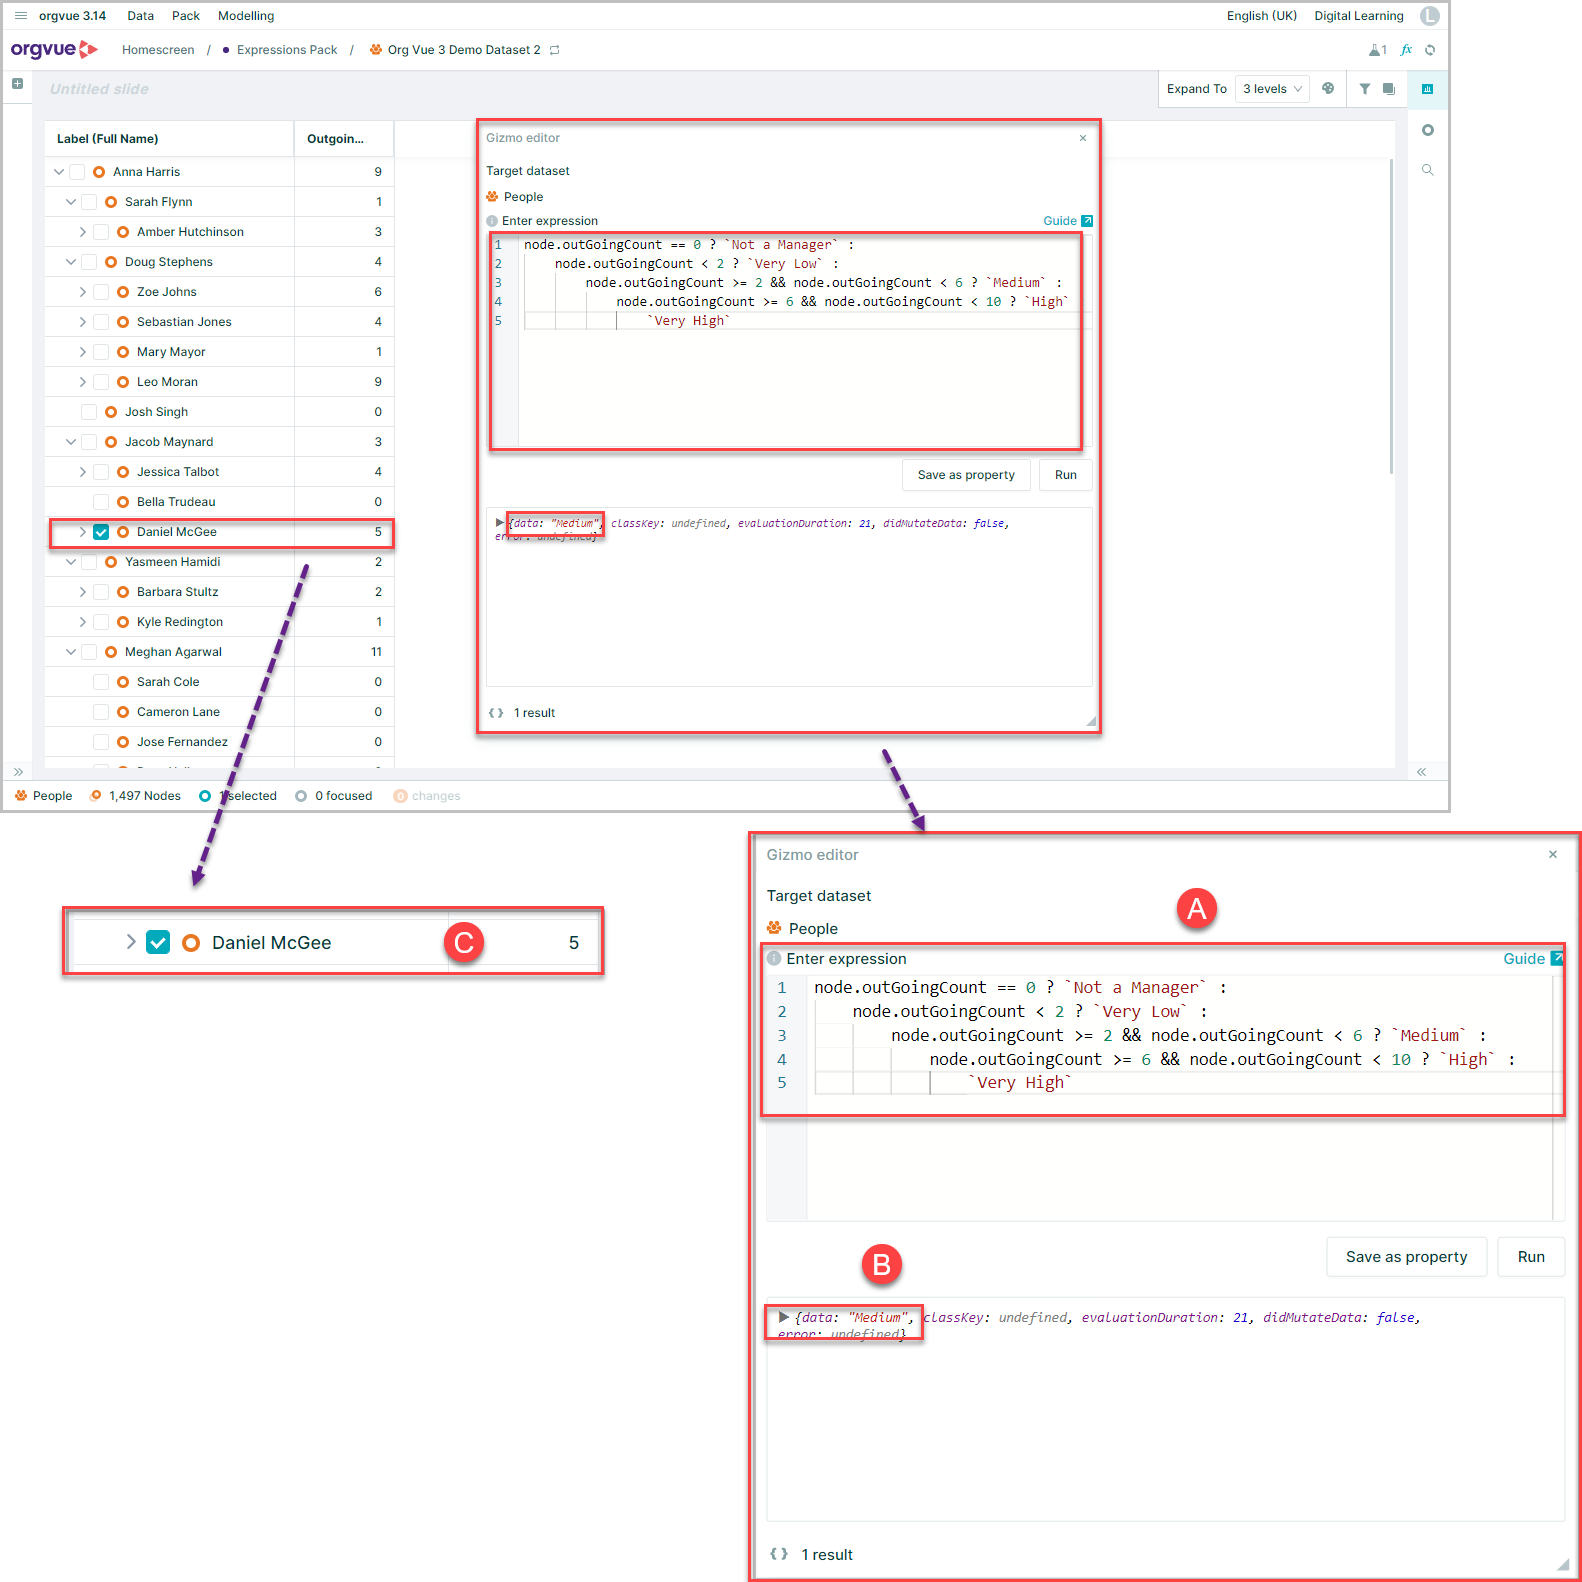
The gizmo editor will also format your code for you as you type the expression, including adding closing brackets when you add an opening one, with the text cursor placed between them in the expression window
- A. The effect of this formatting can be seen with the expression having values shown in green and text displayed in red font automatically
- B. The results of this expression can be seen in the window with the data:
medium, - C. Showing the selected node has returned the value medium based on the expression variable, which categorizes nodes into 5 buckets based on their respective outgoing count value
Node Lists
If you enter a gizmo expression that returns a node or list of nodes, it is then possible to further interact with the node shown in the results pane
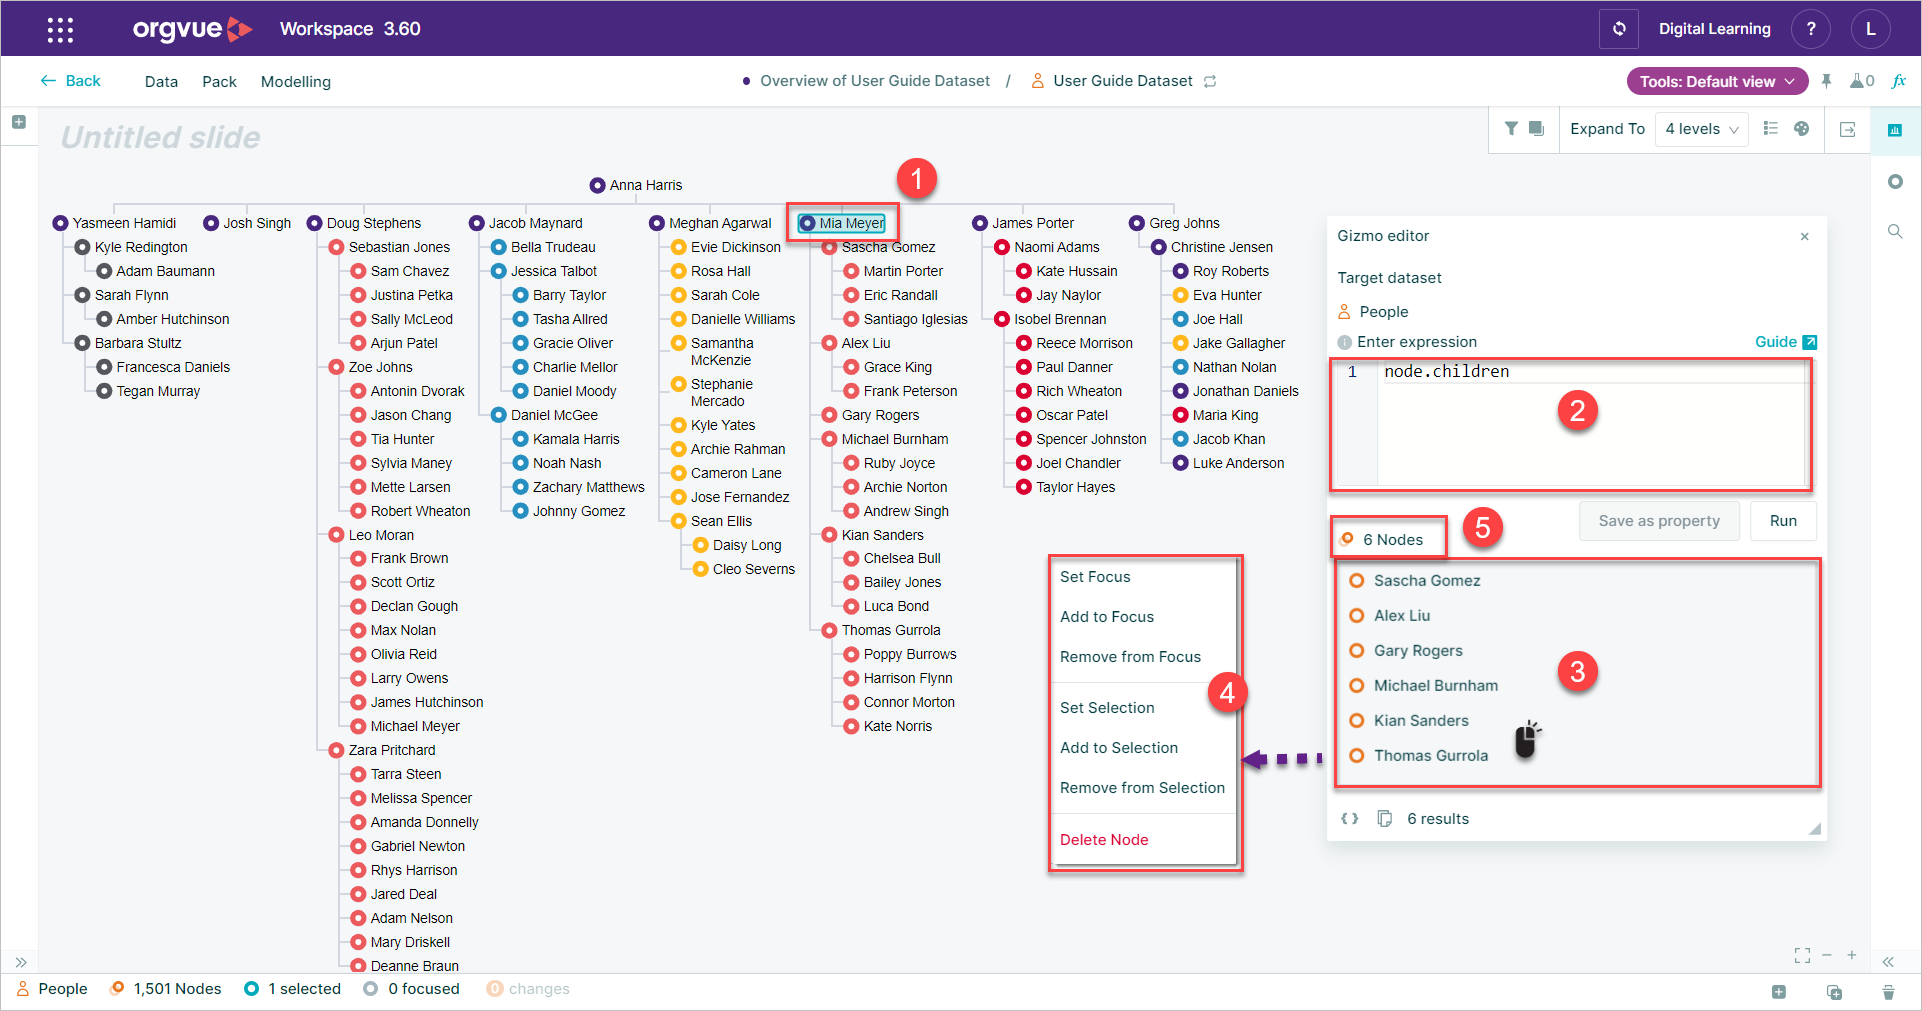
- Selecting a node
- Then entering the gizmo expression e.g.
node.childrenand selectingRun - Returns the list of nodes that are children of the selected node
- Right-clicking on a node in the results pane allows the same actions as any other Property Buckets
- The node total allows interaction with all the nodes in the collection
Nodes in the results pane can also be dragged onto other nodes in the tree as detailed in Reparent Single Node
The node total may be dragged to other functions such as the pinboard
Saving Gizmo Expressions
Expressions that return a single number, string, date or boolean can be saved as properties and these properties can be saved either in the dataset or in the pack
For further information on saving expressions to a dataset see the Expression Properties in the Settings User Guide
When considering where to save an expression, a decision should be made on how the saved property will be used
If the expression will be used across multiple packs, then it should be saved into the dataset via the Property Manager
If however the same expression will be used in a pack across multiple datasets, then it should be saved into the pack
Expressions returning nodes or collections of nodes cannot be saved as pack properties
If you have multiple calculated properties in your data or your dataset has a large number of nodes consider using the Quick Editor Tool to pause calculations while editing data and then Apply Changes to recalculate
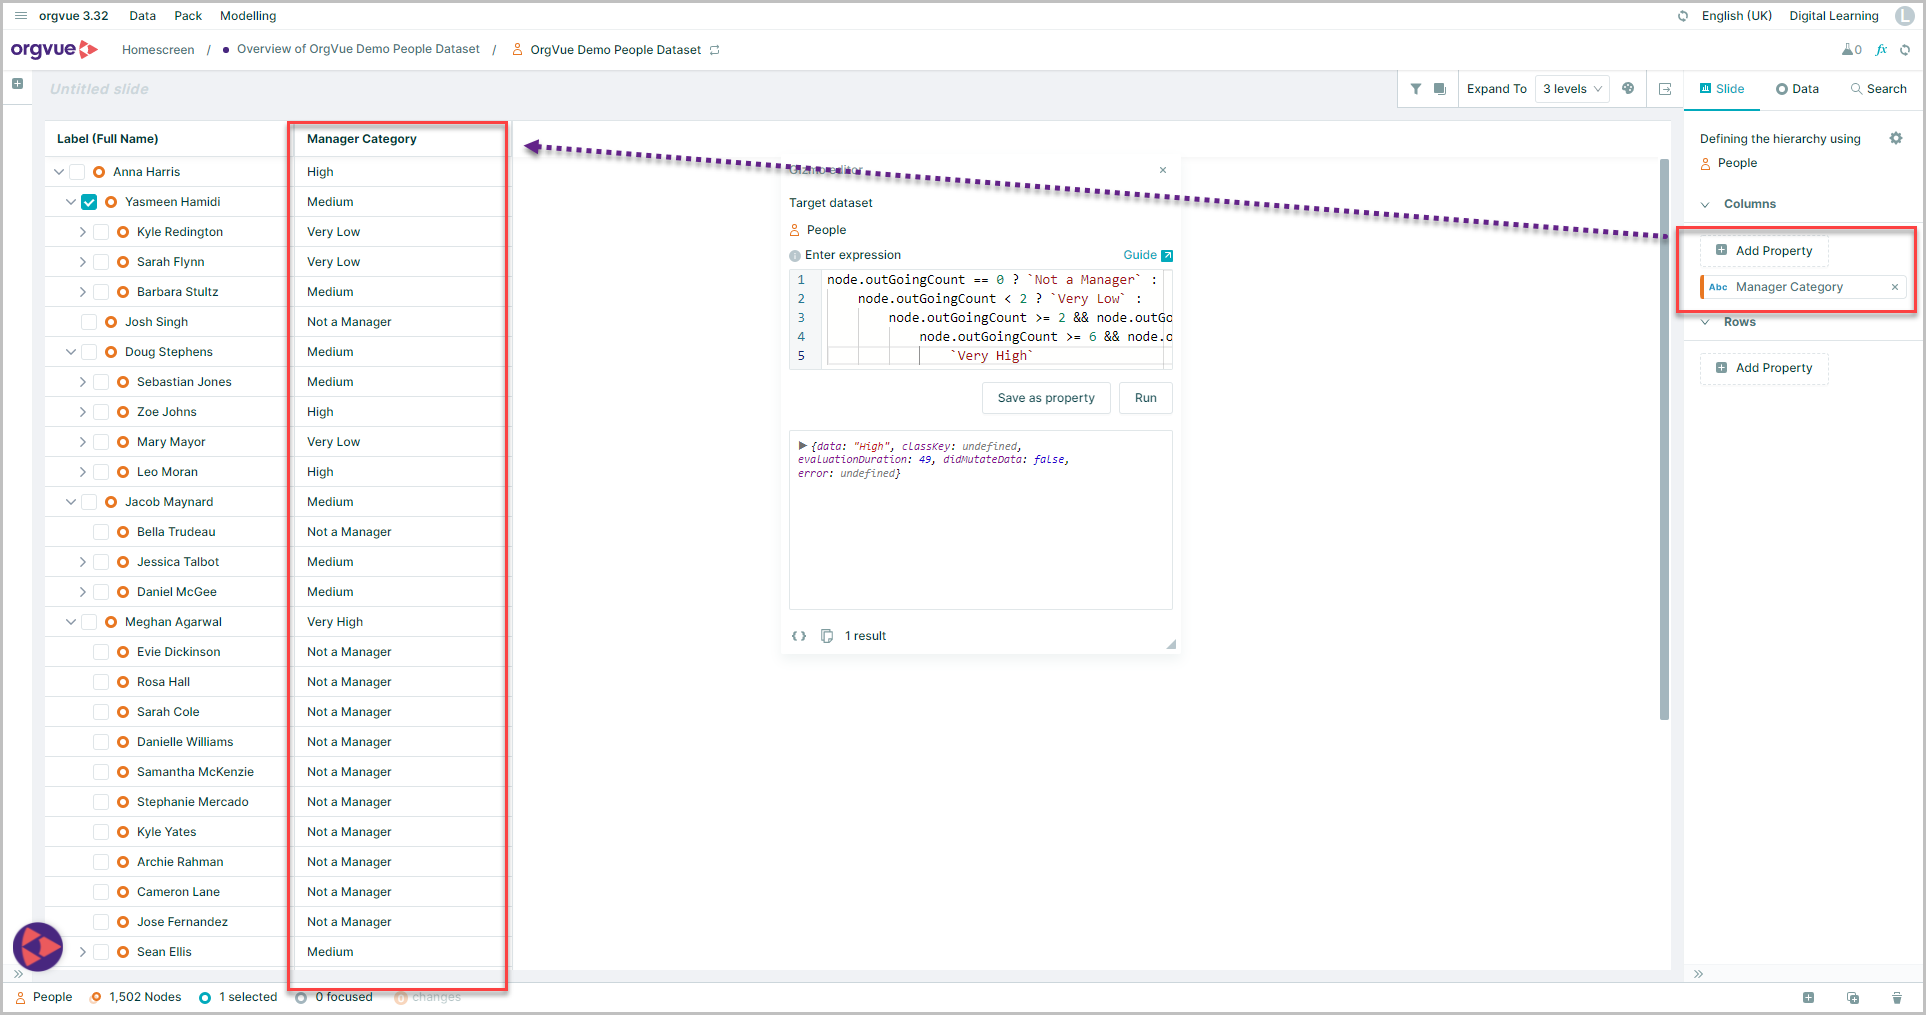
Pack Property
To save an expression to a pack:
- Enter and run your expression
- Select
Save as Property - This will open a save property dialogue box
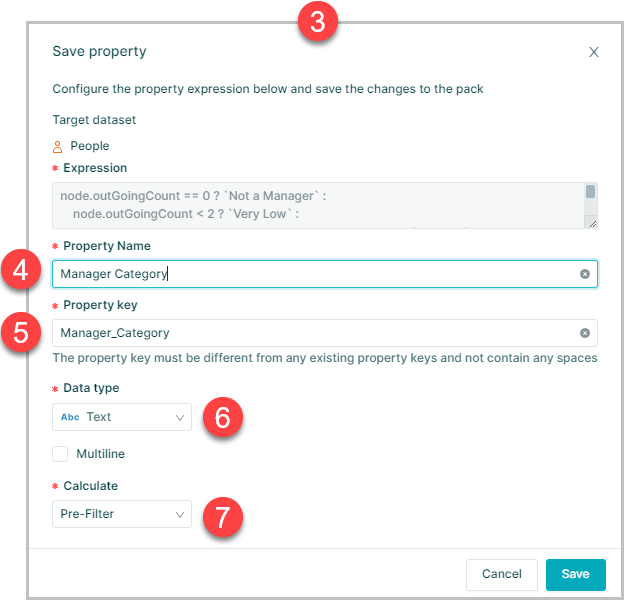
- Enter a name for your property which must be different from any properties in the dataset
- The property key will be autopopulated but can be overridden if required
- Data type will be autopopulated but may be changed if required by selecting from dropdown list
- Calculate mode select from:
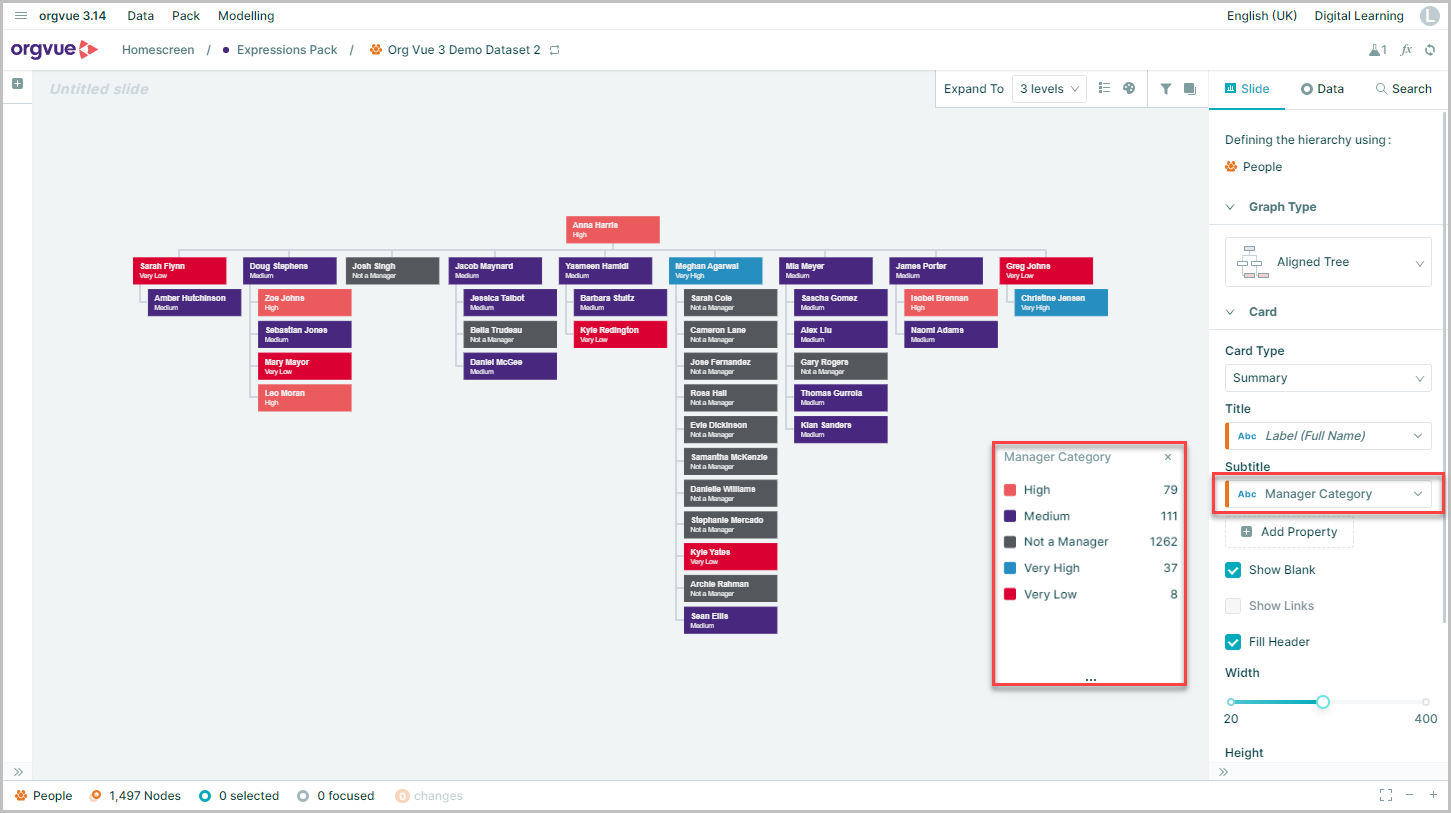
Once saved the property will then be available in the list of properties to add to your visualization and will work with any comparable dataset in the future
Note If you open a dataset using a pack which contains a conflicting property (i.e. a pack property has the same name or key as dataset property) then the pack property will be used and the dataset property ignored
Editing a pack property
Any pack property that has been created may be edited by:
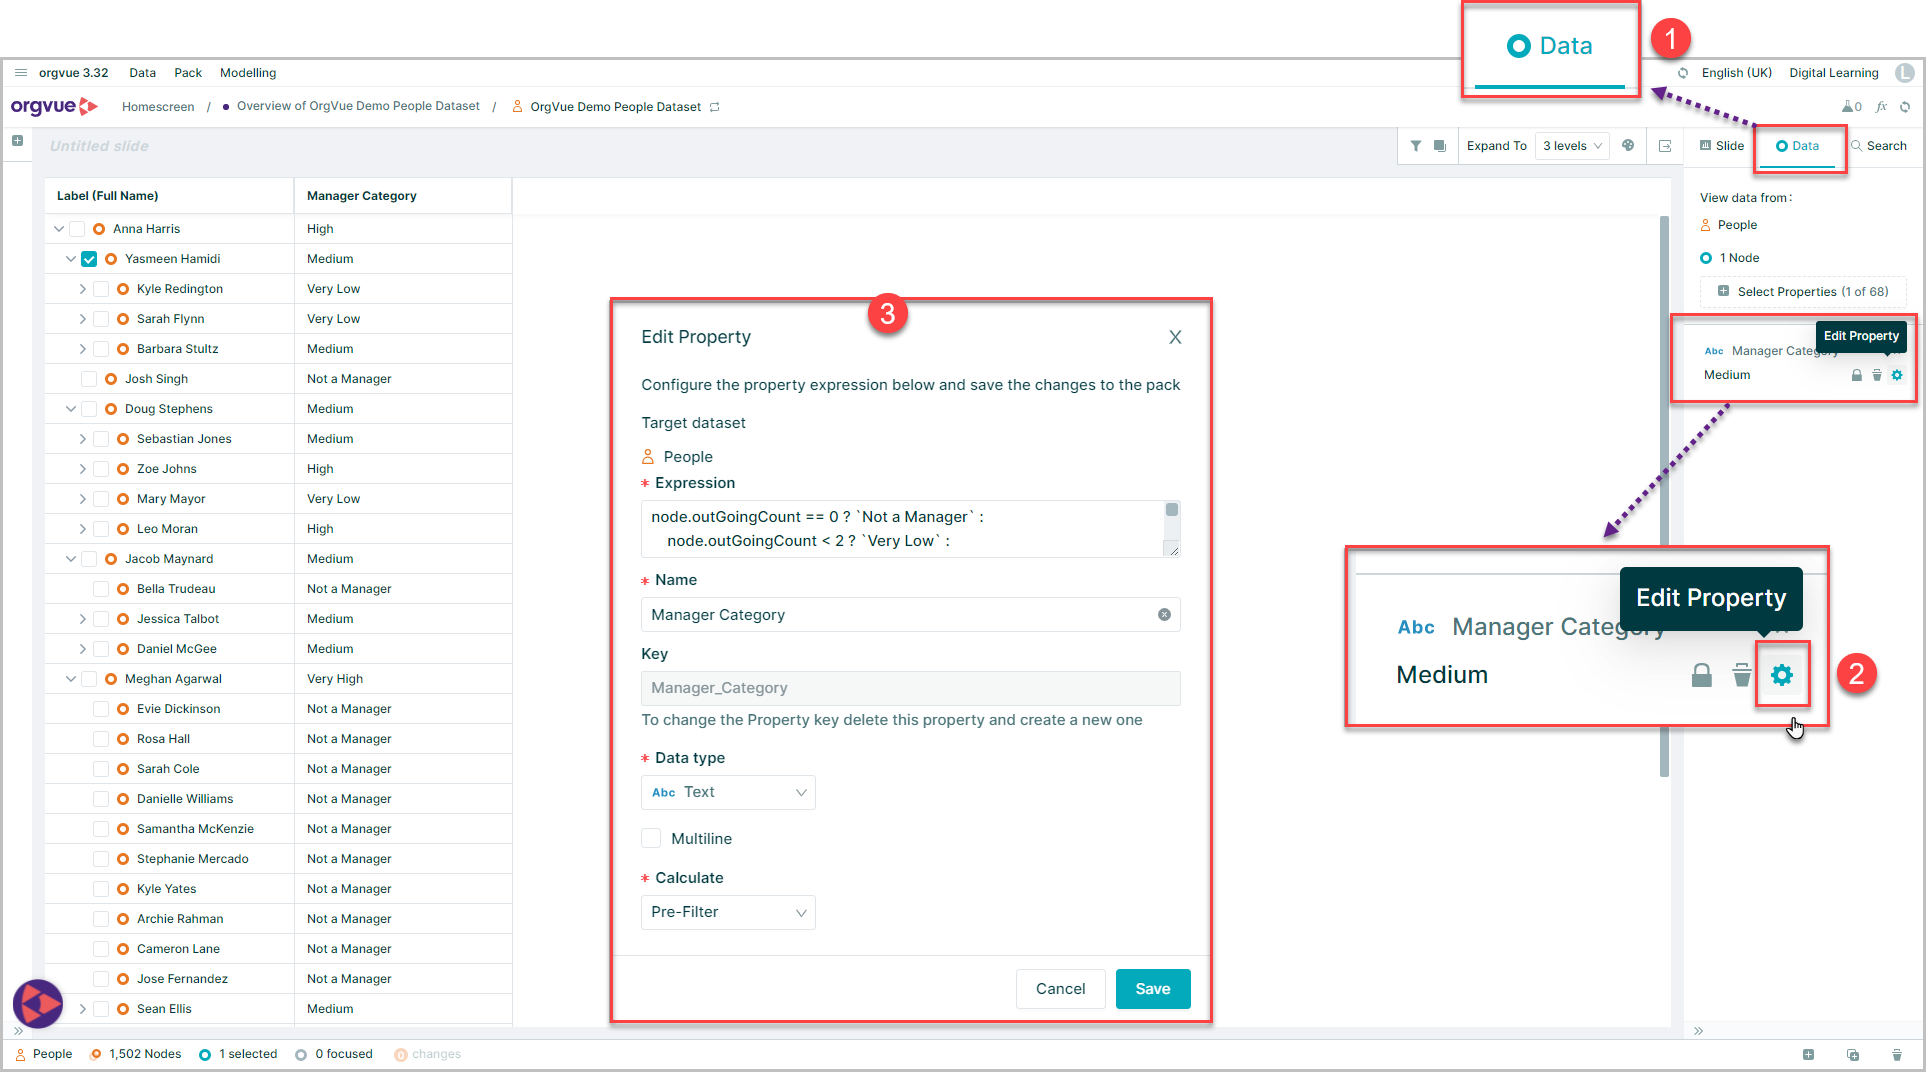
- Select the Data Tab
- Selecting the
Edit Property⚙️ cog icon - This will open the Edit Property window to allow changes to the property
Deleting a pack property
Any pack property that is no longer required may be deleted by:
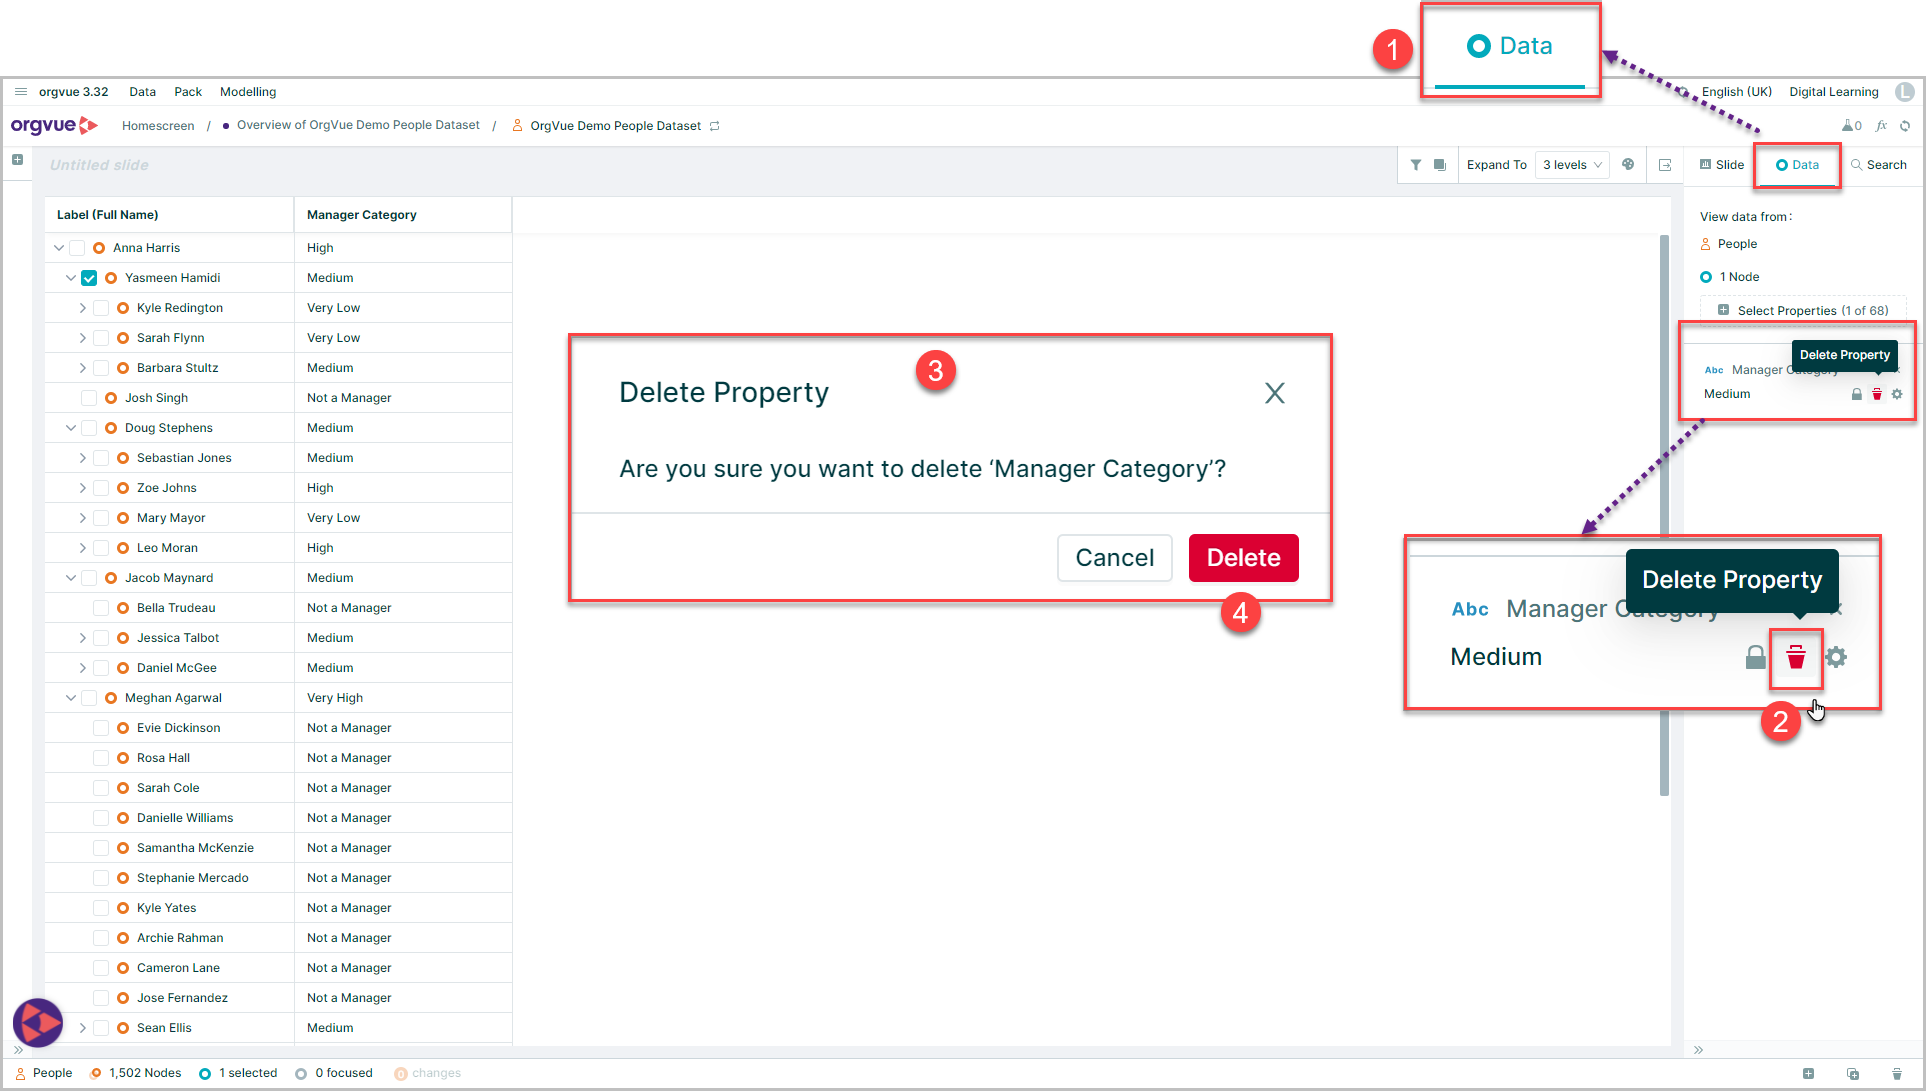
- Select the Data Tab
- Selecting the
Delete Property🗑️ icon - The
Delete Propertyconfirmation message will be shown - Select
Deleteto confirm deletion of pack
Calculation Mode
None
No calculation will be performed
On Demand
An On Demand property will only evaluate when the user activates the property via the "On-demand properties" button or the "Data" menu in the top menu bar
See Trigger On Demand for more details
Pre-Filter
Expressions which are evaluated "Pre-Filter" will evaluate after any relevant change is made to the Data
Changing the filter does not trigger re-evaluation
This mode means that the expression will not be aware of the filter and so results will not change if you filter out certain Nodes
Post-Filter
Expressions which are evaluated "Post-Filter" will evaluate after any relevant change is made to the Data and when the filter changes
These expressions are aware of, and hence can depend on, the filter
On Demand Expressions
Create an On Demand Expression
It is possible to create expressions as properties either via the Workspace Property Manageror Settings and these expressions may be set to run On demand
An on-demand calculation runs only when explicitly activated, which may be useful if the expression references external lookups that may change often

To set an expression to run On demand:
- Add a new property or edit an existing one in Settings Property Manager
- Enter the expression in the expression window
- Set the Property evaluation mode to
On Demand - Click
Saveto save the new expression property
Running an On Demand Expression
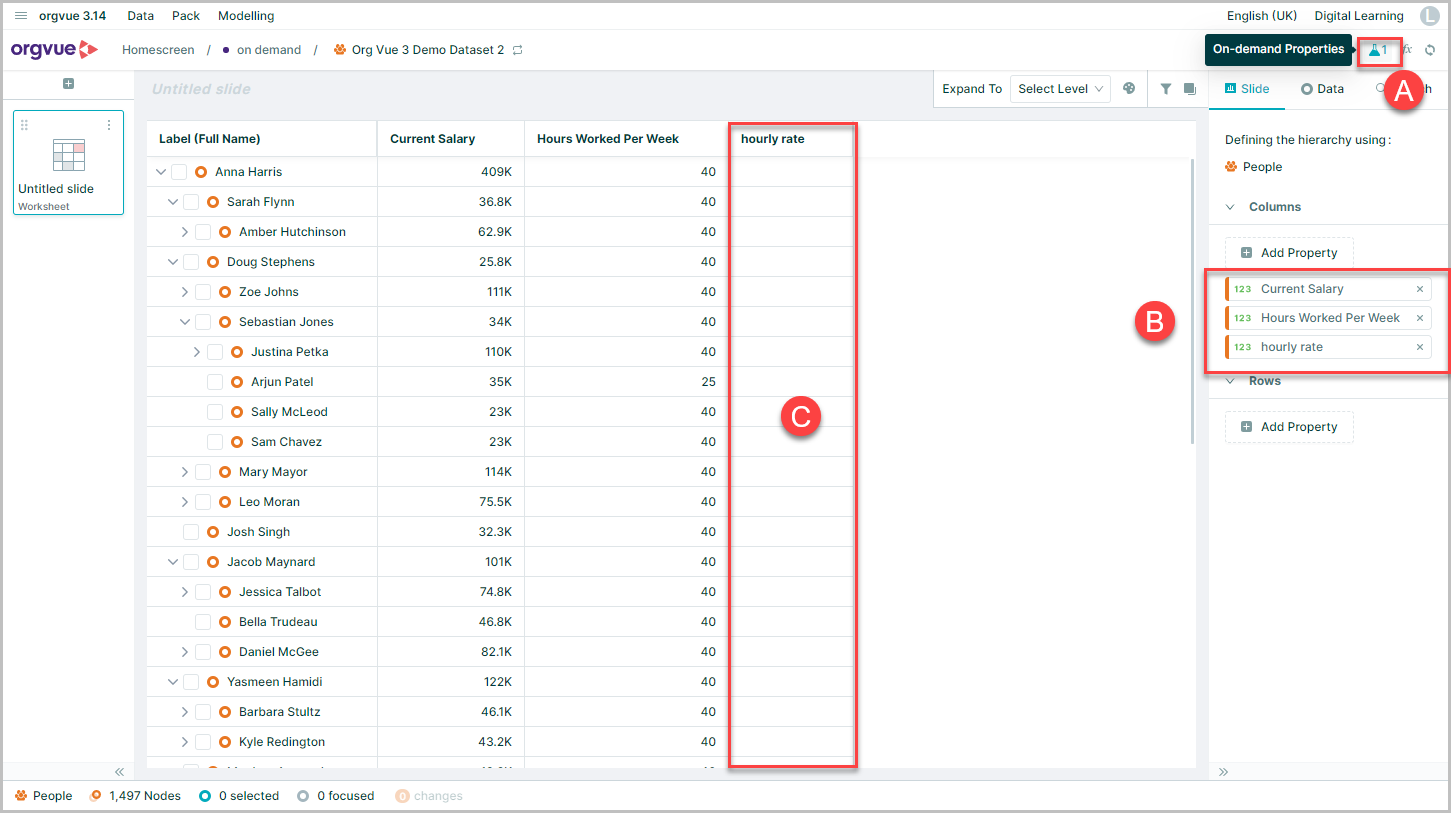
After opening a dataset that contains any On Demand expressions:
- A. The On Demand Properties icon will display the number of available properties to run
- B. The property will be available to add via property selector
- C. The Property value will be blank until the expression is calculated
To calculate the expression:
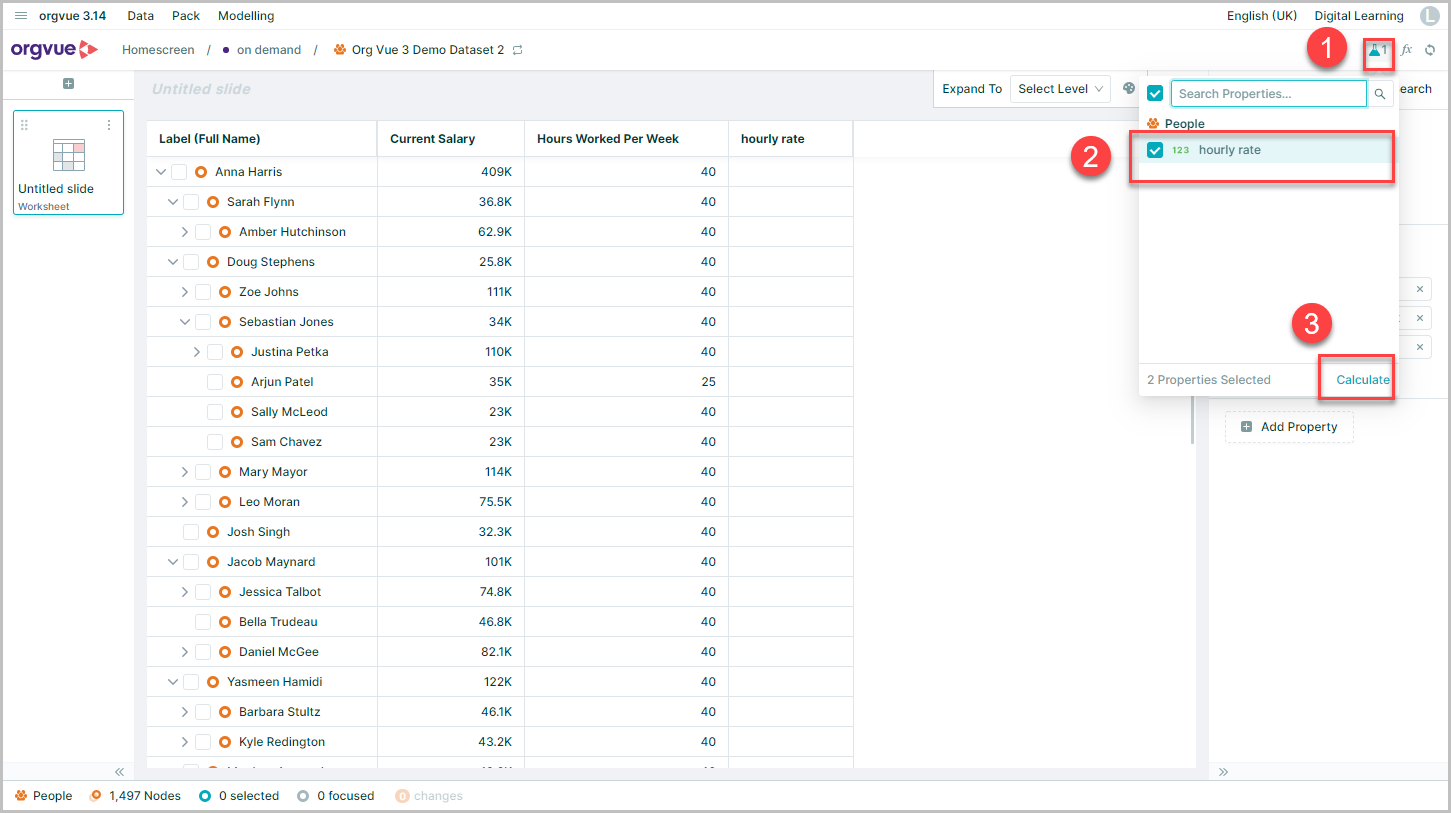
- Select the On Demand Properties icon
- Select the required property(s) to run from those listed
- Select
Calculate
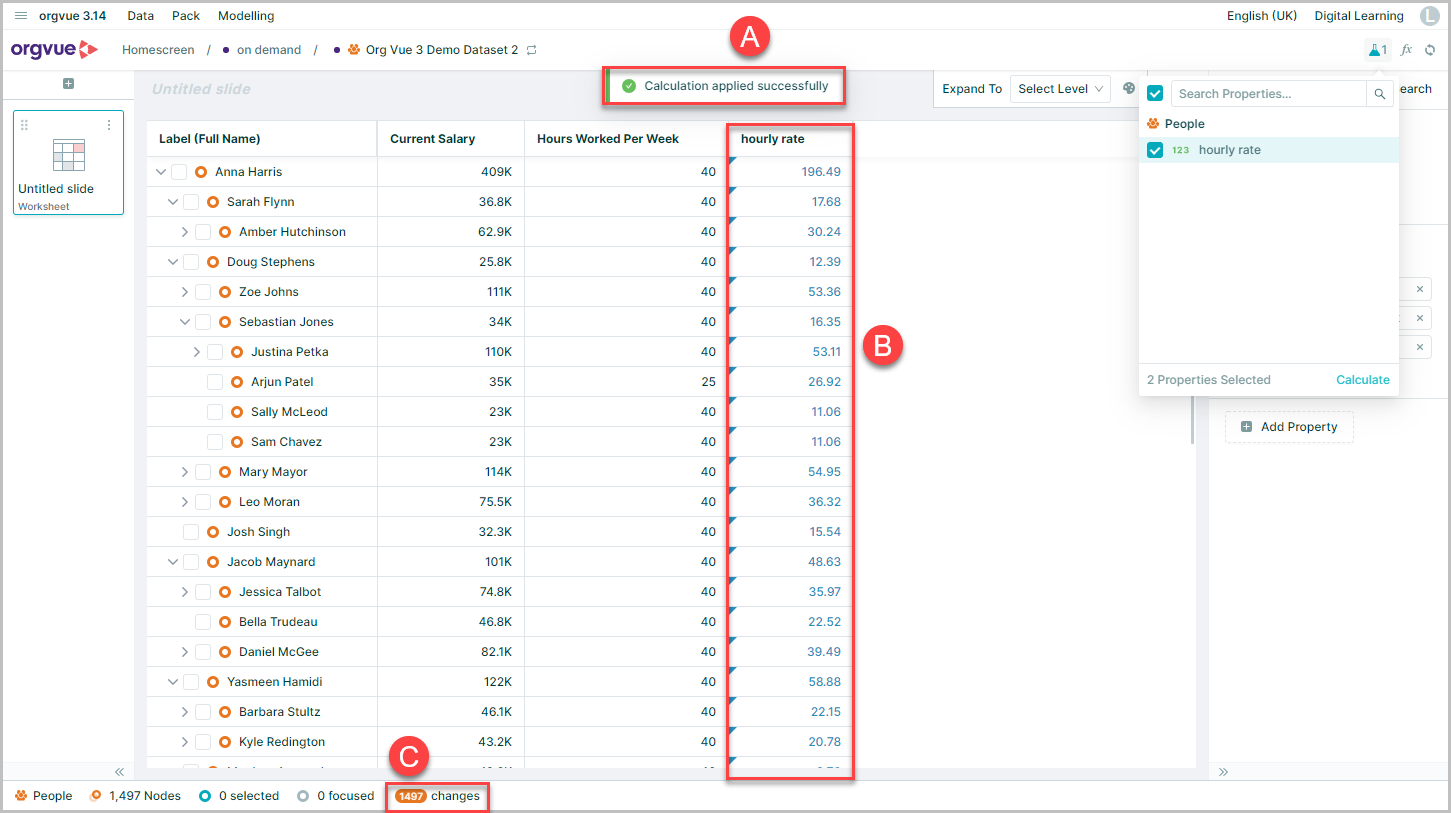
- A. A pop-up message will appear at the top of the screen confirming the calculation has applied successfully
- B. The property values of the calculated property will be populated
- C. The Data Node Summary will display the number of nodes updated
This process will need to be repeated whenever the dataset is opened and the property is required for use
setValueexpression this must be saved as On Demand to operate correctly
Expression Lookups
An expression lookup allows you to define what options are available when updating a property value
This may be useful to limit inputs to a property value to ensure data cleanliness
An example of this may be to limit the locations available to select from, to only London, New York & Paris
Creating a Lookup Expression
A lookup expression is applied to a property within the edit property screen in settings. For further details see the Expression Lookups in Settings User Guide
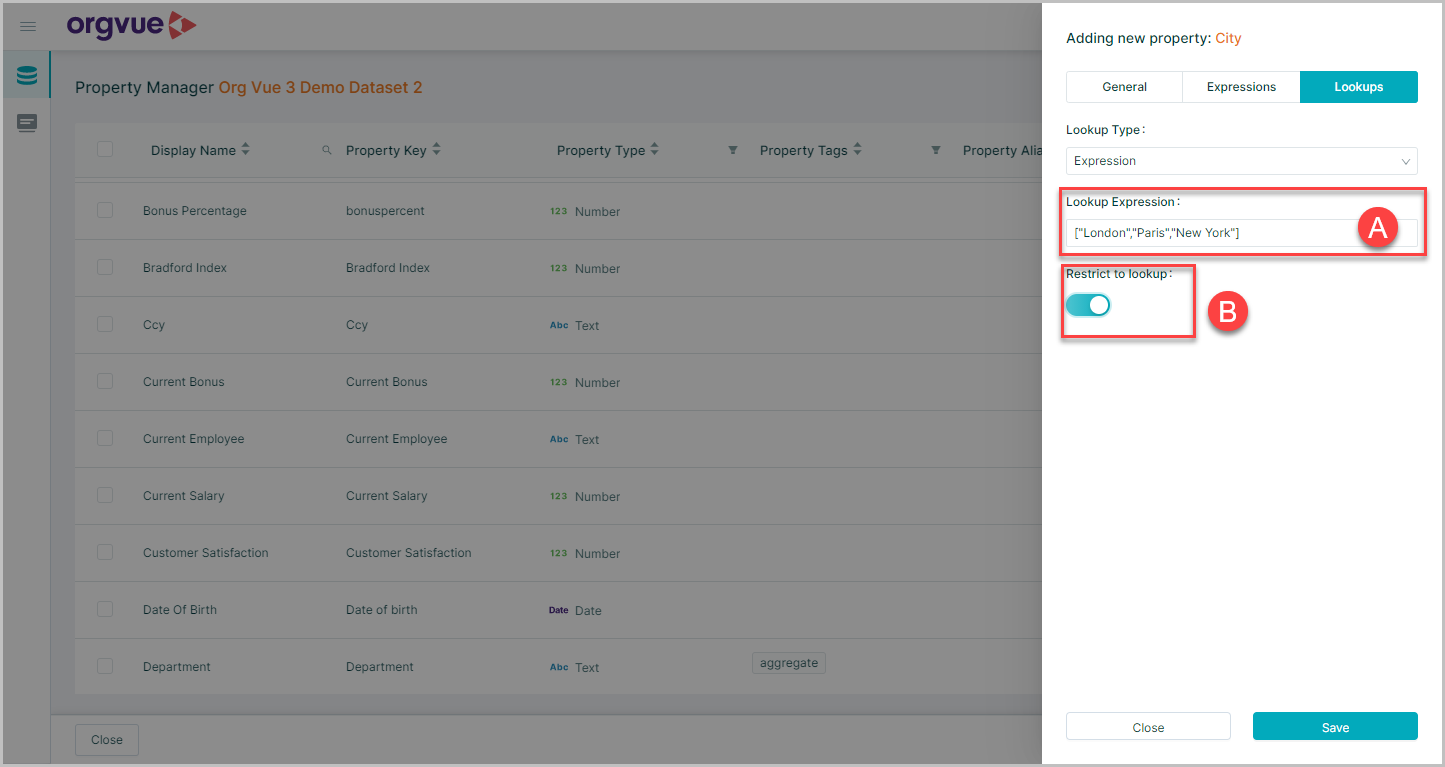
- A. The expression is entered into the expression panel
- B. Option to set property to
Restrict to lookup
To view a video on creating a Lookup Expression click the thumbnail to open the video in a new browser tab

Using a Lookup Expression
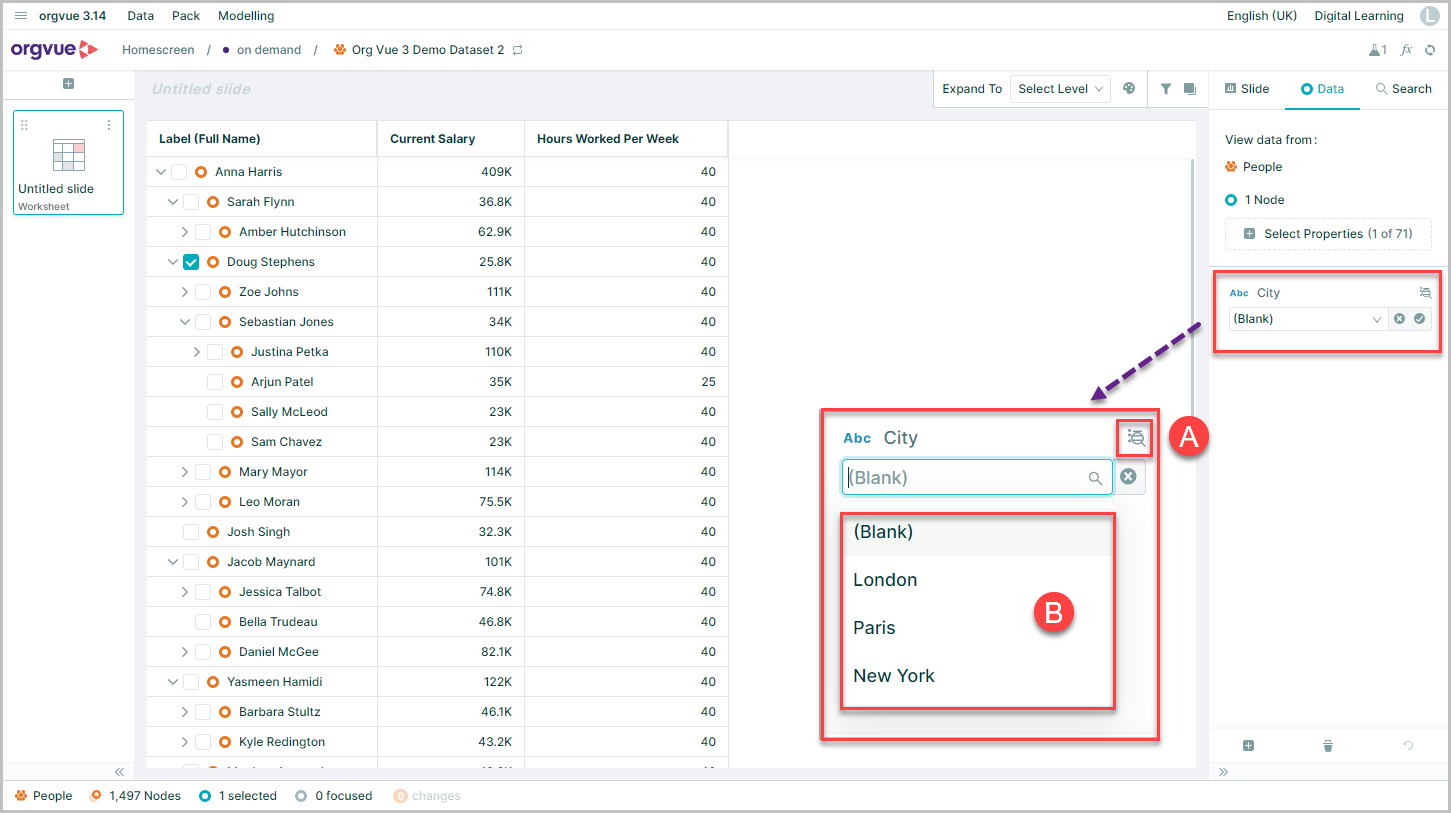
- A. Any property with a lookup expression will show the lookup icon on the data panel when selected
- B. Editing the value will open a selection window with the available values to select from
Restrict to lookupoption is not selected in settings, then it is possible to enter additional options into the property