
Editing Nodes
Nodes may be edited in four places within a pack:
Data Tab
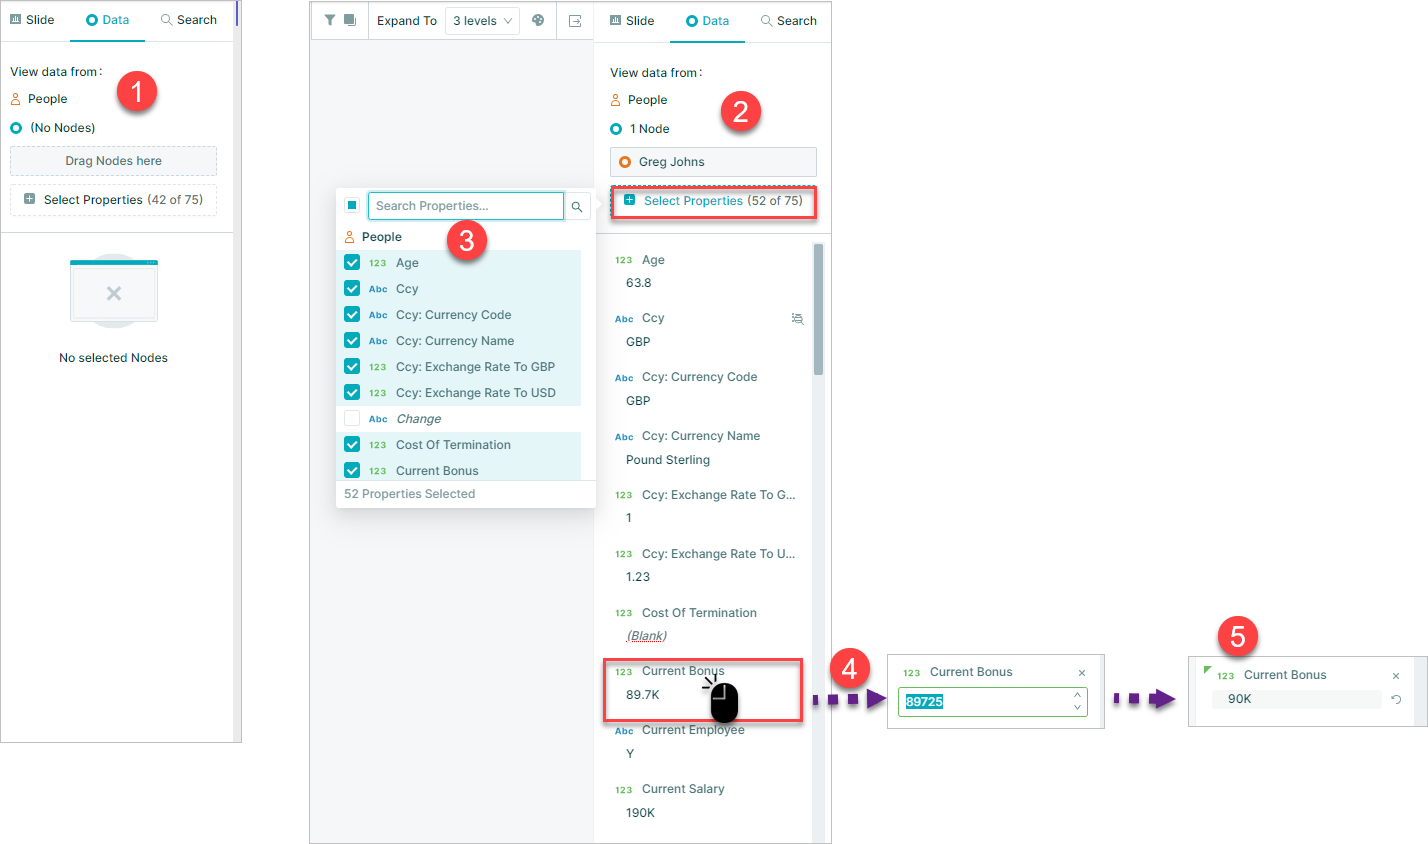
The Data tab on the right-hand panel allows you to further analyze and, if required, edit the data in your dataset
You can view node data here if you have selected a node, or a summary of data if multiple nodes have been selected
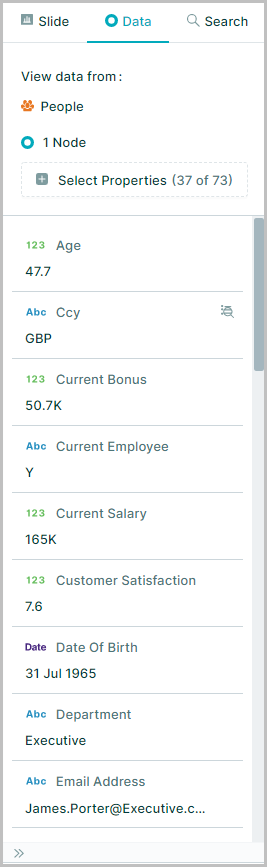
Edit Single Node on Data Tab
- With no nodes selected on the canvas, no data detail will show on the Data Tab
- Selecting a single node on the canvas displays the data for each property on the data tab
- By default, all properties in the dataset are displayed* but clicking the Select Properties button which opens the property selection window to enable you to uncheck/check the required properties for display
- To edit the data held in any property double click into the data cell to activate and make the required change
- After editing the data press enter to confirm the change
- Generated properties are not selected for display in data panel by default as cannot be edited
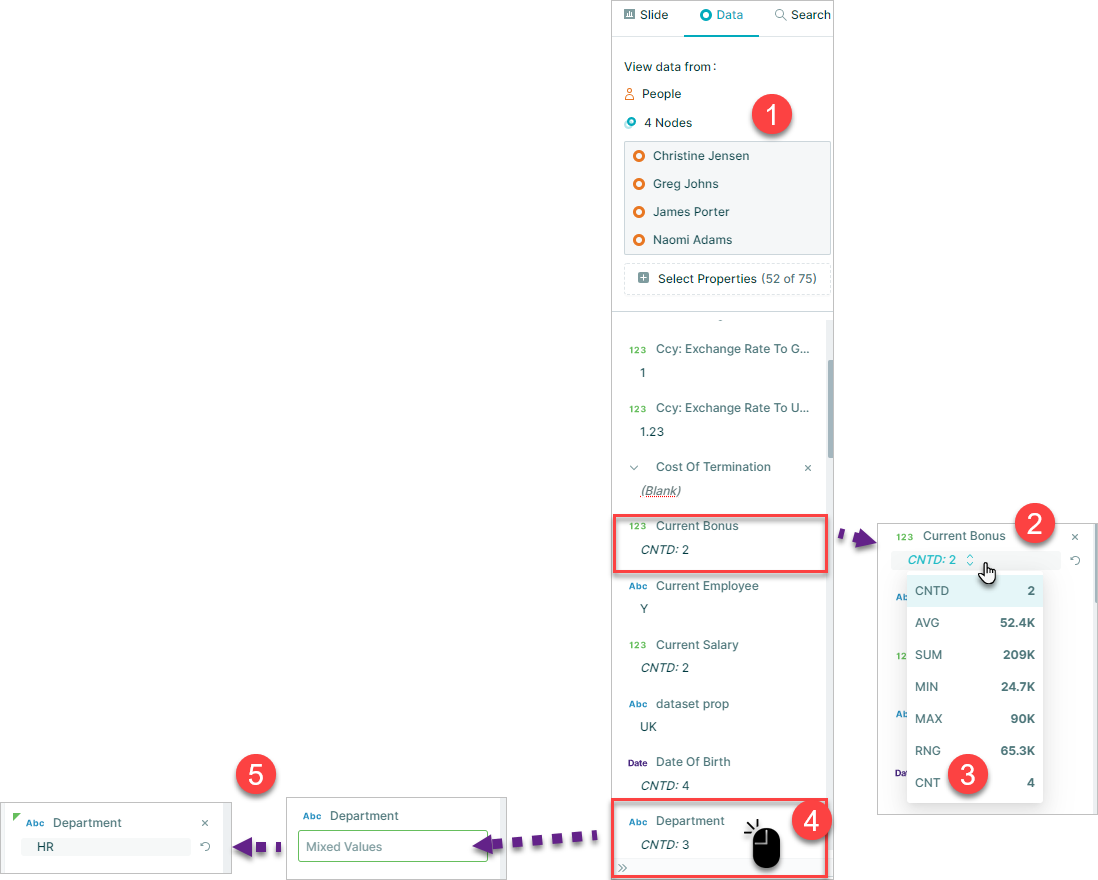
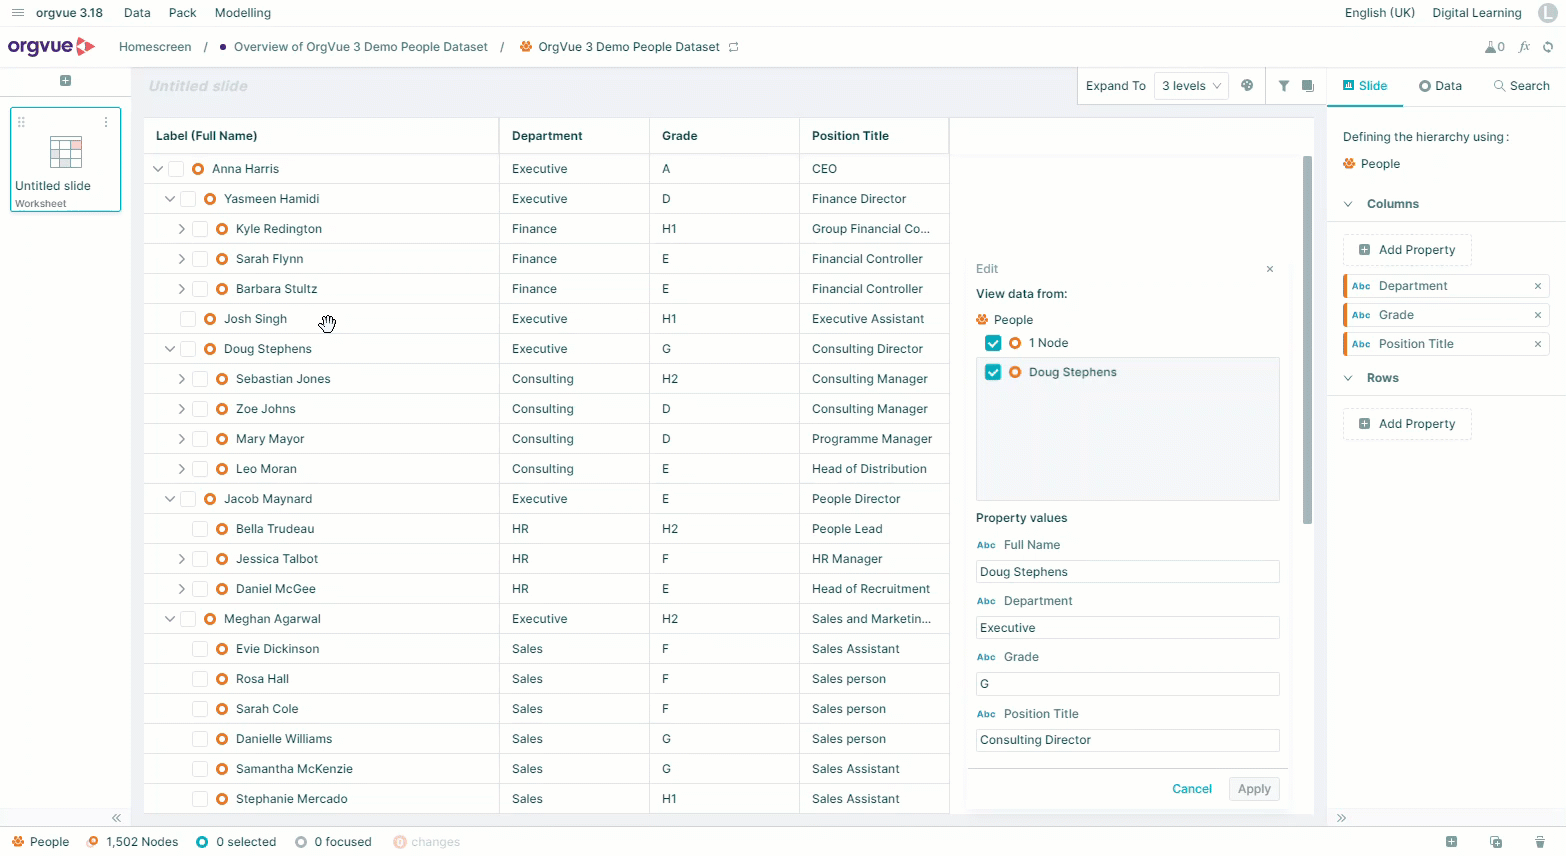
Edit Multiple Nodes on Data Tab
- If multiple nodes are selected on the canvas, the data tab provides a summary for the selected nodes based on properties selected for display
- Hovering over the displayed summary value for any property will reveal a dropdown menu selector
- Opening this menu will provide summary statistics for the currently selected nodes
- It is also possible to edit all the individual data values for a property for the selected nodes by double-clicking the data cell to edit it
- The new value to be applied to all selected nodes can be entered in the edit property window and saved by clicking the tick icon
Edit nodes on worksheet
Single nodes may be edited on a worksheet by:
- Selecting the required cell to make it active
- Type the new cell value
- Press
Enterto update
To view a video on Editing Data in a Worksheet click the thumbnail to open the video in a new browser tab

Edit nodes on tree slide
Single or multiple node may be edited on a tree slide by:
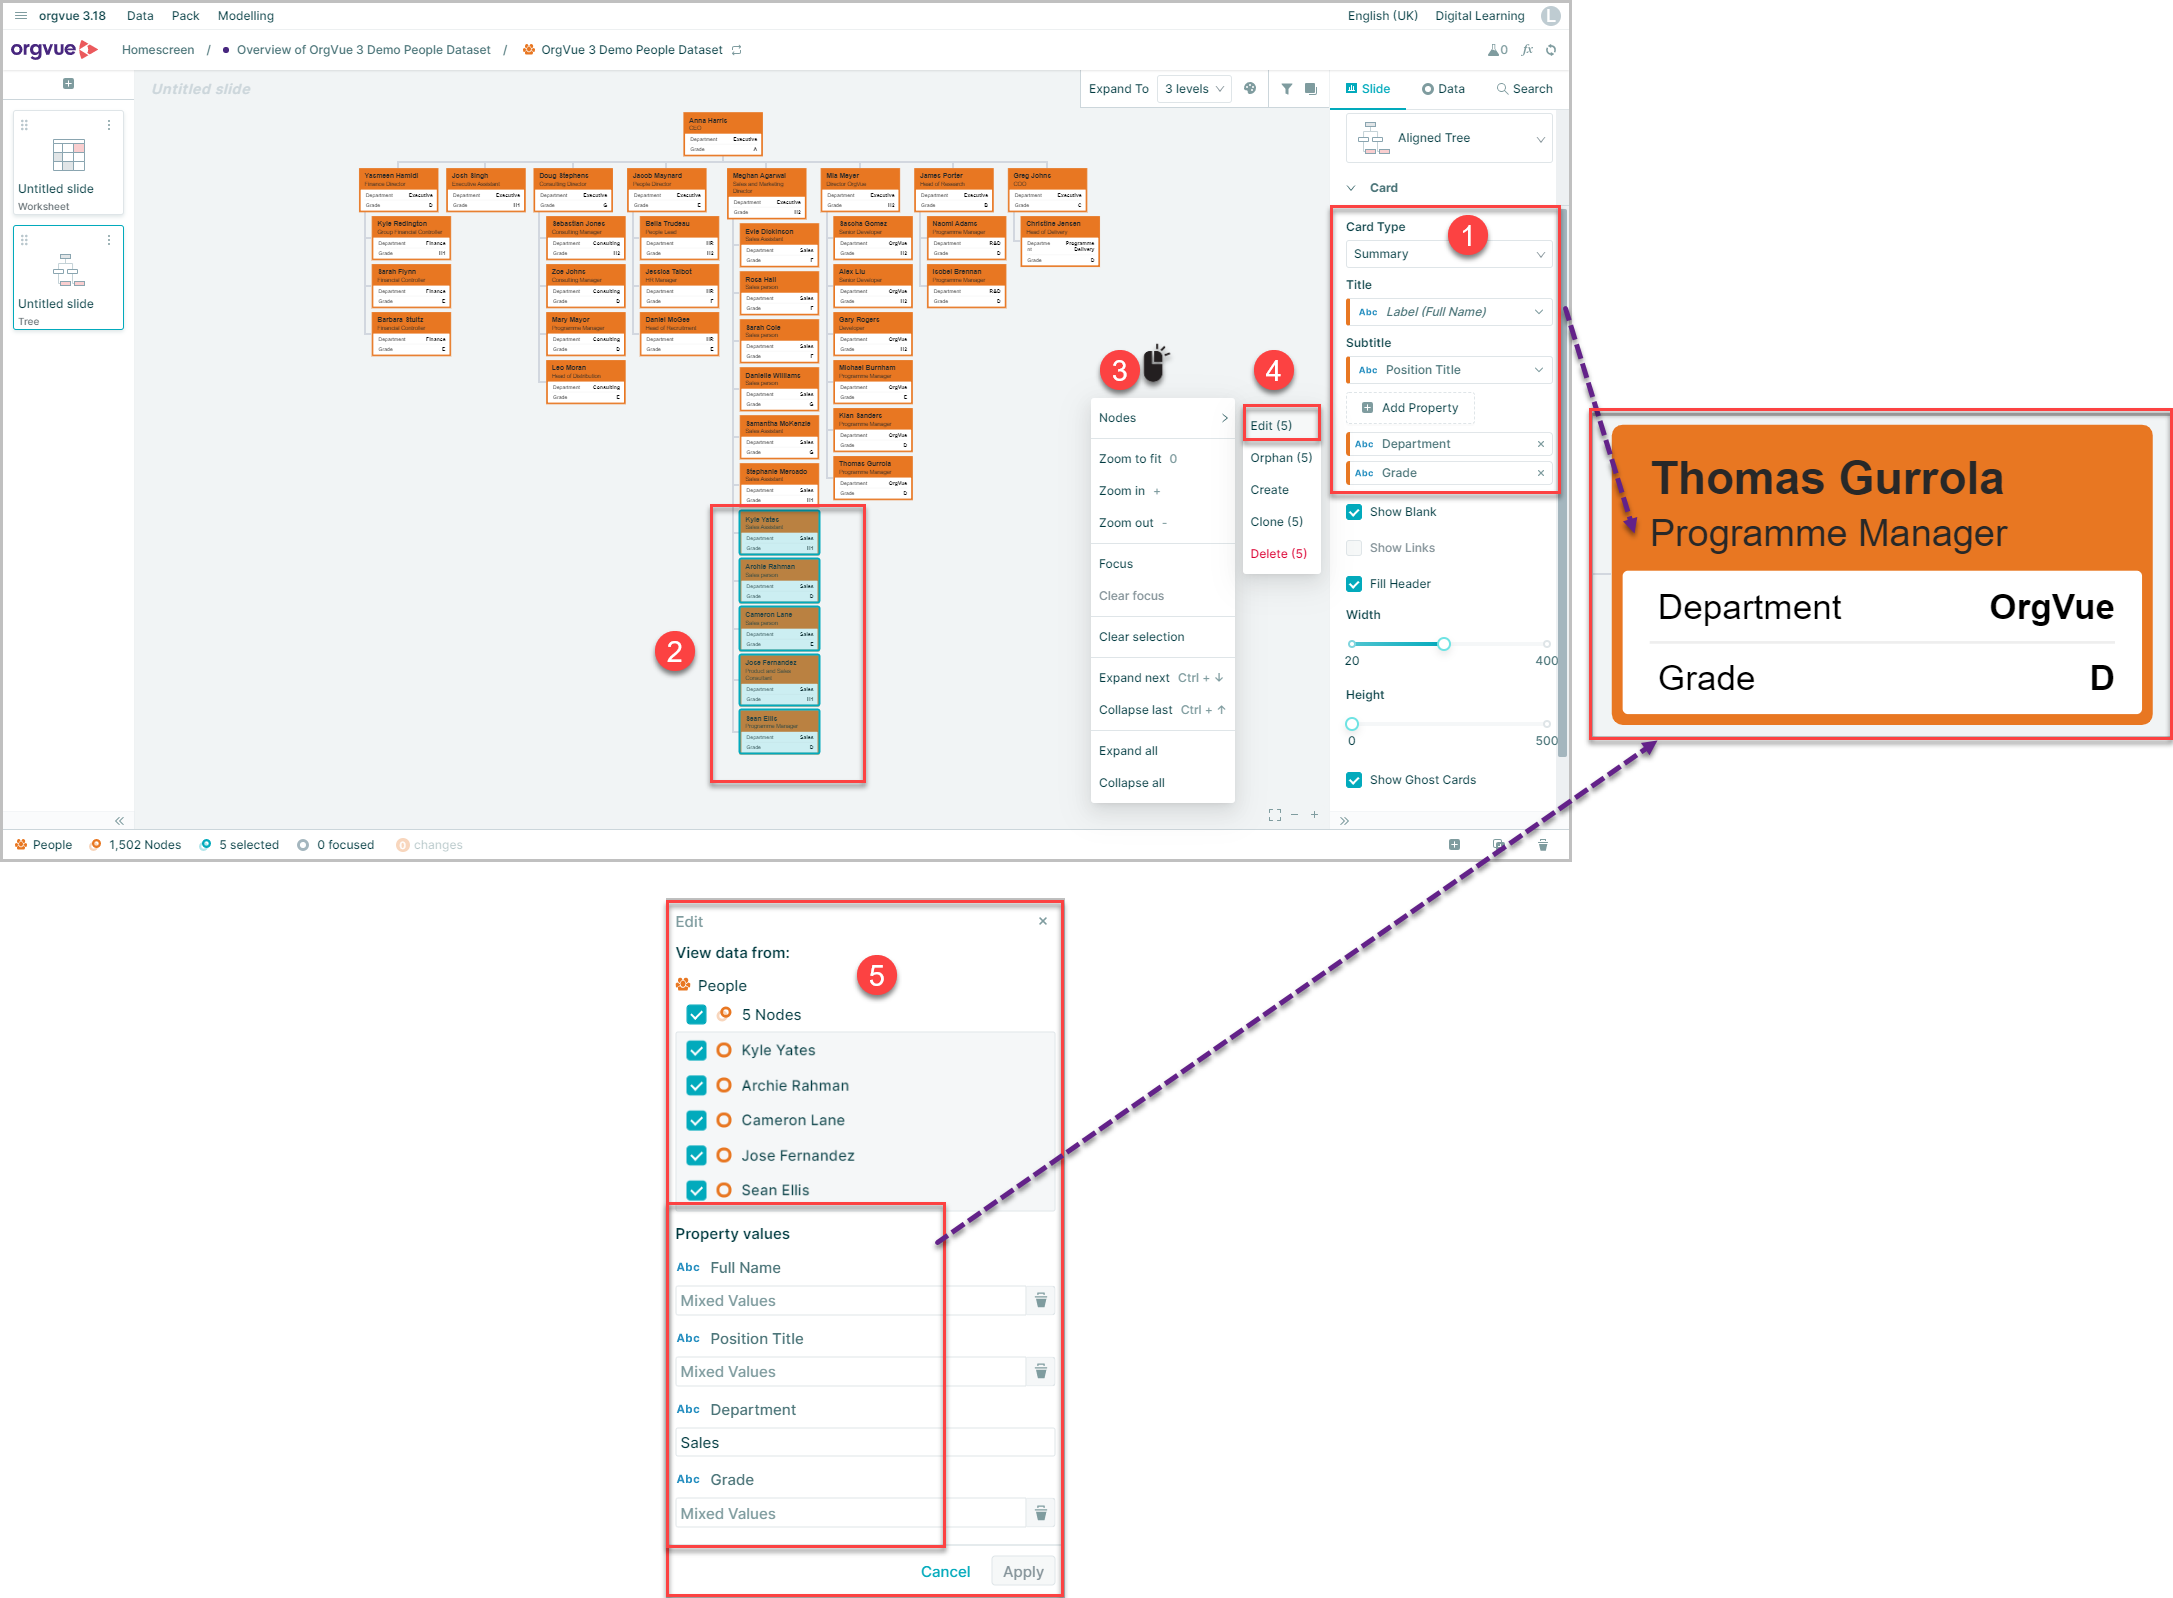
- Setting the Card Type to
Summaryand adding any properties to edit - Select the node(s) on the tree. See Selecting Nodes for the different methods for selecting nodes
- Right-click on a blank area of canvas to open menu
- Select
Edit - The edit window will open containing any properties shown on the summary card for selected nodes to enable editing of the values
Edit nodes on Crosstab
Nodes on a crosstab slide may be edited by dragging and dropping aggregate blocks of nodes or individual nodes from one intersection of the crosstab to another
Doing this will edit the node values for the properties displayed on the crosstab
Aggregates Node Blocks
To edit aggregate node blocks on a crosstab slide:
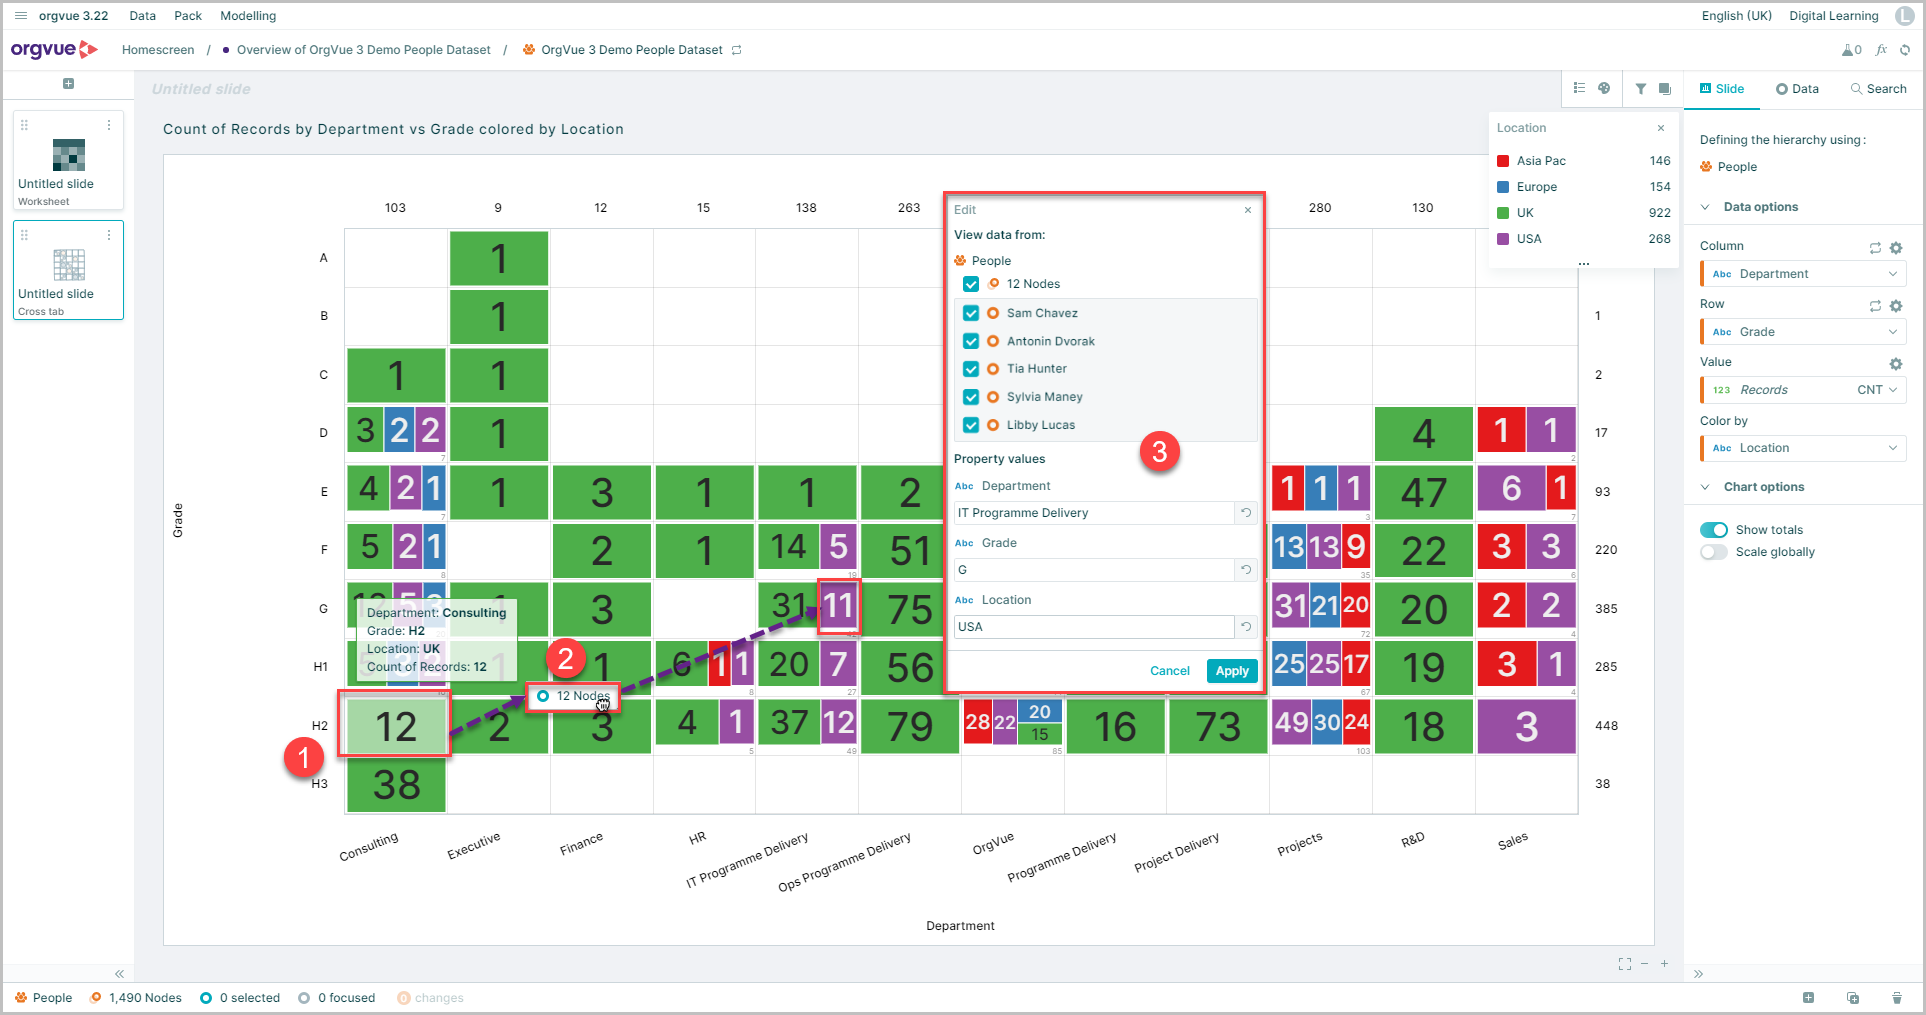
- Select a node blocks
- Drag the nodes and drop them onto the new intersection of the crosstab
- The edit node window will be shown confirming the property values being applied to listed nodes
In this example the 12 nodes highlighted will have their values for following properties edited: | Property | Original Value | New Value | |:----------:|:--------------:|:---------------------:| | Department | Consulting | IT Programme Delivery | | Grade | H2 | G | | Location | UK | USA |
Individual Node Cards
To edit individual nodes on a crosstab:
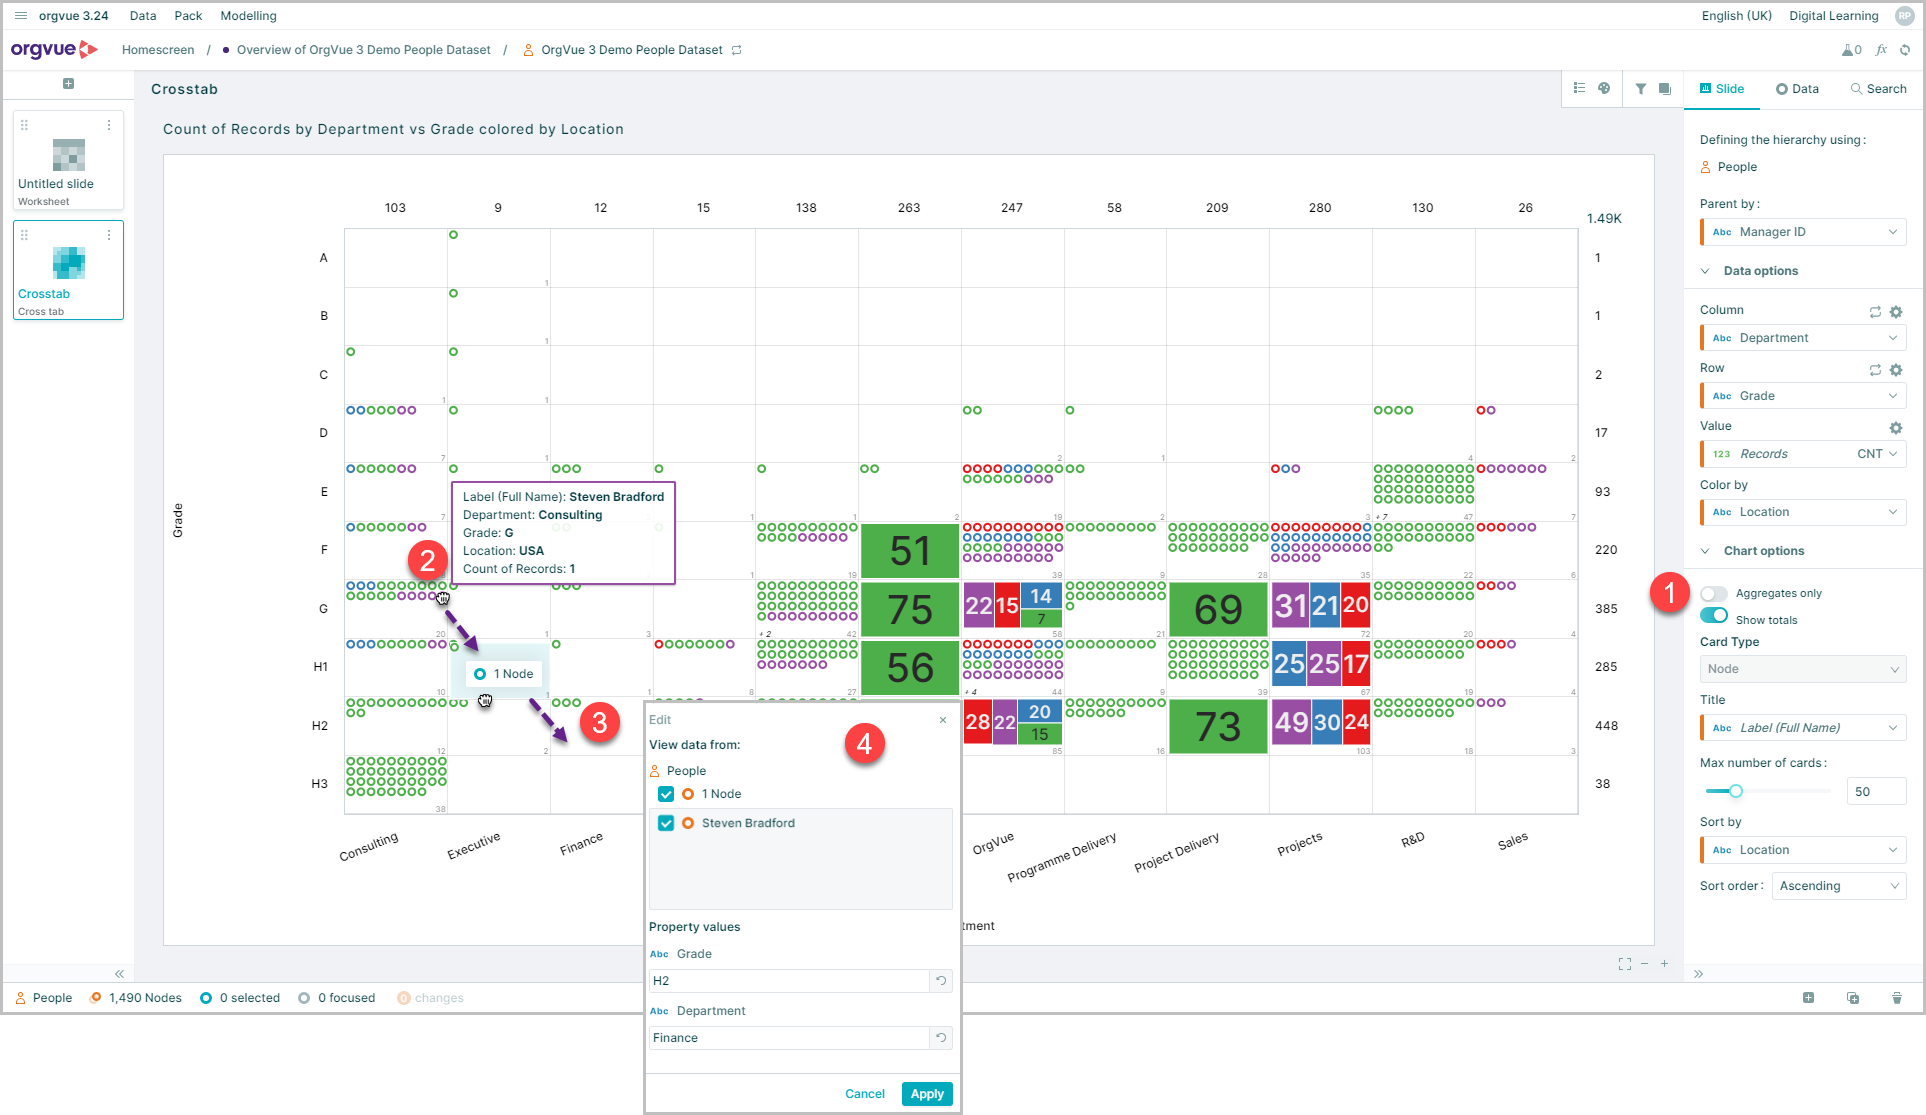
- Set the
Aggregate onlytoggle switch tooff - Hover the mouse over the required node to display the Node card
- Drag the node and drop it onto the new intersection of the crosstab
- The edit node window will be shown confirming the property values being applied to the node
It is also possible to drag nodes from a crosstab onto the Footer
Data type validation
When entering or editing data into number, date and Boolean fields Orgvue will prevent the entry of an incorrect data types