
Customize
Settings
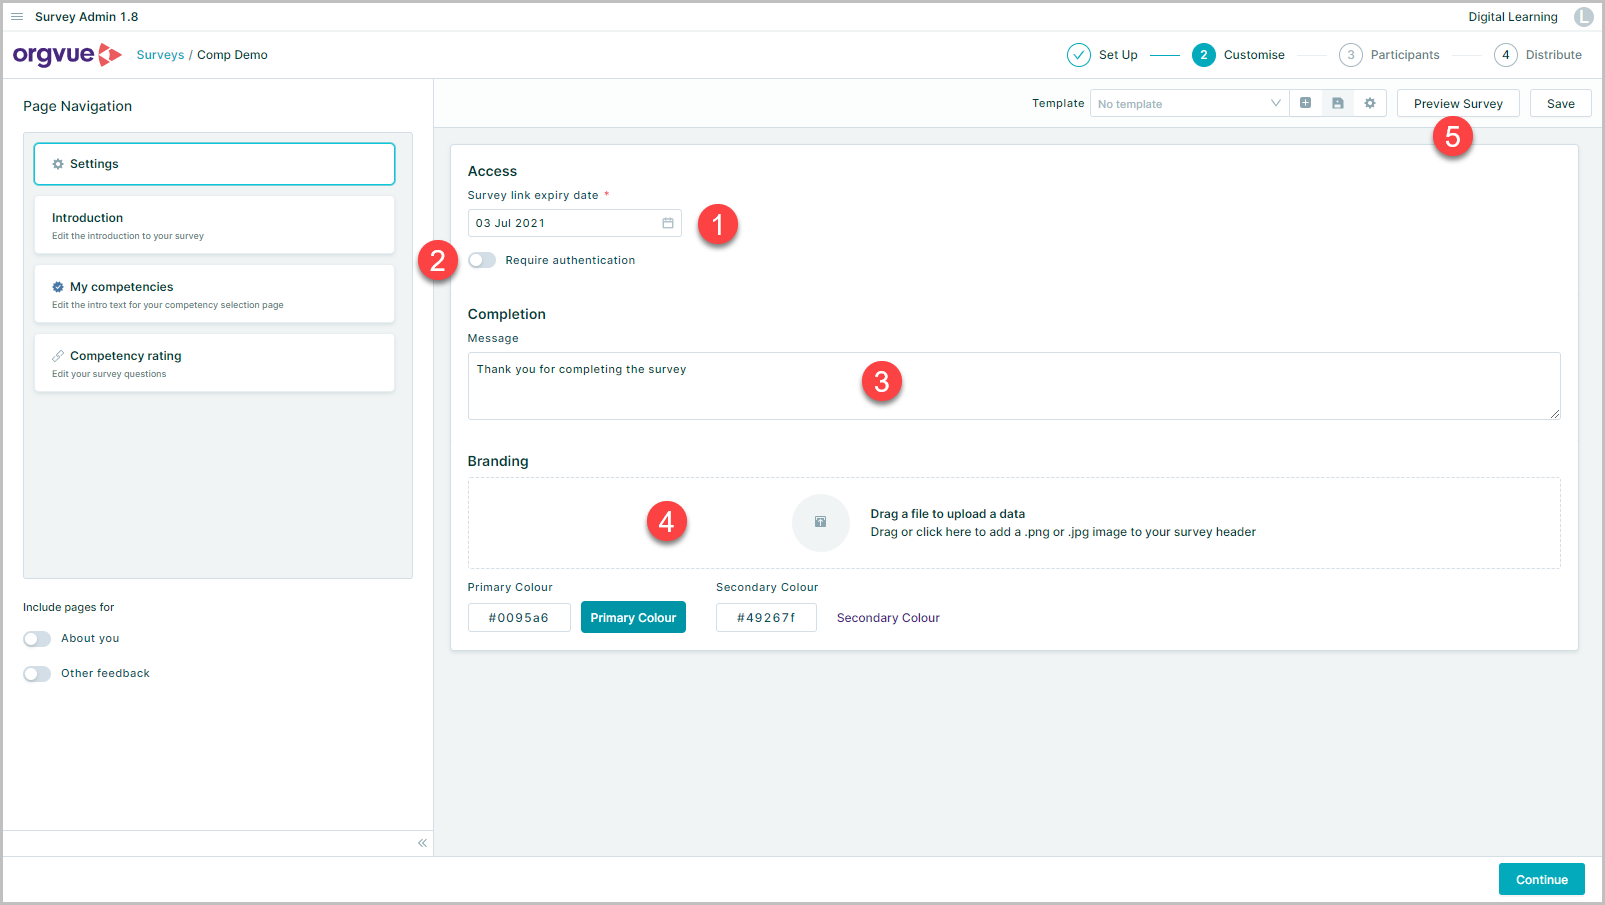
In the Settings menu, you can:
- Set a Survey link expiry date. This date will be the last date when survey participants are able to access the survey. After this date, all the survey links will expire and the survey state will become
Closed - Enable / disable authentication option see Authentication for more details
- Customize survey completion message
- Stylize the survey using your own logo and colors
- Preview Survey
Add Branding
To add a brand logo click or drag a .png or jpg file onto the window

Select the file from the file selection window

The uploaded logo will be shown and can be deleted using the bin icon

Authentication
It is possible enable authentication to the survey so that any participant must first login to Orgvue before being able to complete the survey
There are 3 different types of authentication that can set to control participants access to the survey
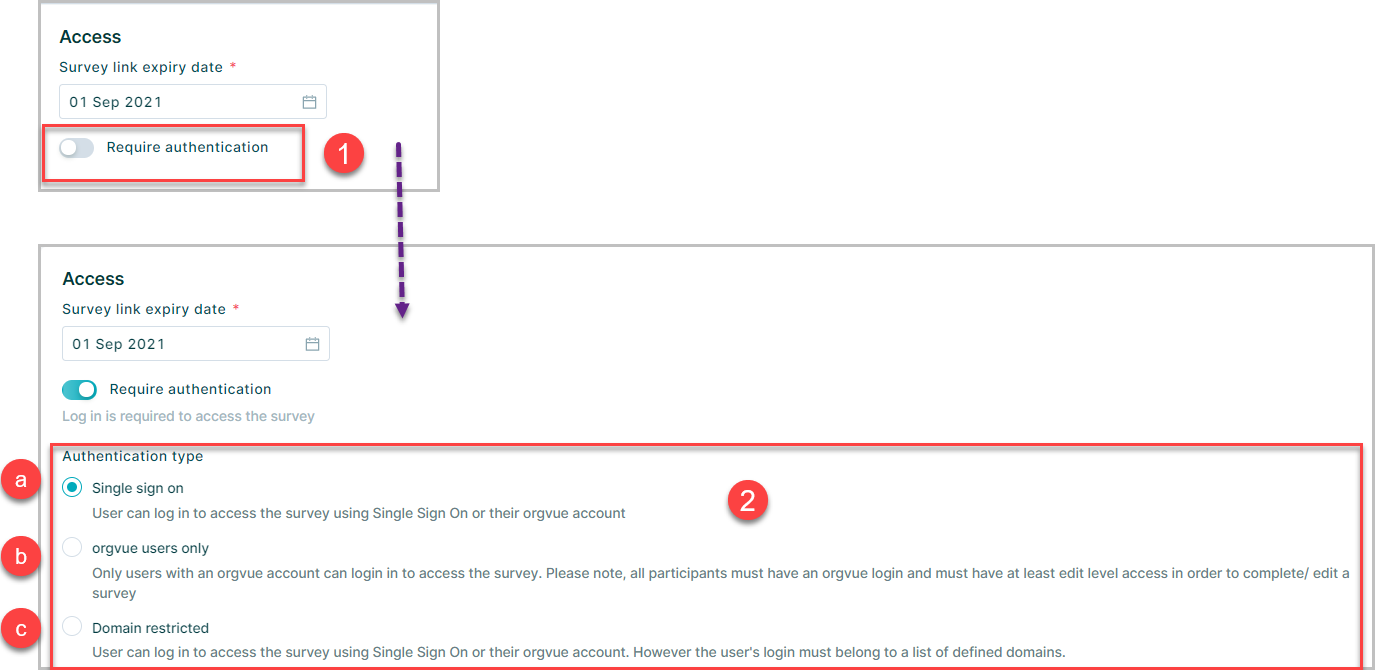
- Switching the
Require authenticationtoggle switch toon Selecting the required authentication type from the dropdown
- a. Single sign on: This setting requires integration with the client’s single sign on system. It will require that all participants sign into their own company’s Single sign on before they can access the survey OR use an Orgvue account if they have one
- b. Orgvue users only: Participant must be an Orgvue user and use their Orgvue login to access the survey
- c. Domain Restricted This setting requires that users login to access the survey either via Single Sign On or their Orgvue account but with an additional level of authentication that their domain must be one of those defined

NOTE:
For Single sign on authentication, please ensure that all of the intended participants' email domains exist in your organization's SSO configuration as set up within the Orgvue platform.
For Domain Restricted authentication, please ensure that each of the domains entered into the Domain Restricted section exists in your organization's SSO configuration as set up within the Orgvue platform.
If you are unsure about what domains are set up for your organization in Orgvue (and there is no way for you to view that within Orgvue) please contact support@orgvue.com who will be able to provide you with this information
Survey pages and questions
By default, the Competency management survey contains 3 pages:
- A. Introduction
- B. My competencies
- C. Competency Rating
with 2 additional pages available to add:
- D. About You
- E. Other Feedback
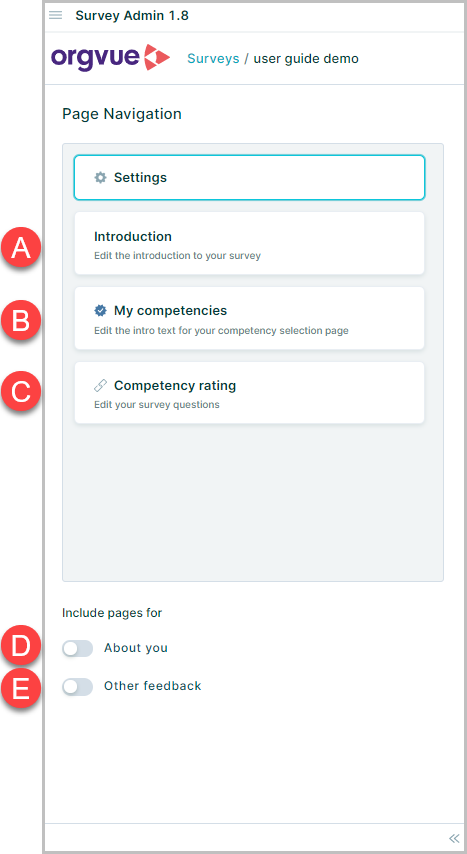
Using the left navigation pane, you can visit each page to customize and populate it
- Page names are amendable by clicking the pencil icon next to each page name
- For each page, you can edit page introduction text
Introduction
Default text is provided in the text box. You can enter your own message (typically instructions and context to running the survey) and format it using the text editing options
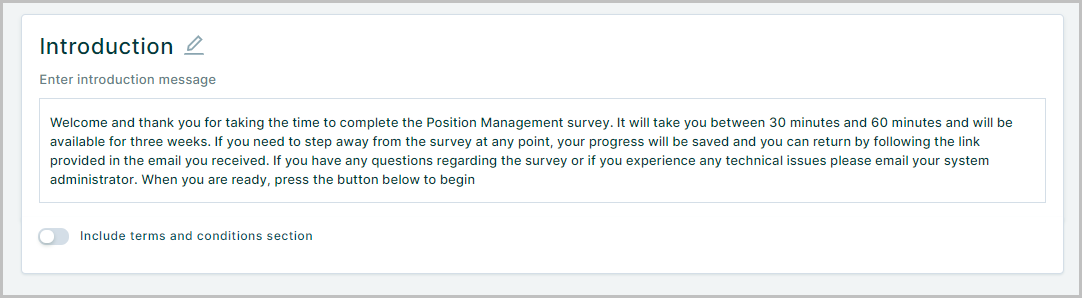
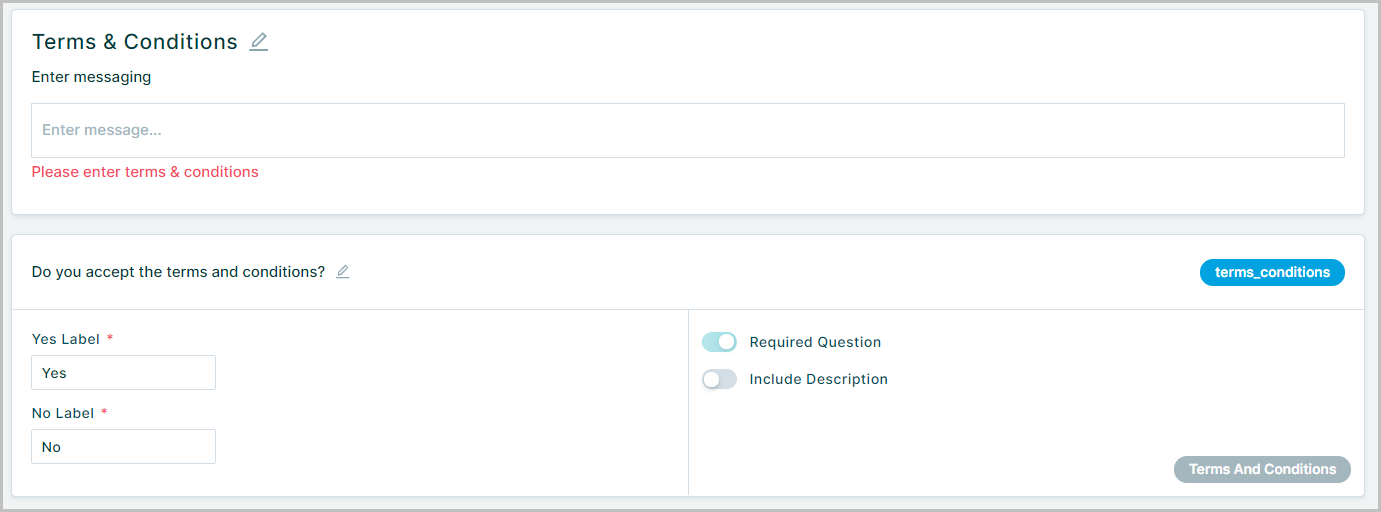
If you'd like to get consent from survey participants, you can include a 'Terms & Conditions' section which is technically a pre-set Boolean question
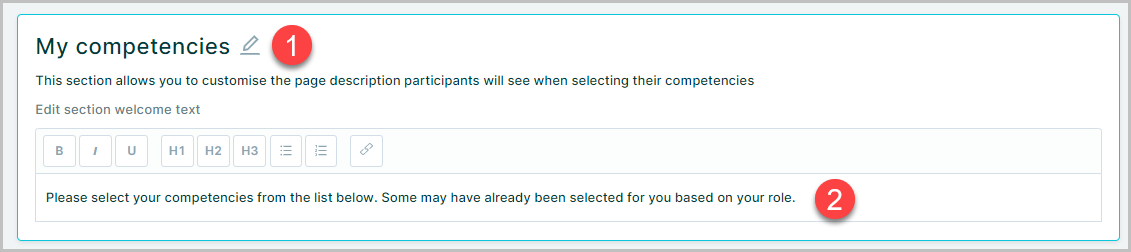
My competencies
This sections allows users to select the Competencies they want to assign a rating against
The welcome text may be edited as required
This screen also enables the setting of competency selection approach to be used in the survey
The selection options are:
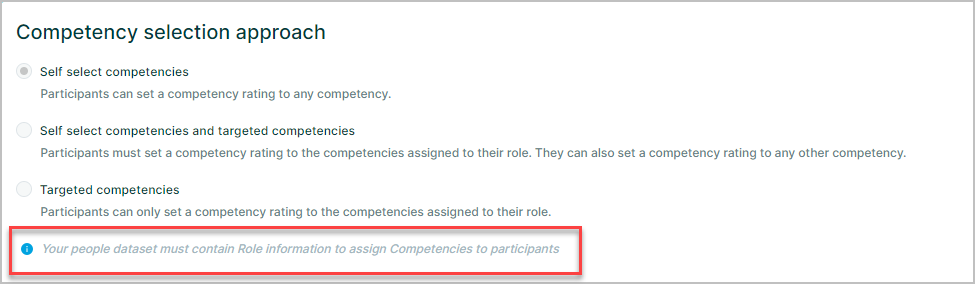
- Self select competencies: Participants can set a competency rating to any competency
- Self select competencies and targeted competencies: Participants must set a competency rating to the competencies assigned to their role. They can also set a competency rating to any other competency
- Targeted competencies: Participants can only set a competency rating to the competencies assigned to their role.
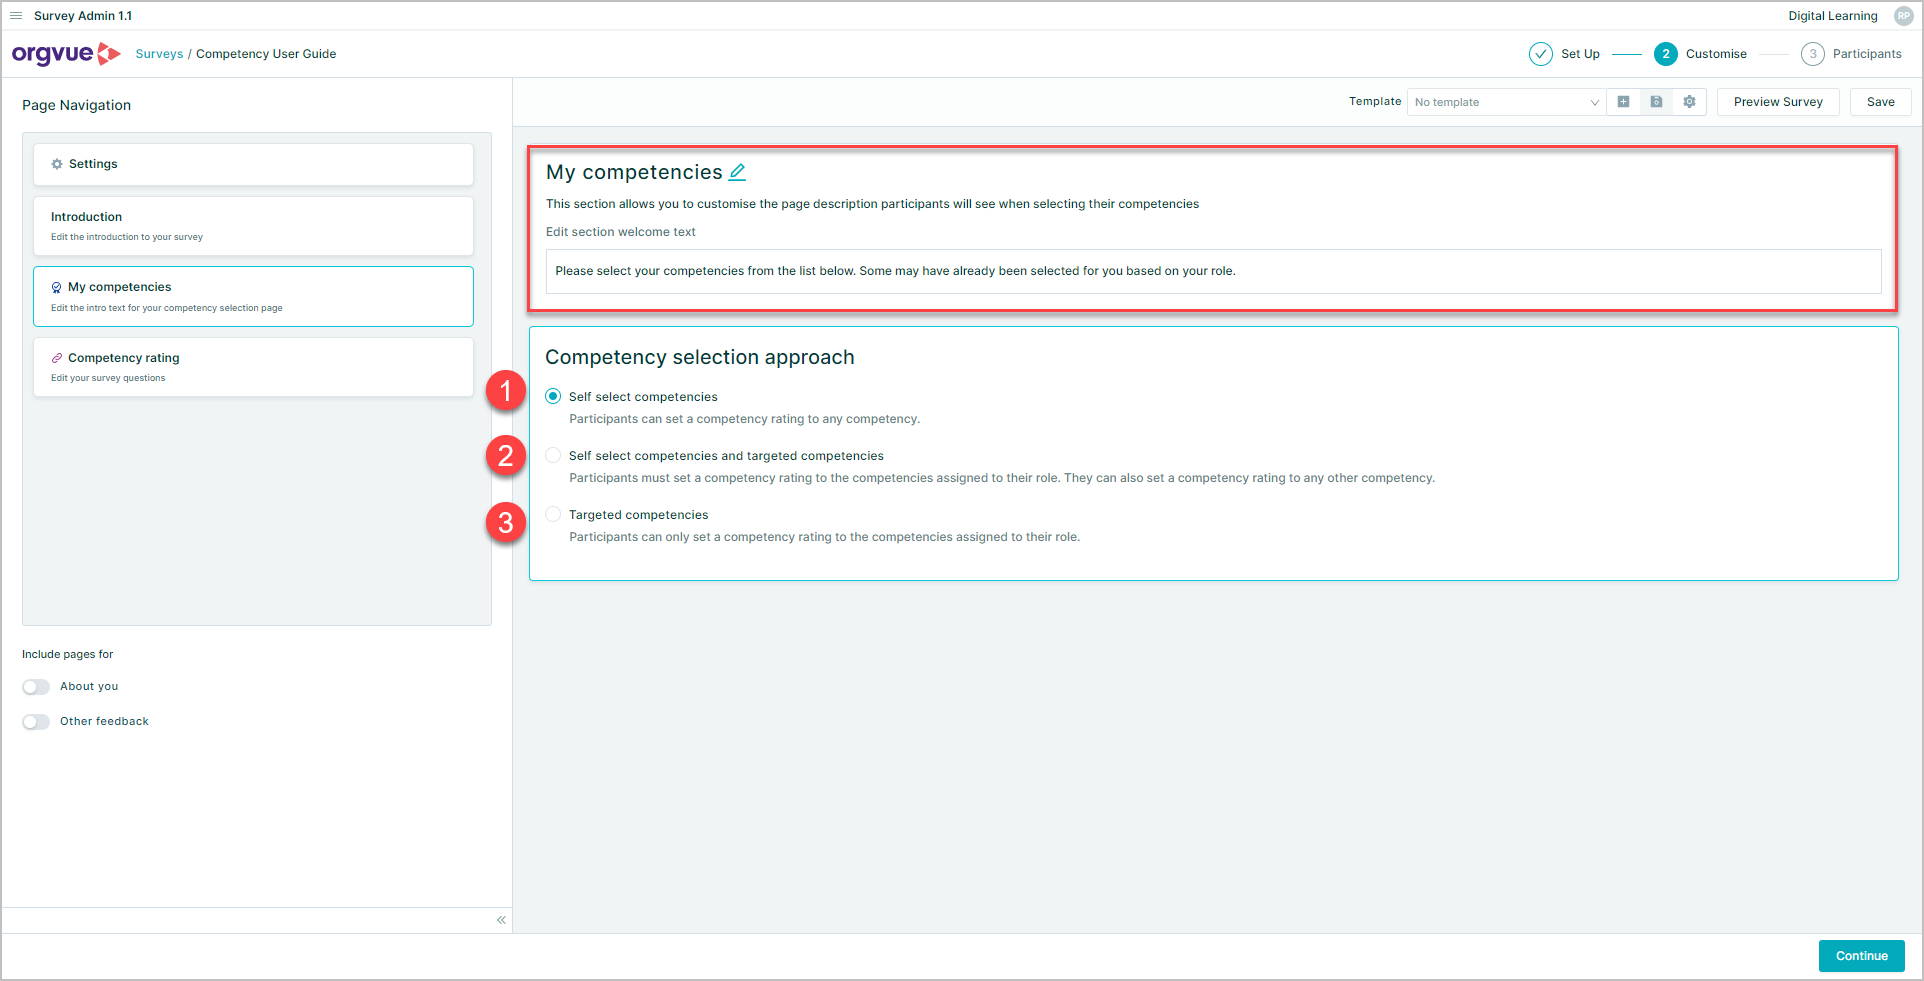
For further details see Pre Selection
If the people dataset does not meet the pre requisites of containing the roleID property to match the roles dataset then the selection options will be greyed out and default to Self select competencies only
A warning will also be displayed if the people dataset does not contain the roleID
If either of the pre selection options are chosen then a linked roles to competencies dataset will need to be selected to provide the pre selected competencies by:
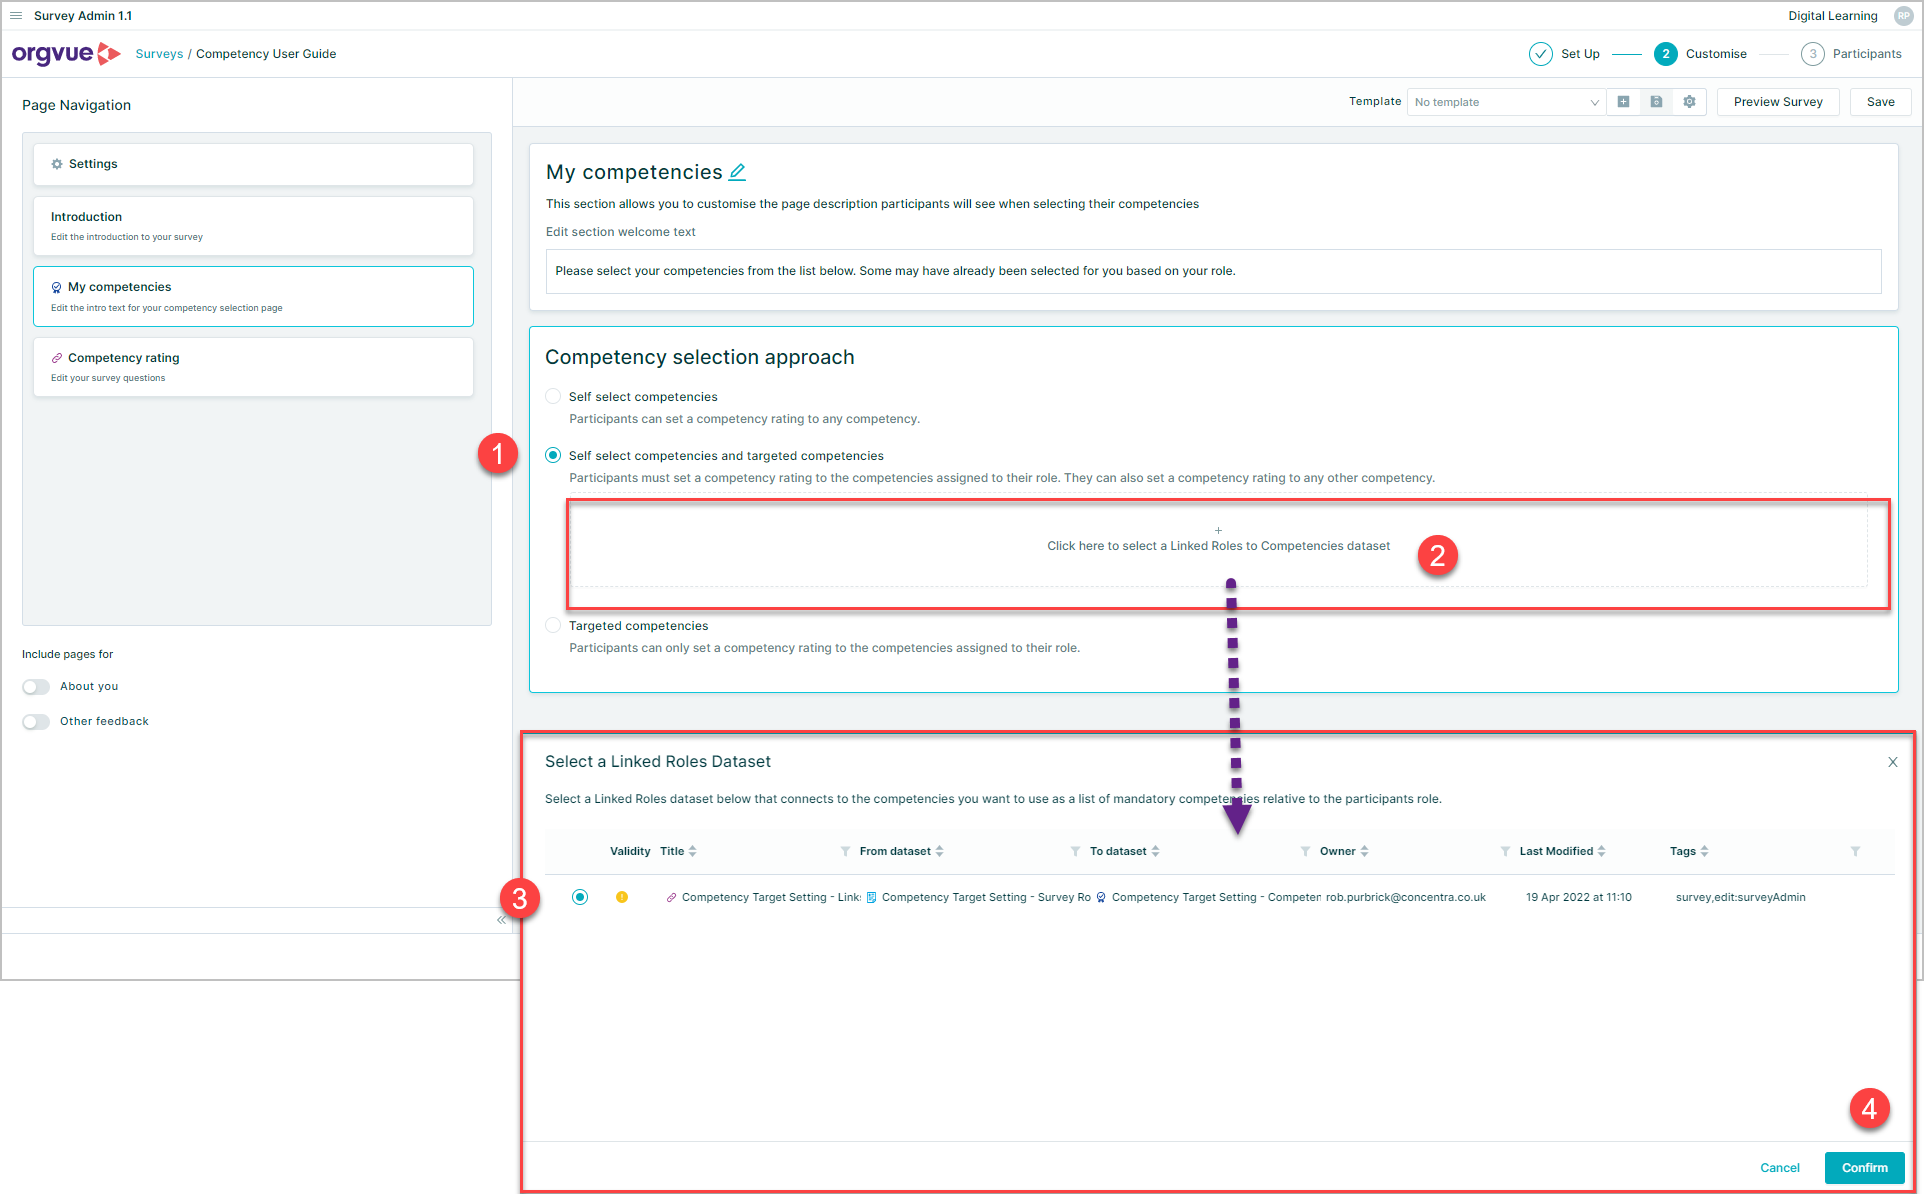
- Select either
Self select competencies and targeted competenciesorTargeted competencies - Click into the selection area to open the linked dataset selection panel
- Select the required linked roles to competencies dataset to provide the target competencies by role
- Select
continue
If the selected linked datasets do not contain detail for all roles a warning will be displayed

The linked dataset may still be used but any roles not included will default to self selection of competencies during survey completion
Once selected the linked dataset will be shown
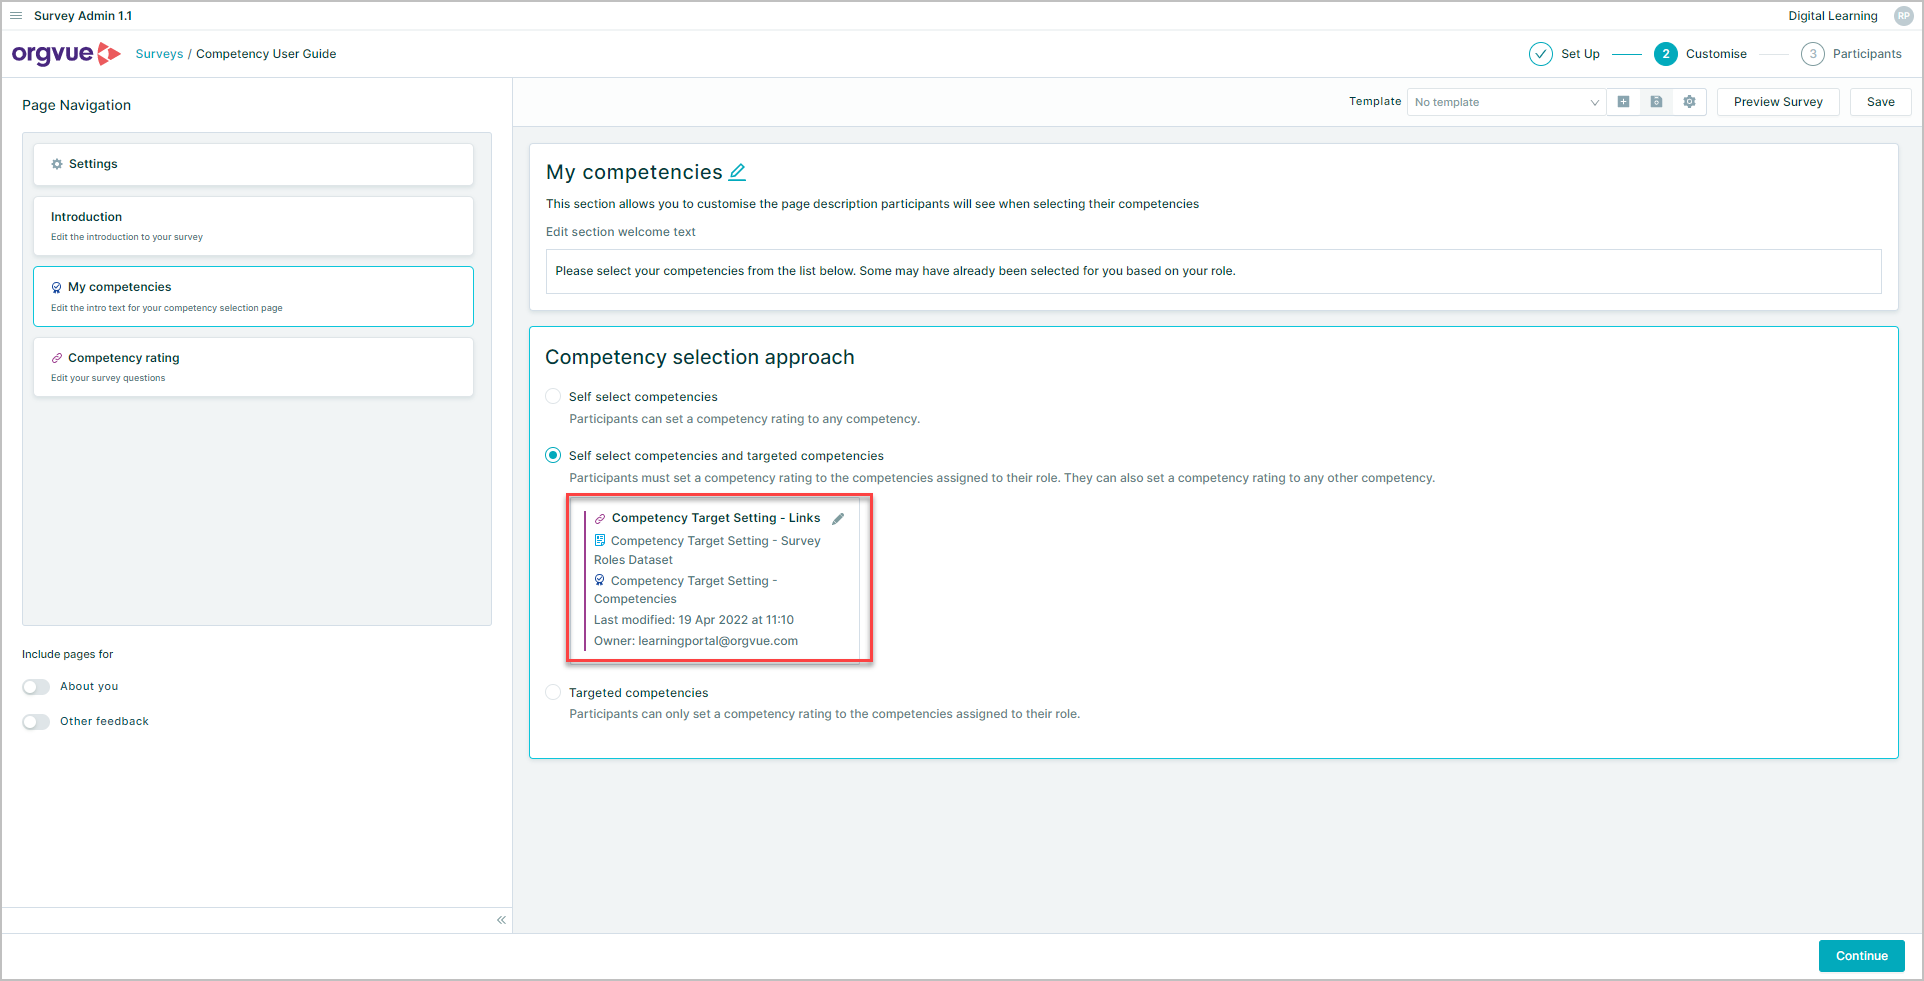
To change this selection click the edit pencil 🖉 icon
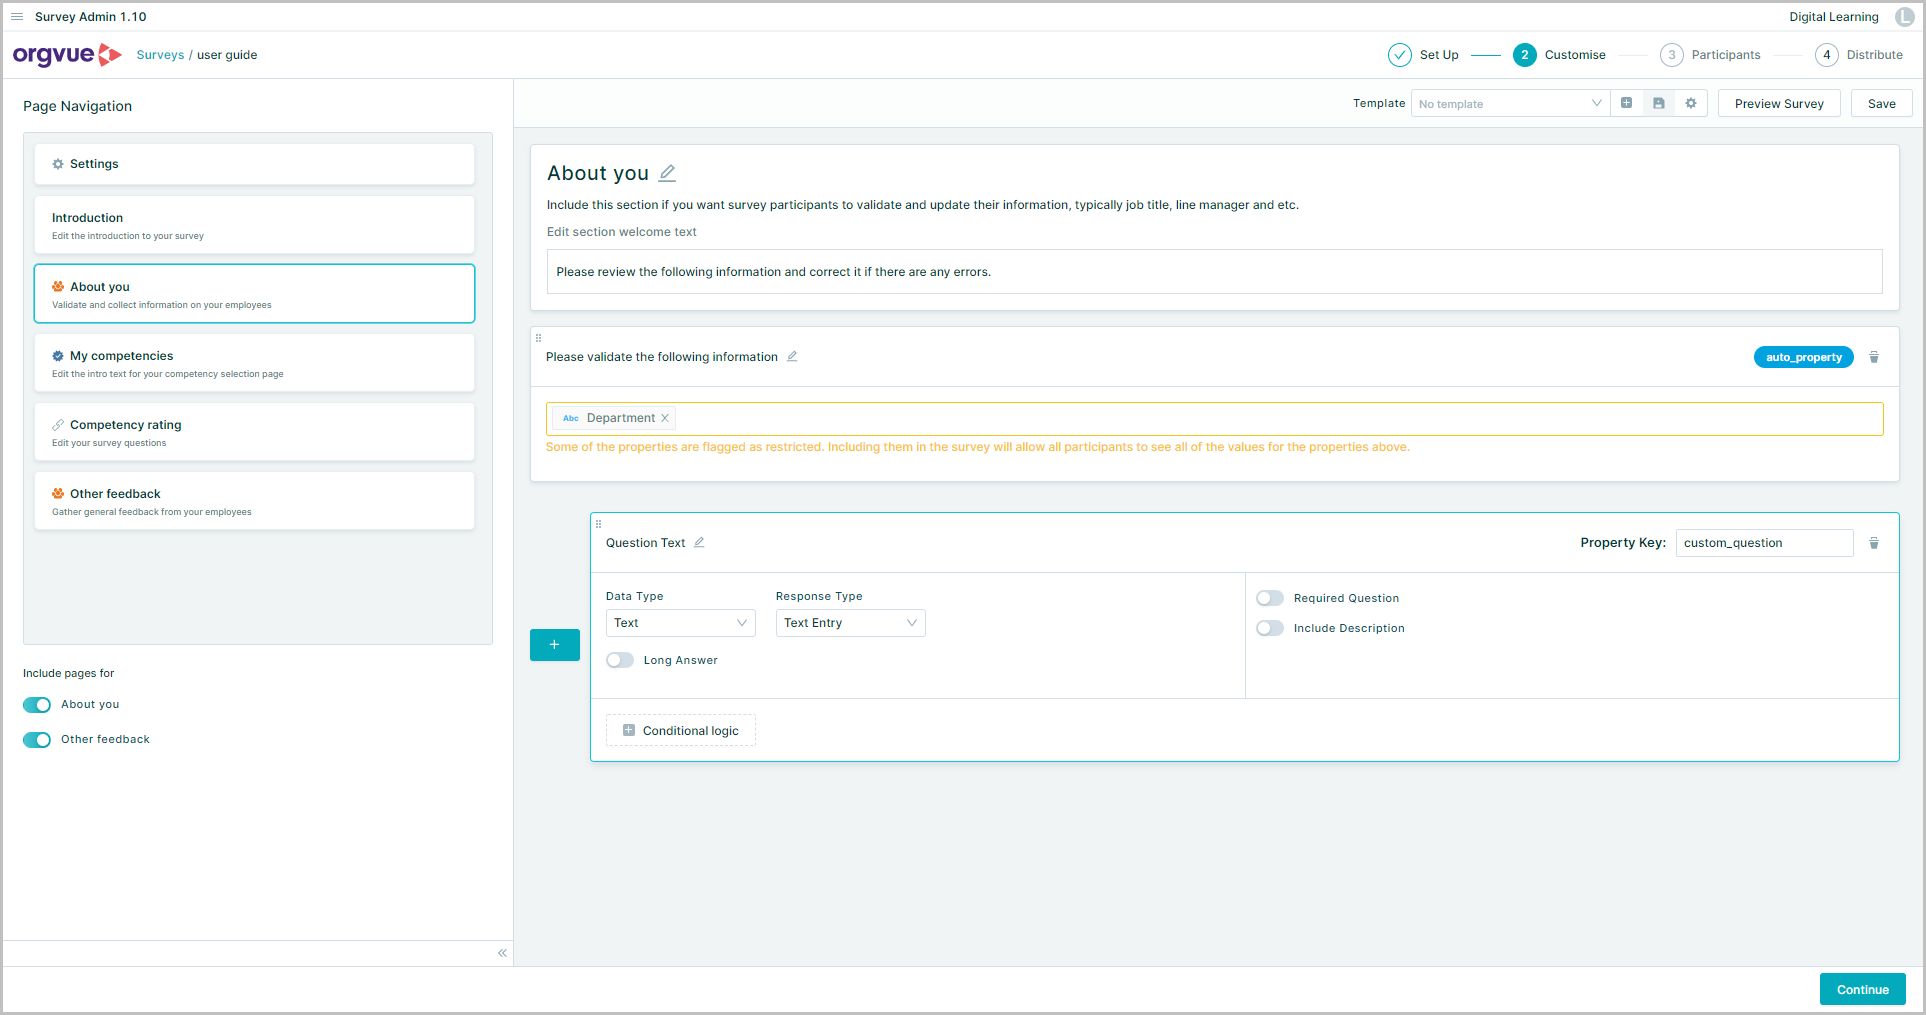
About you
Pre-set question available:
- Data Confirmation: allows you to select properties from your People Dataset to include in the survey and validate
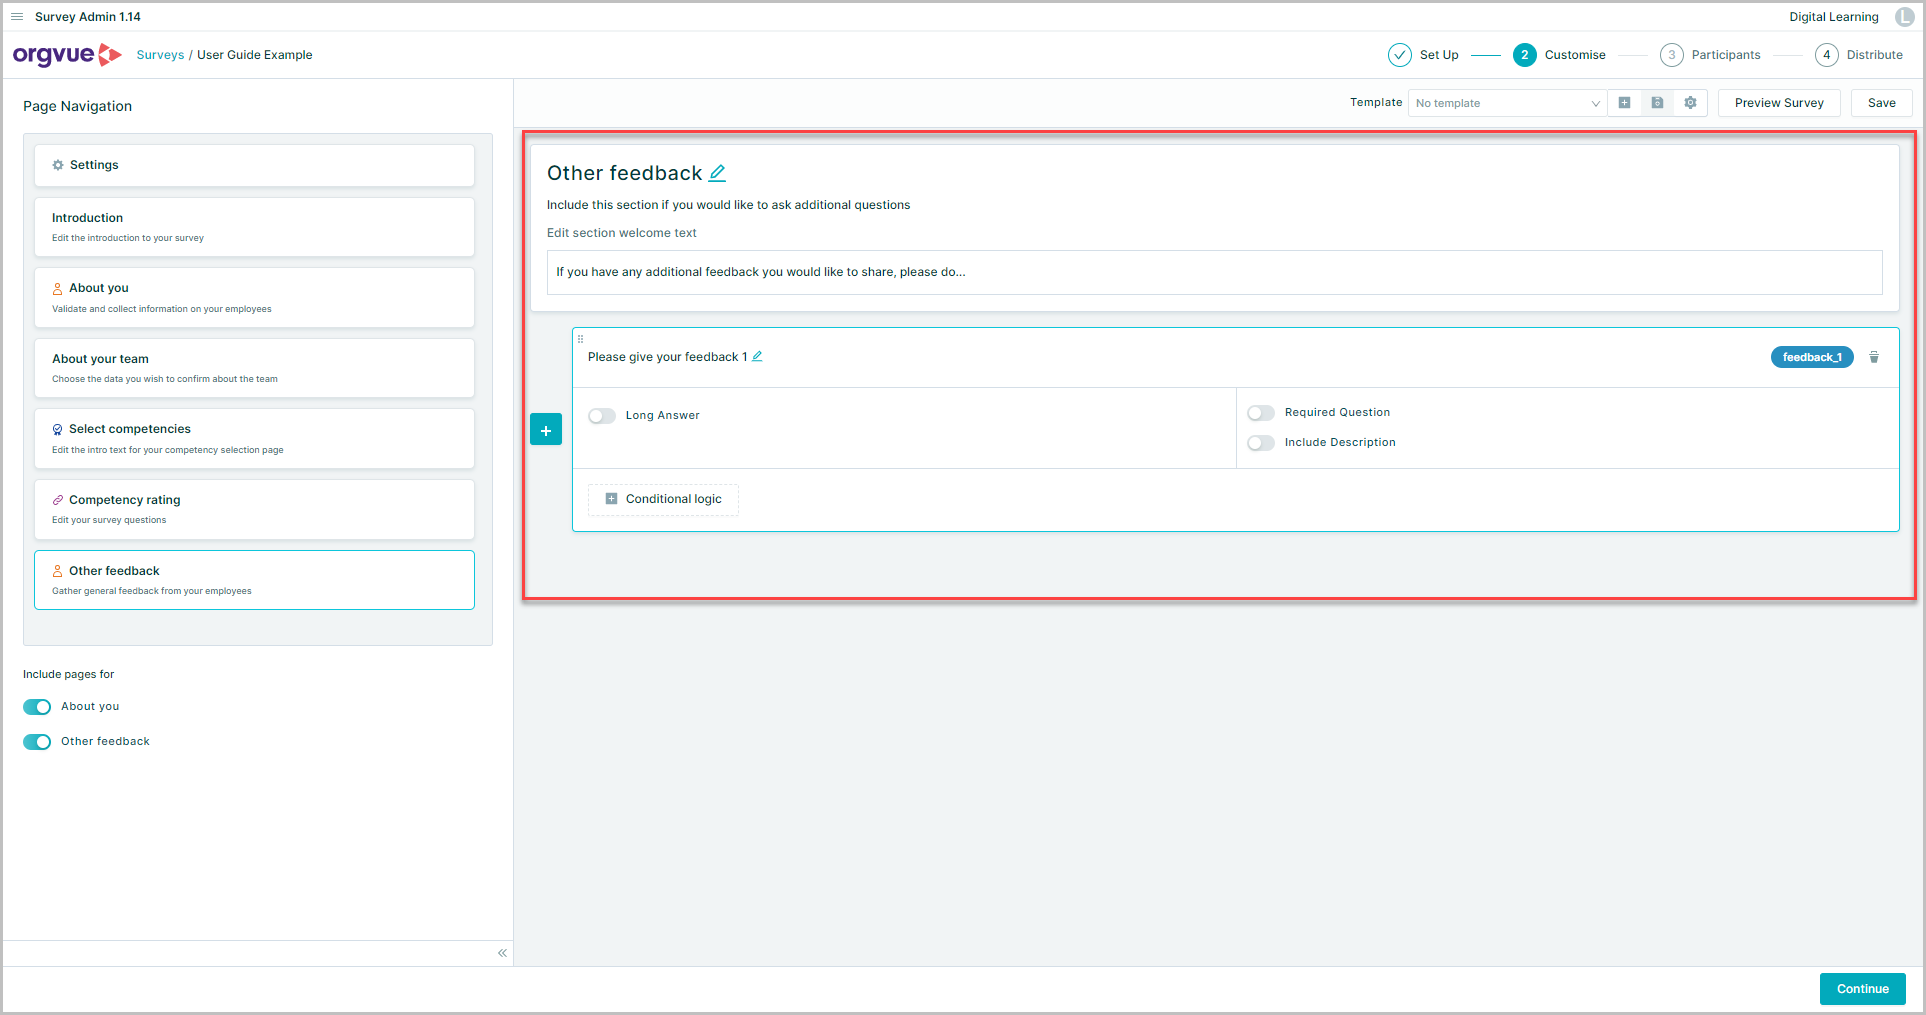
Other Feedback
Three pre-set feedback questions are available with pre-set Property keys:
- feedback_1
- feedback_2
- feedback_3
These may be used as required with custom question text or a custom question may be created with its own Property key
Each of the pre set feedback questions may have conditional logic added to them. See Conditional Questions for more detail
Competency Rating
This section allows the user to assign a rating against each competency associated to their role
Options on this page:
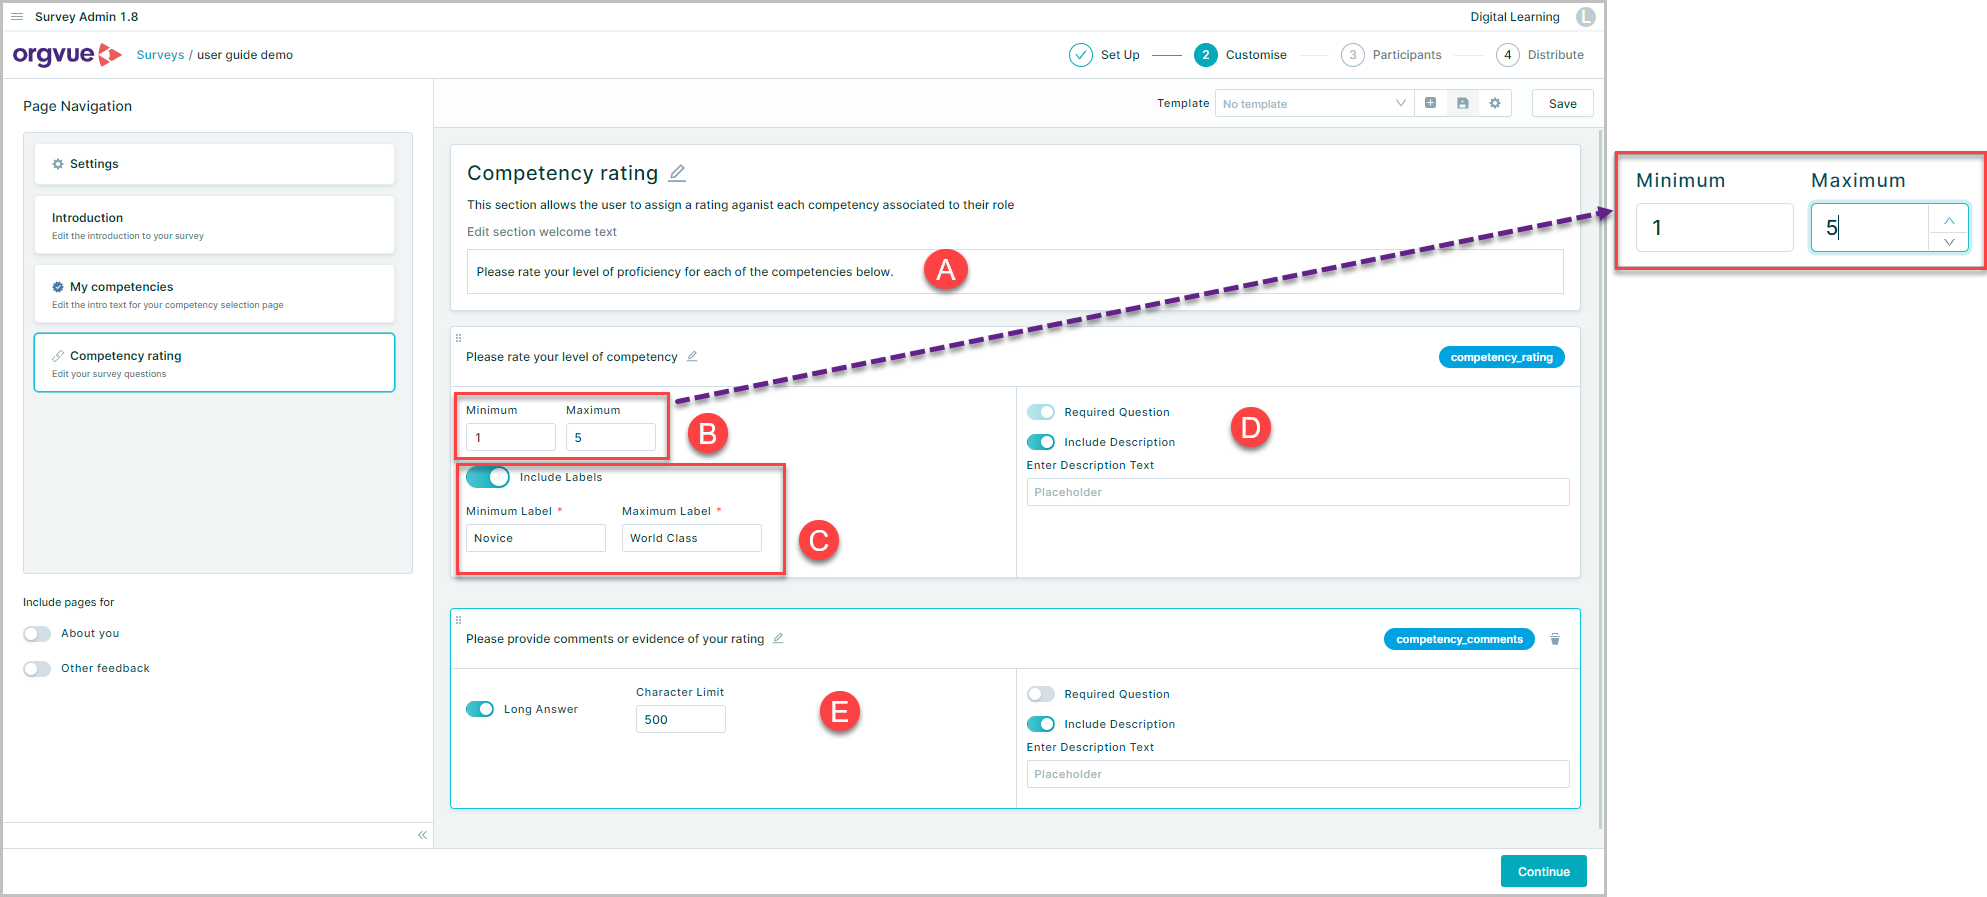
- A. Welcome text can be edited
- B. Competency Rating: Set the minimum and maximum values for ratings
- C. Include Labels: Toggle on to set text label for minimum and maximum ratings
- D. Include Description: Toggle on to enter text to describe ratings
- E. Competency Comments: Optional question that can be added to capture comments for each rating
Survey templates
Survey templates enable you to save the survey you created as a template and re-use it for other projects (with a different set of People and Competency datasets in the same tenant)
The menus are located next to 'Preview Survey' button
All the templates created in the tenant are available to choose from the dropdown
If you have a saved survey template and want to use it to create your survey, choose the template from the dropdown
All the configuration will be imported into your new survey except the Data Confirmation question which contains properties that are specific to a certain Dataset
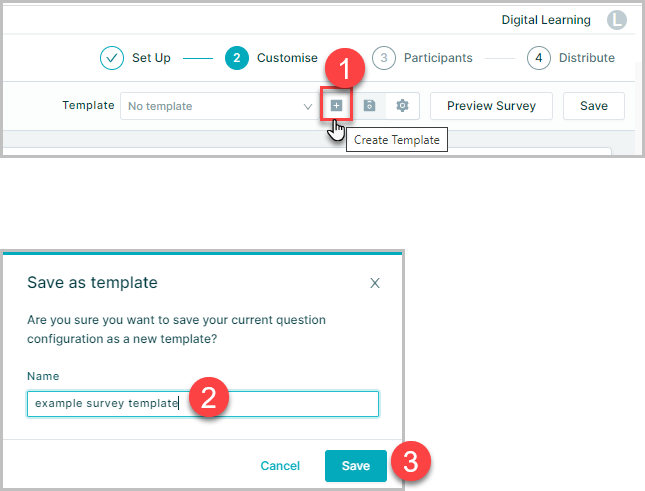
To create a template from the survey you're working on:
- Select the
+ - Enter template name
- Select
Save
You can update the template as you make changes to the survey by clicking the 'save' icon

To rename or delete a survey template, open up the Template Manager by clicking the 'cog' icon. To rename a template, click the pencil icon, rename it and click the Save button. To delete a survey, click the bin icon
Select Participant
The next step in the survey creation process is to Select Participants