
Customise
Settings
The settings menu is the first screen displayed in the Customise step
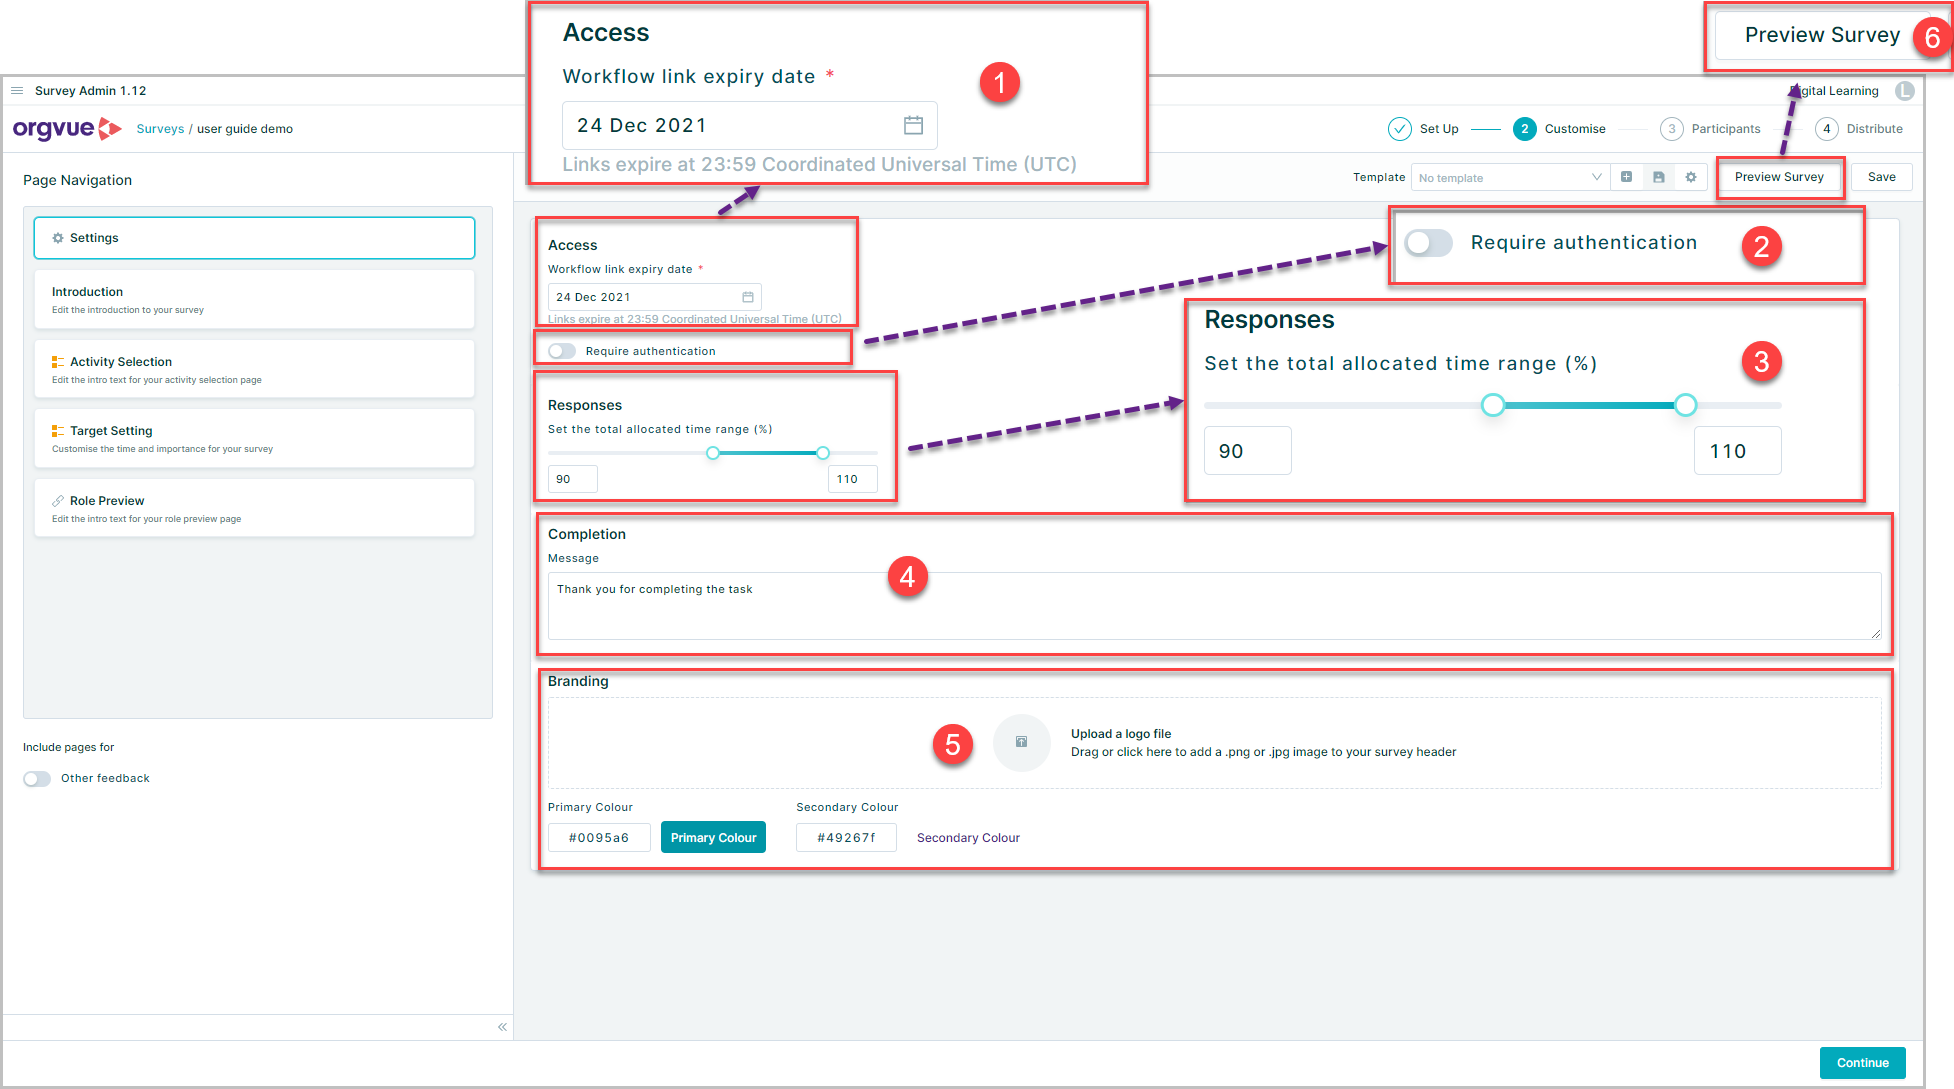
In the Settings menu, you can:
- Set a Workflow link expiry date
- Enable / disable Authentication
- Set the required Responses level
- Customize Survey Completion Message
- Add Branding to stylize the survey using your own logo and colors
- Preview Survey
Workflow Link Expiry Date
This date will be the last date when survey participants are able to access the survey
Links will expire at 23:59 co coordinated universal time UTC on selected date
After this date, all the survey links will expire and the survey state will become Closed
Authentication
It is possible enable authentication to the survey so that any participant must first login to Orgvue before being able to complete the survey
There are 3 different types of authentication that can set to control participants access to the survey
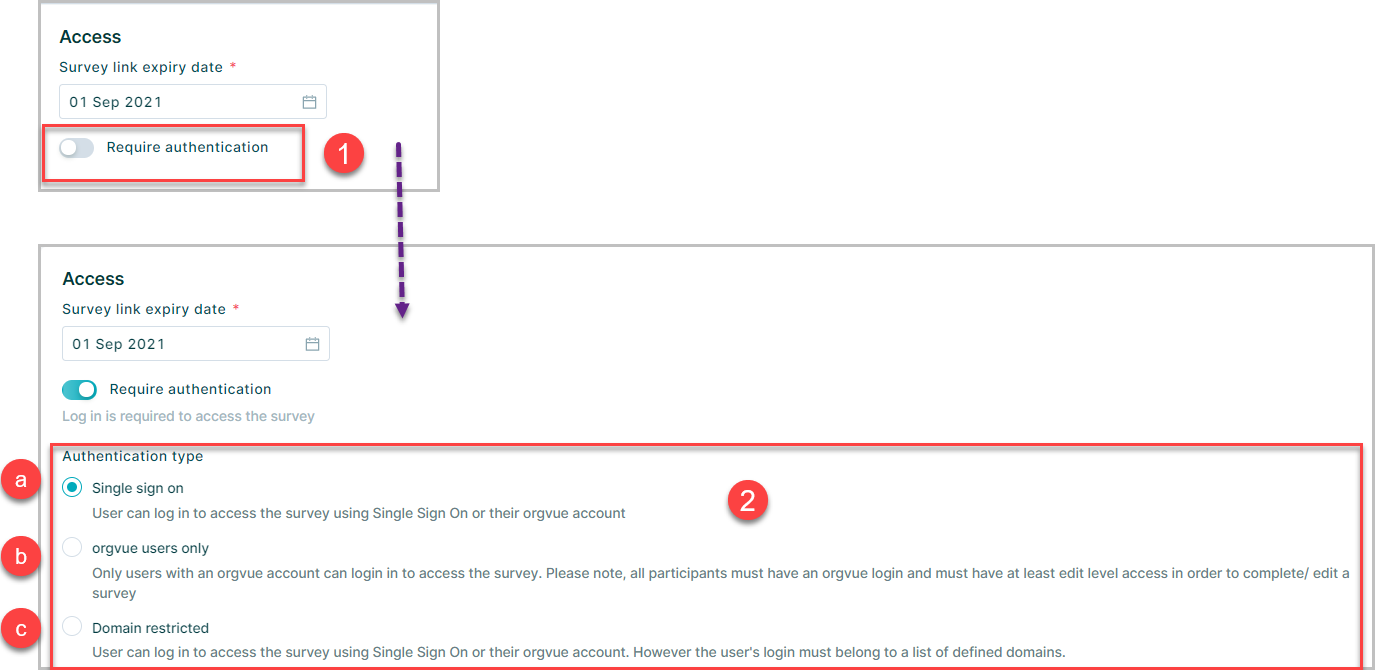
- Switching the
Require authenticationtoggle switch toon Selecting the required authentication type from the dropdown
- a. Single sign on: This setting requires integration with the client’s single sign on system. It will require that all participants sign into their own company’s Single sign on before they can access the survey OR use an Orgvue account if they have one
- b. Orgvue users only: Participant must be an Orgvue user and use their Orgvue login to access the survey
- c. Domain Restricted This setting requires that users login to access the survey either via Single Sign On or their Orgvue account but with an additional level of authentication that their domain must be one of those defined

NOTE:
For Single sign on authentication, please ensure that all of the intended participants' email domains exist in your organization's SSO configuration as set up within the Orgvue platform.
For Domain Restricted authentication, please ensure that each of the domains entered into the Domain Restricted section exists in your organization's SSO configuration as set up within the Orgvue platform.
If you are unsure about what domains are set up for your organization in Orgvue (and there is no way for you to view that within Orgvue) please contact support@orgvue.com who will be able to provide you with this informationResponses
When completing a survey, respondents will estimate the time spent on each activity selected
The Responses Slider Control allows the setting of permitted total time allocated for a survey to be submitted
The default setting is 90% to 110% which means a respondent may enter activity time totaling anywhere between 90-110% of their actual working hours
Adjusting this slider can extend or restrict this range
Note: There is no validation performed on the total time when submitting Target surveys
Completion Message
When a survey is submitted by a respondent a completion message is displayed on screen
The text of this message may be edited in this section

Add Branding
To add a brand logo click or drag a .png or jpg file onto the window

Select the file from the file selection window

The uploaded logo will be shown and can be deleted using the bin icon

Survey pages and questions
By default the Activity Target Survey will contain four pages with an optional fifth page
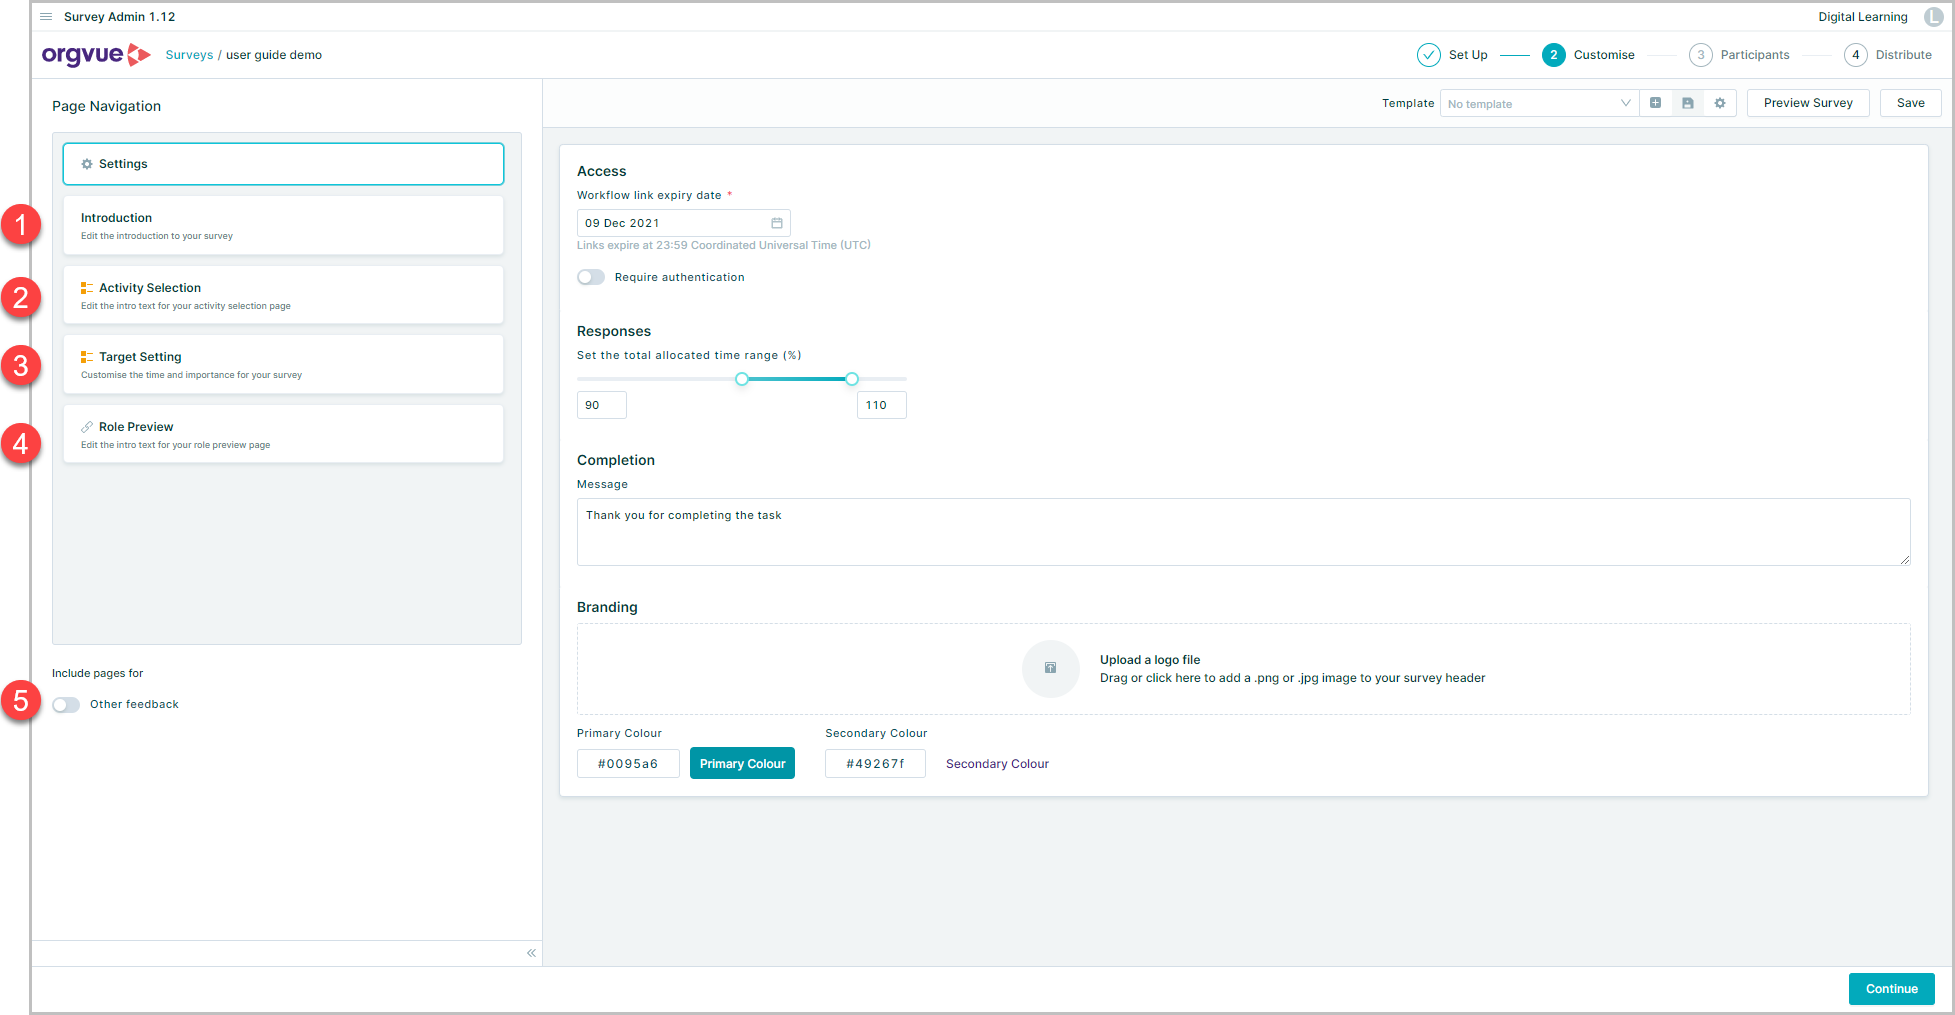
The customise step allows these pages and the questions on them to be tailored to suit the audience and application
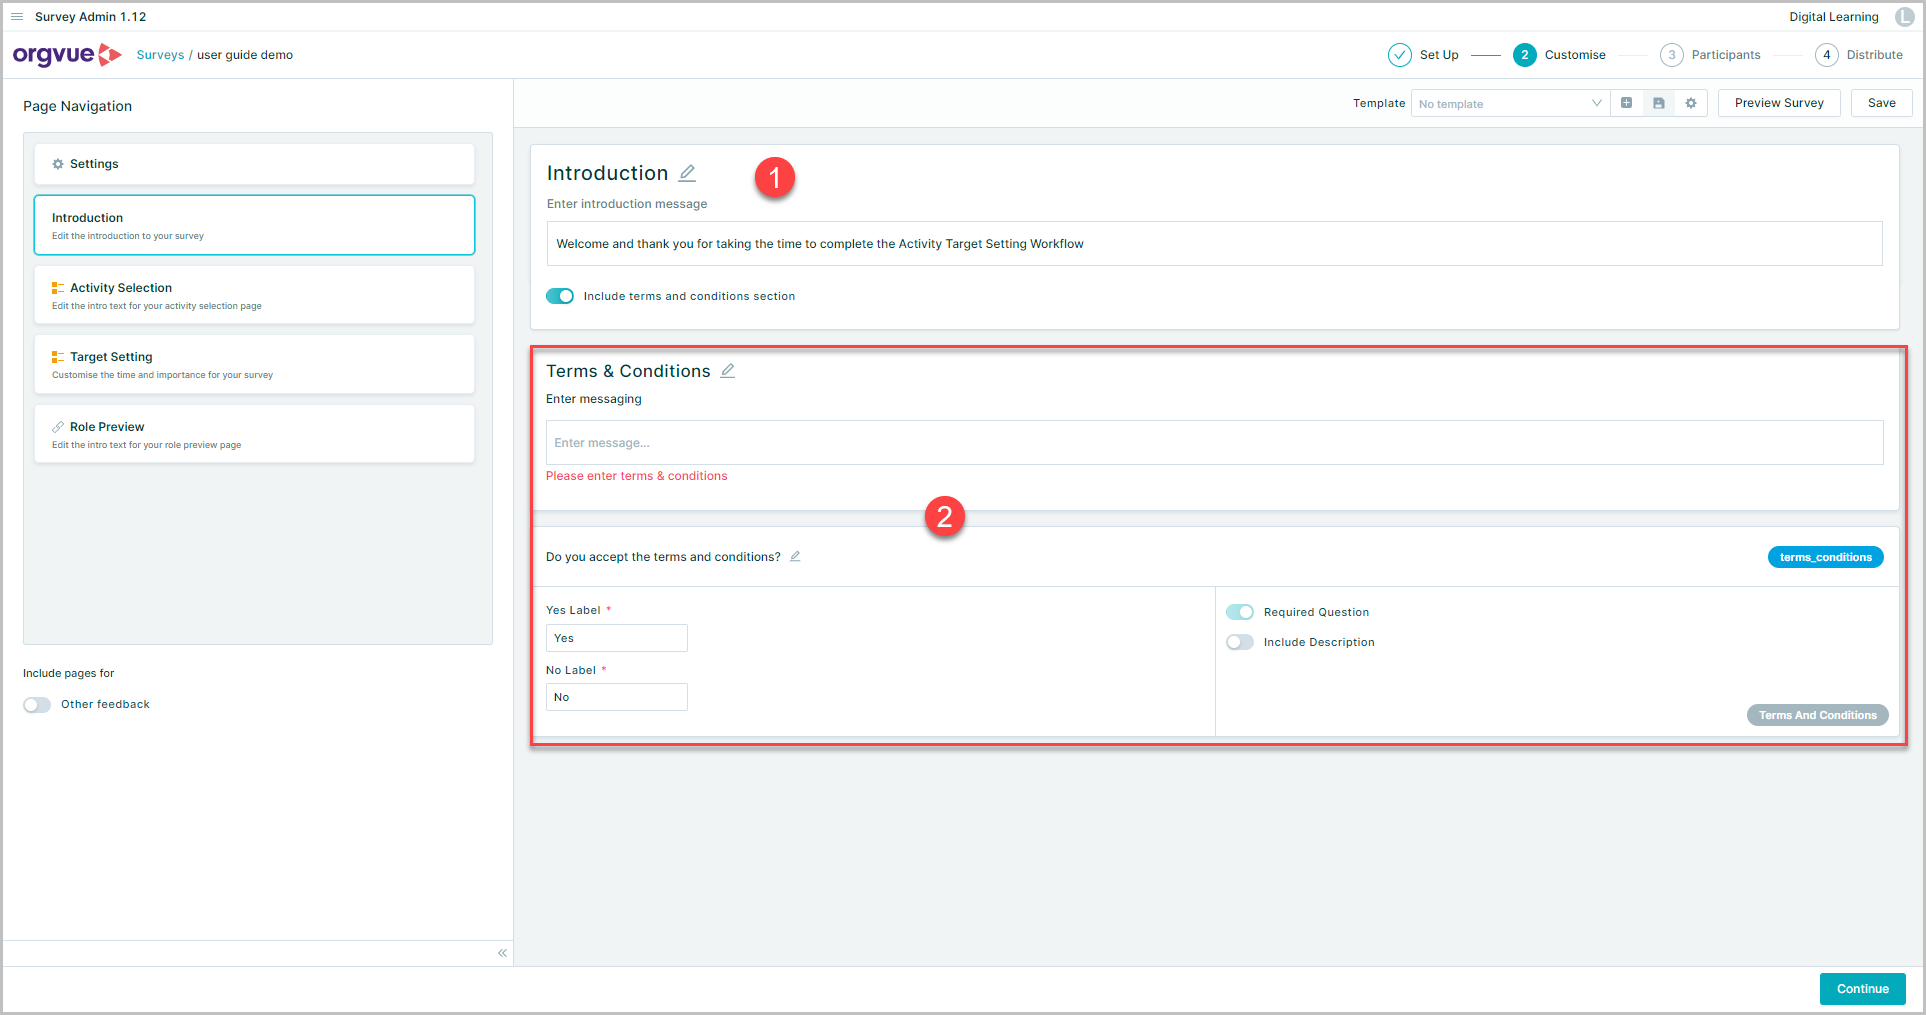
Introduction
- Default introduction text is provided in the text box. This may be edited (typically instructions and context to running the survey) and formatted using the text editing options
- If you'd like to get consent from survey participants, you can include a 'Terms & Conditions' section which is technically a pre-set Boolean question
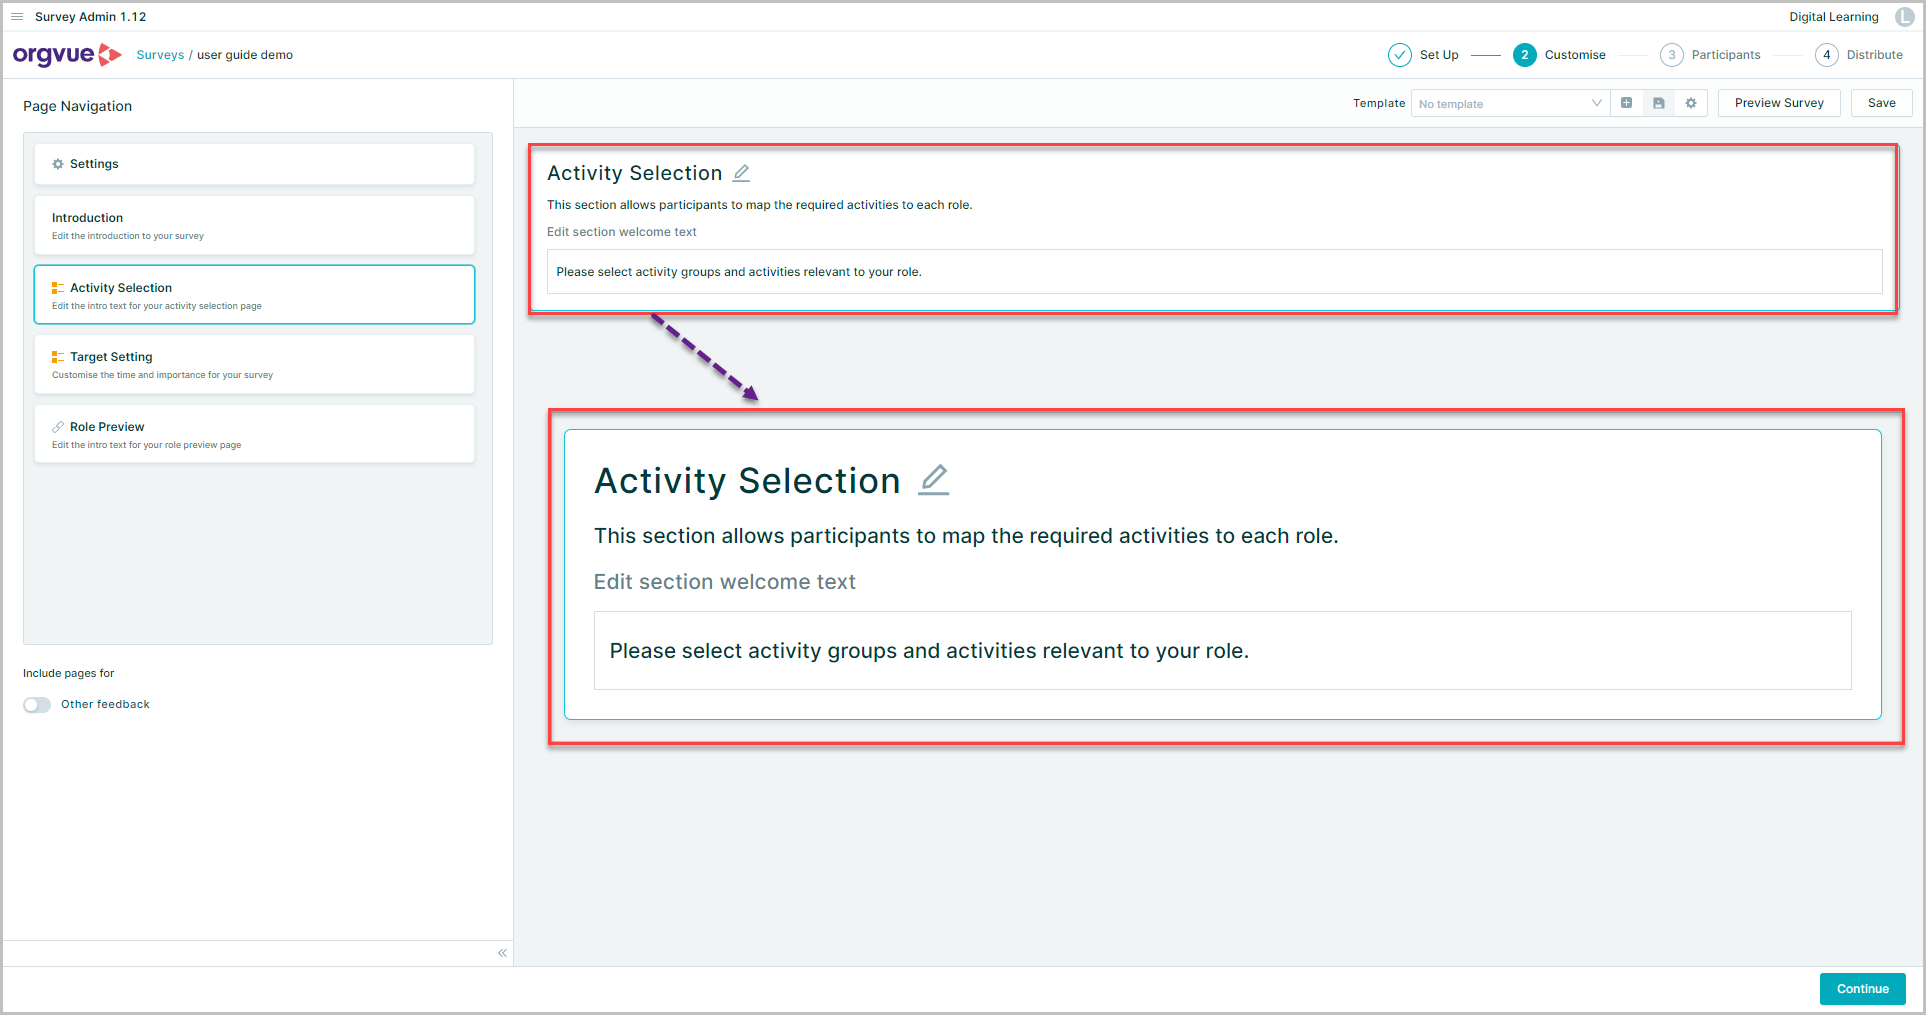
Activity Selection
The activity selection screen is where participants will select which activities are linked to which roles
This screen has no additional questions available to add but the page name and welcome text may be edited if required
Target Setting
The target setting screen has three options available to enable on it:
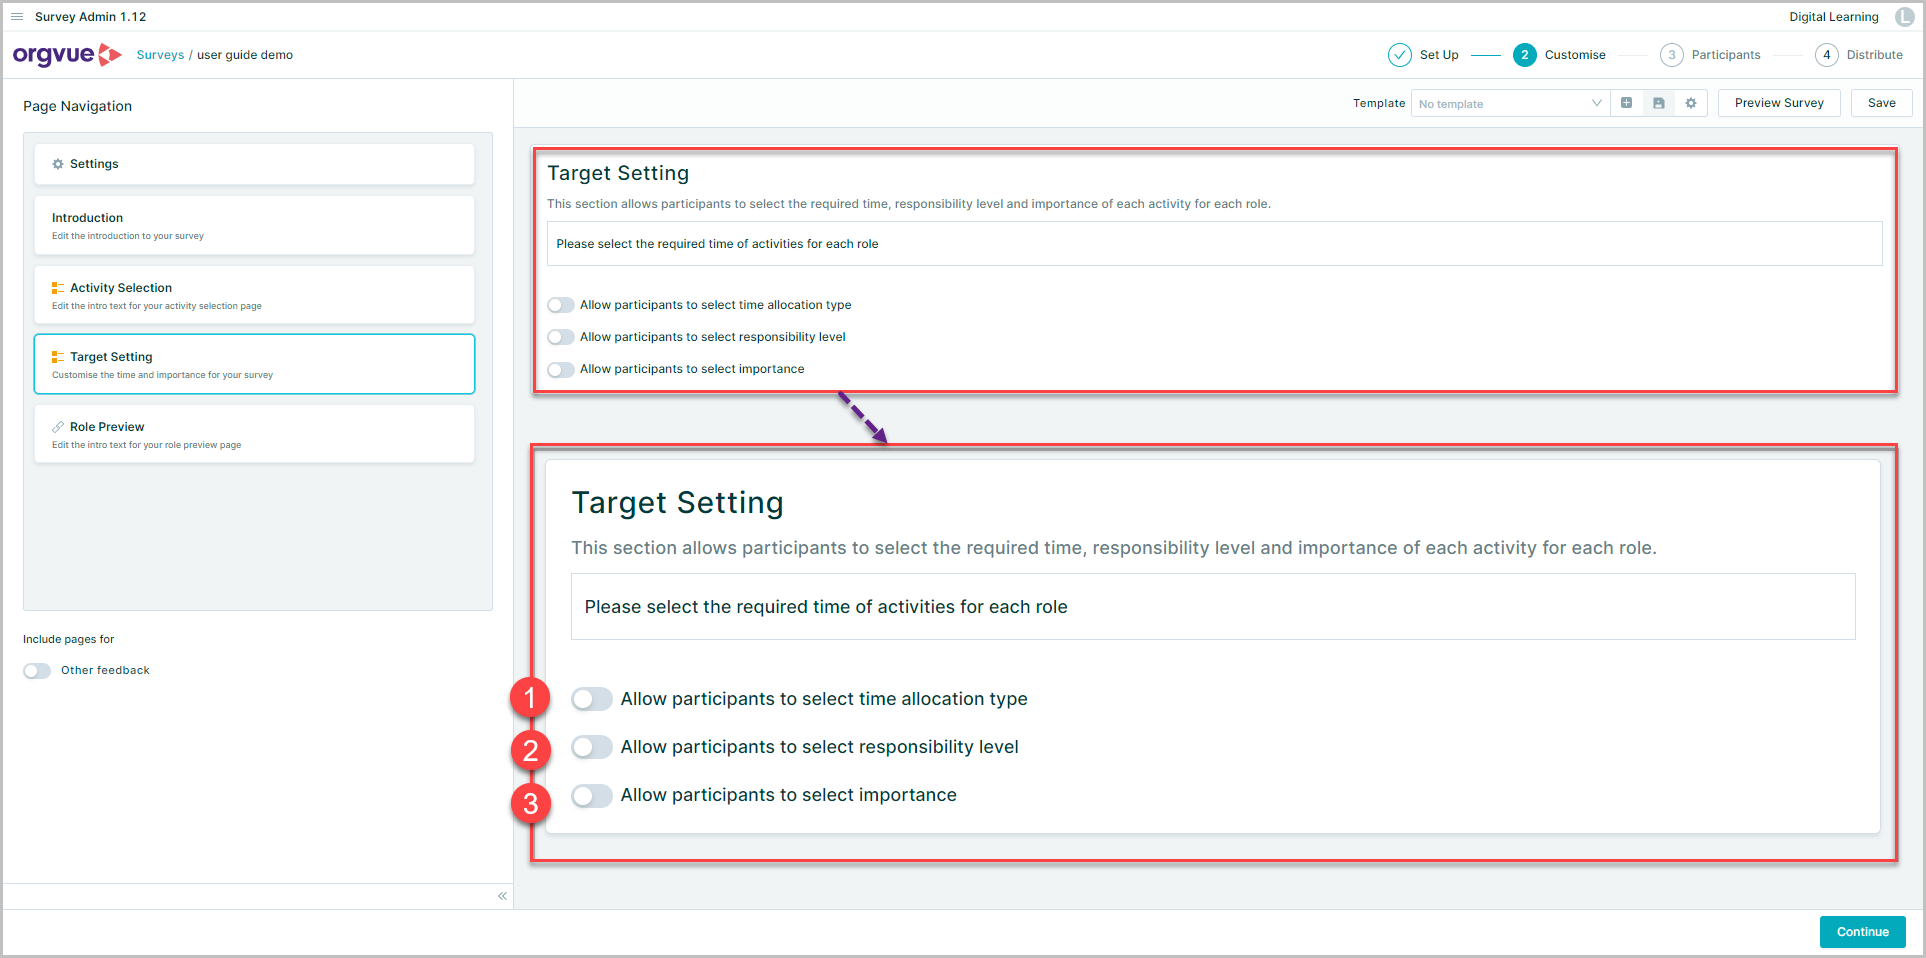
By default it has no options enabled on it and will therefore not appear in the survey if no selections are made
Time Allocation
When enabled the time allocation option allows the selection of either
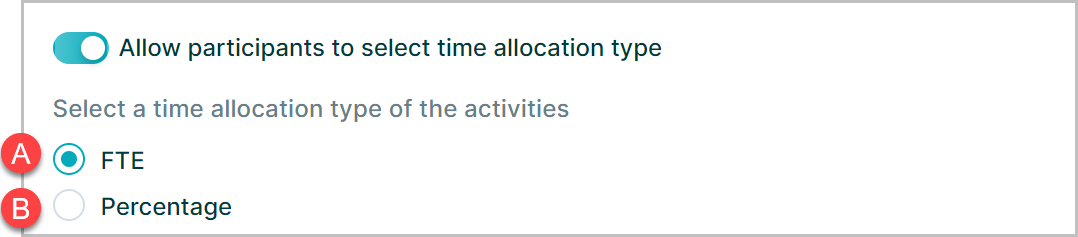
- A. FTE
- B. Percentage
As the unit of time allocation entry for activities
Responsibility Level
Responsibility level defines how a role is assigned to activities
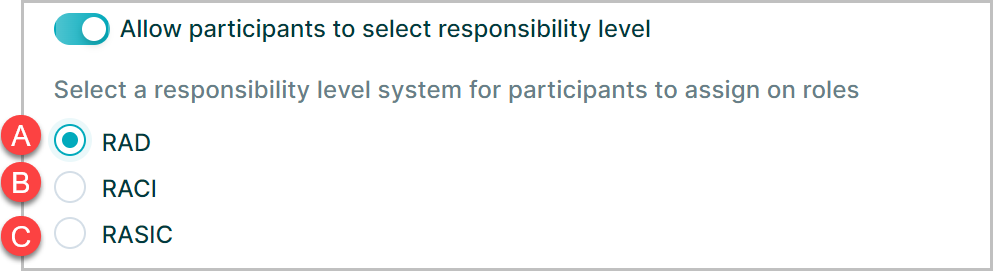
Select from:
- A. RAD: Responsible, Accountable and Do
- B. RACI: Responsible, Accountable, Consulted and Informed
- C. RASIC: Responsible, Approving, Supporting, Informed and Consulted
Importance
Importance describes the how critical the activity is
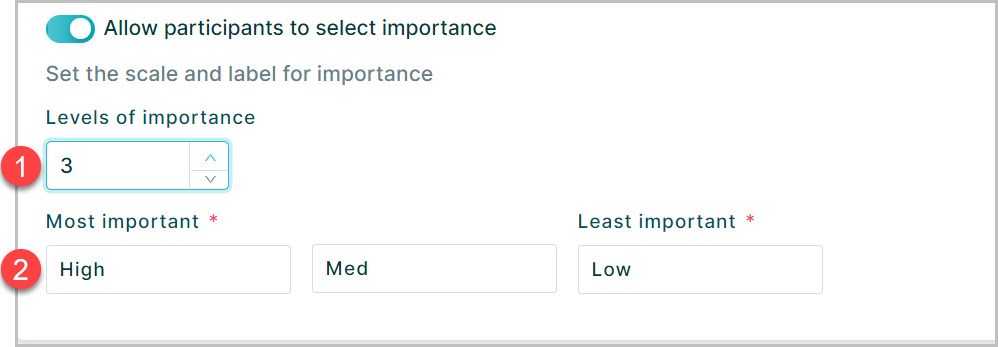
Once enabled:
- Select the number of levels of importance to be displayed (2 to 5)
- For each level enter a label to describe the level from most important to least important
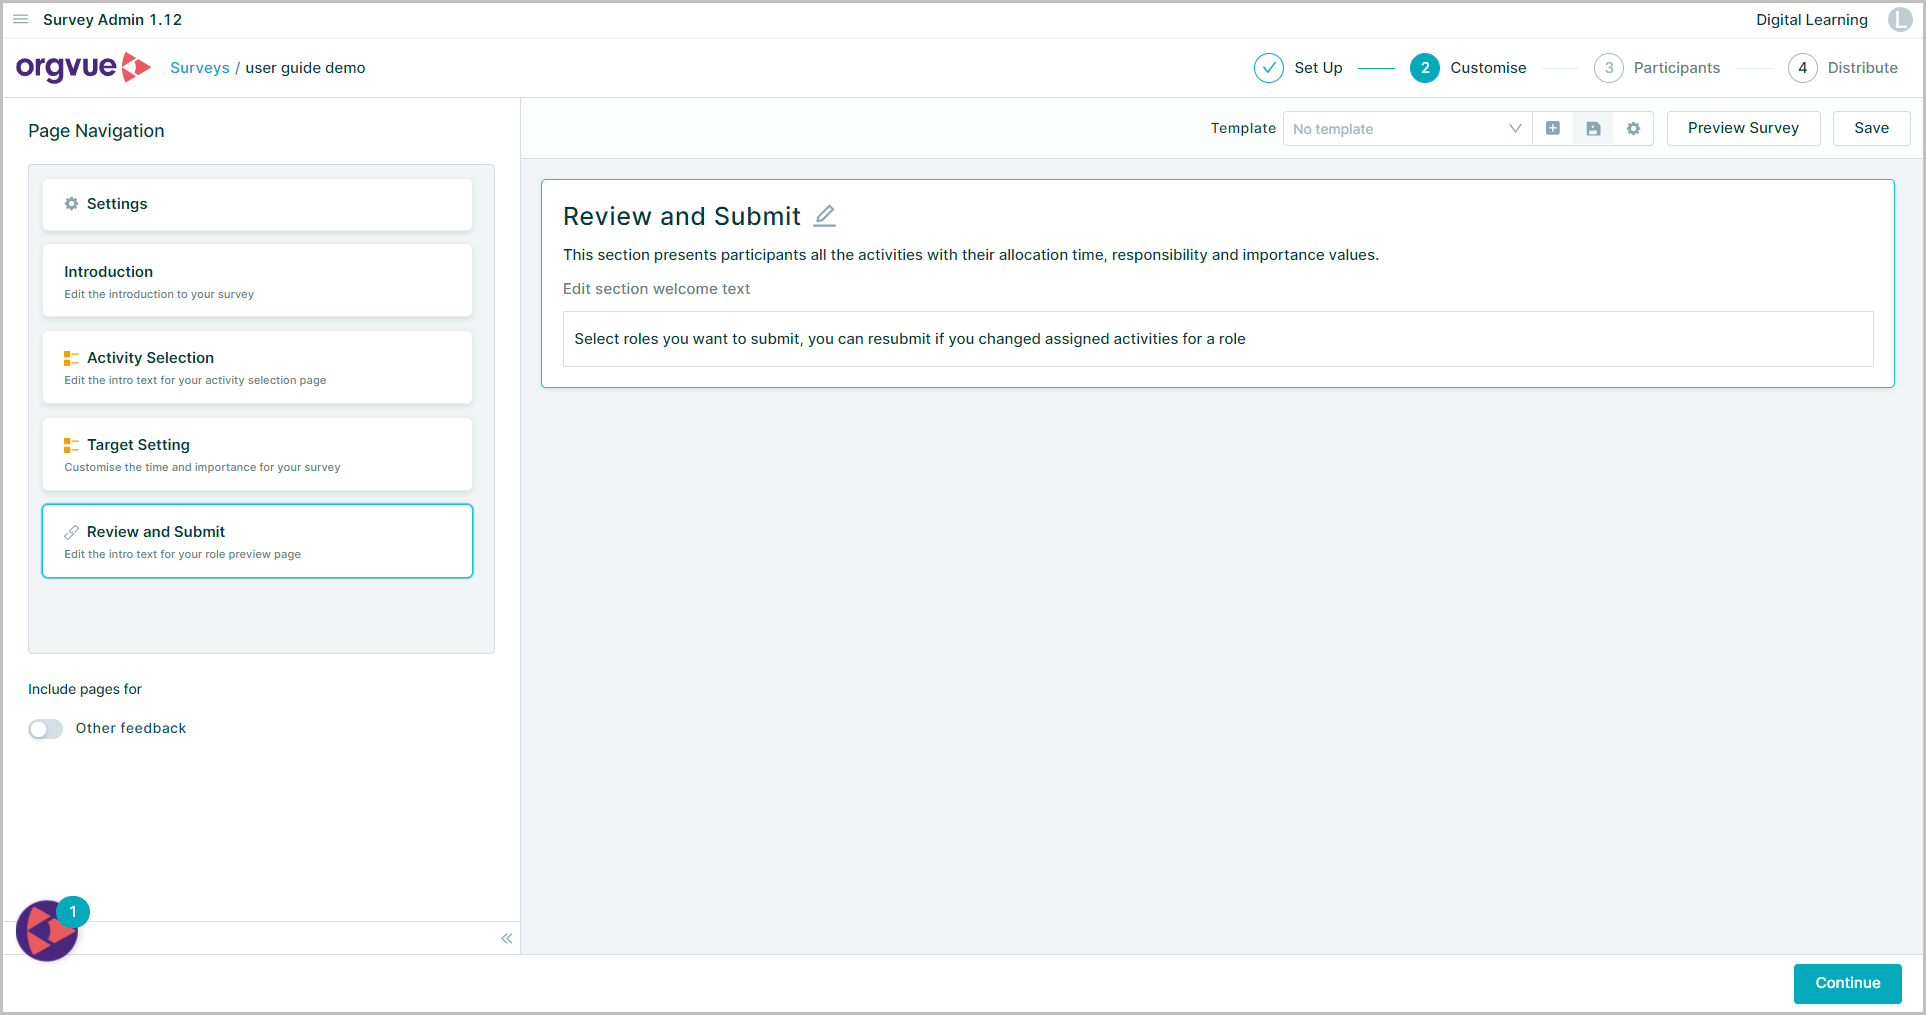
Review and Submit
The Review and Submit screen provides the participant with a screen to review the details entered prior to submission
This screen has no additional questions available to add, but the page name and welcome text may be edited if required
Other Feedback
The other feedback page is an optional one that may be added to the survey by:
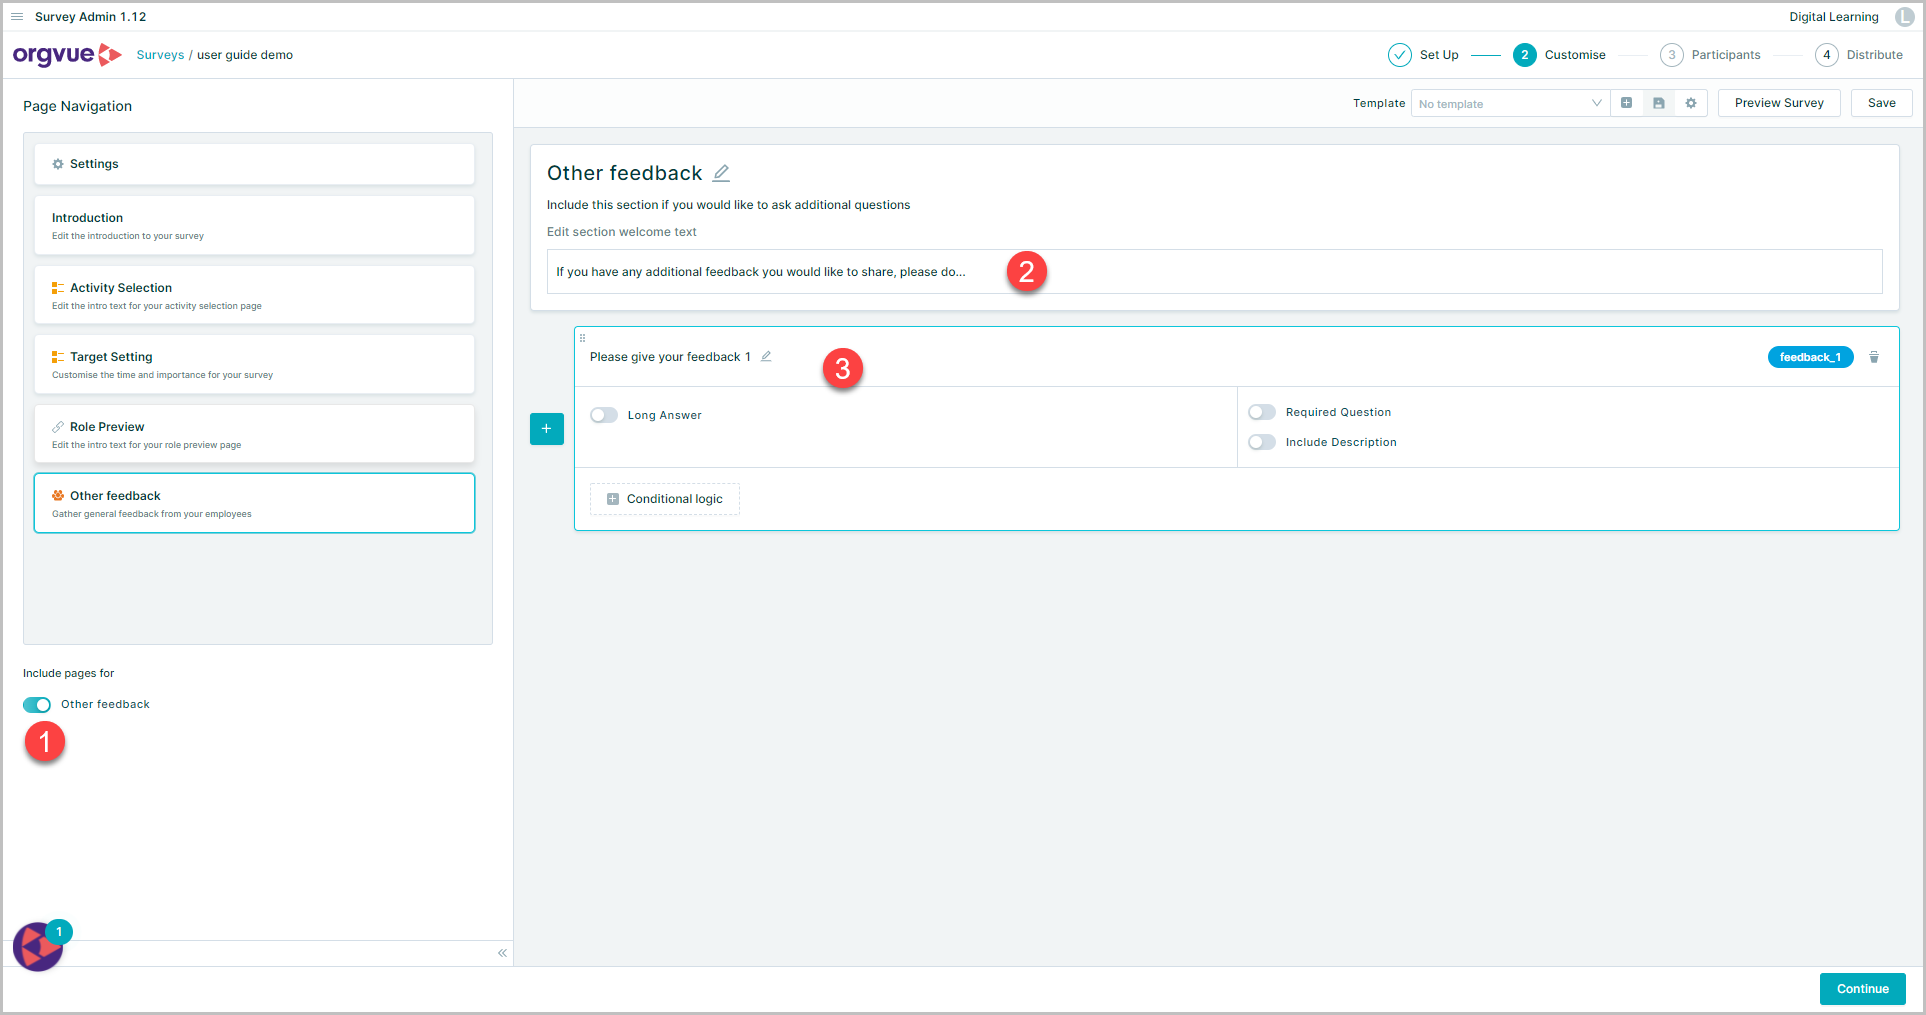
- Enabling the
Other Feedbacktoggle switch - Entering or editing the welcome text
- Entering the question details
Preview Survey
At any point during the customise stage the survey may be previewed using the Preview Survey button
Once all the pages and questions and customised as required click Continue to move to the Participants