
Settings Overview
Settings is accessible to all login role profiles that have access to Workspace however the functions available will depend on the user role:
- Users: Access will be limited to the Data and Packs tabs only which will only display the resources the user either owns or has previously been granted access to
- Admin: All tabs accessible and all resources shown and editable
For further details on roles see Roles
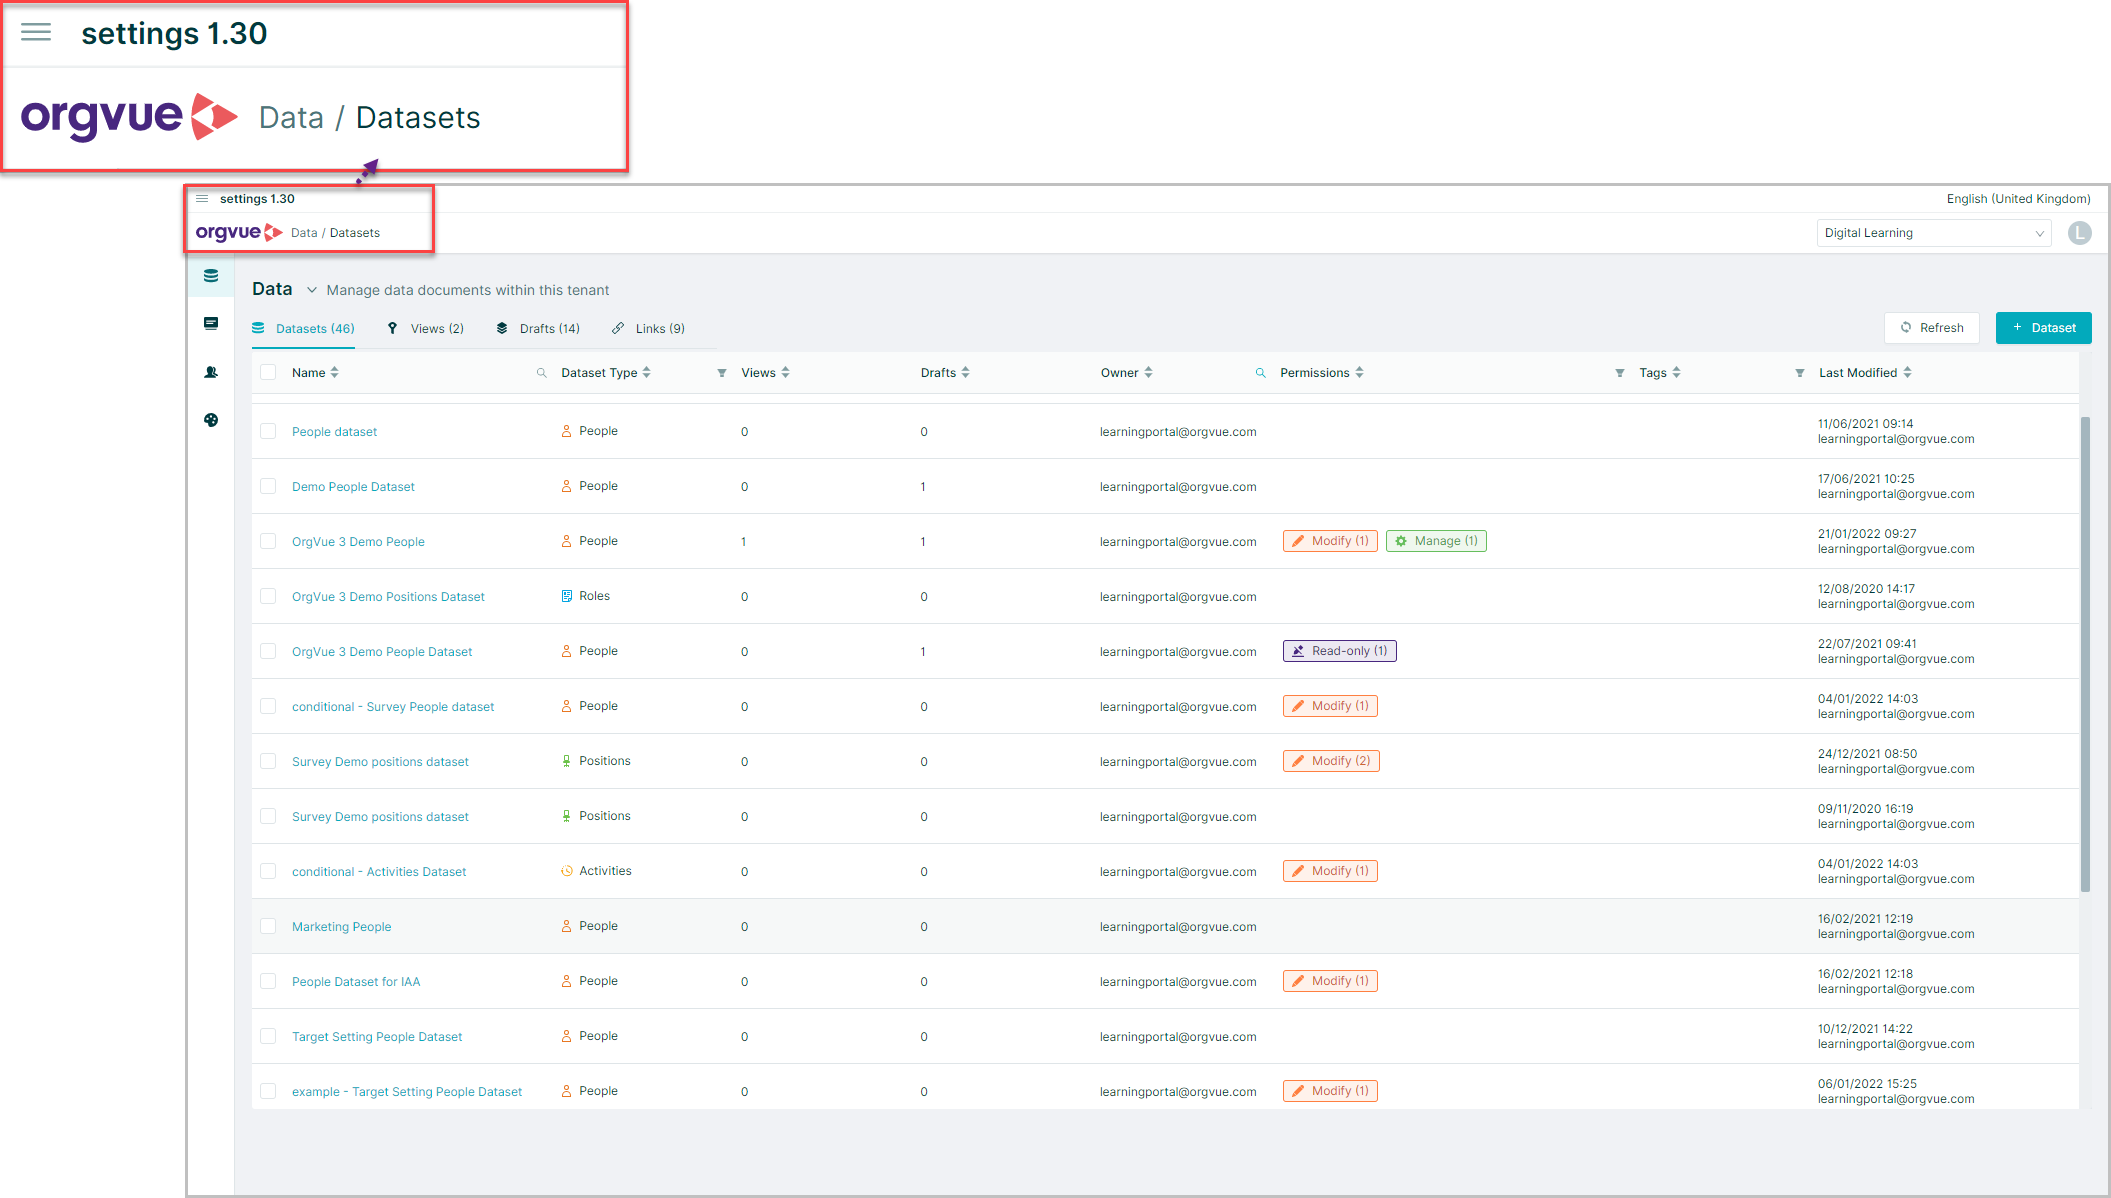
After logging in to the Settings application you will be presented with the default Data screen
There are a number of features shown here that are present on all Settings screens:
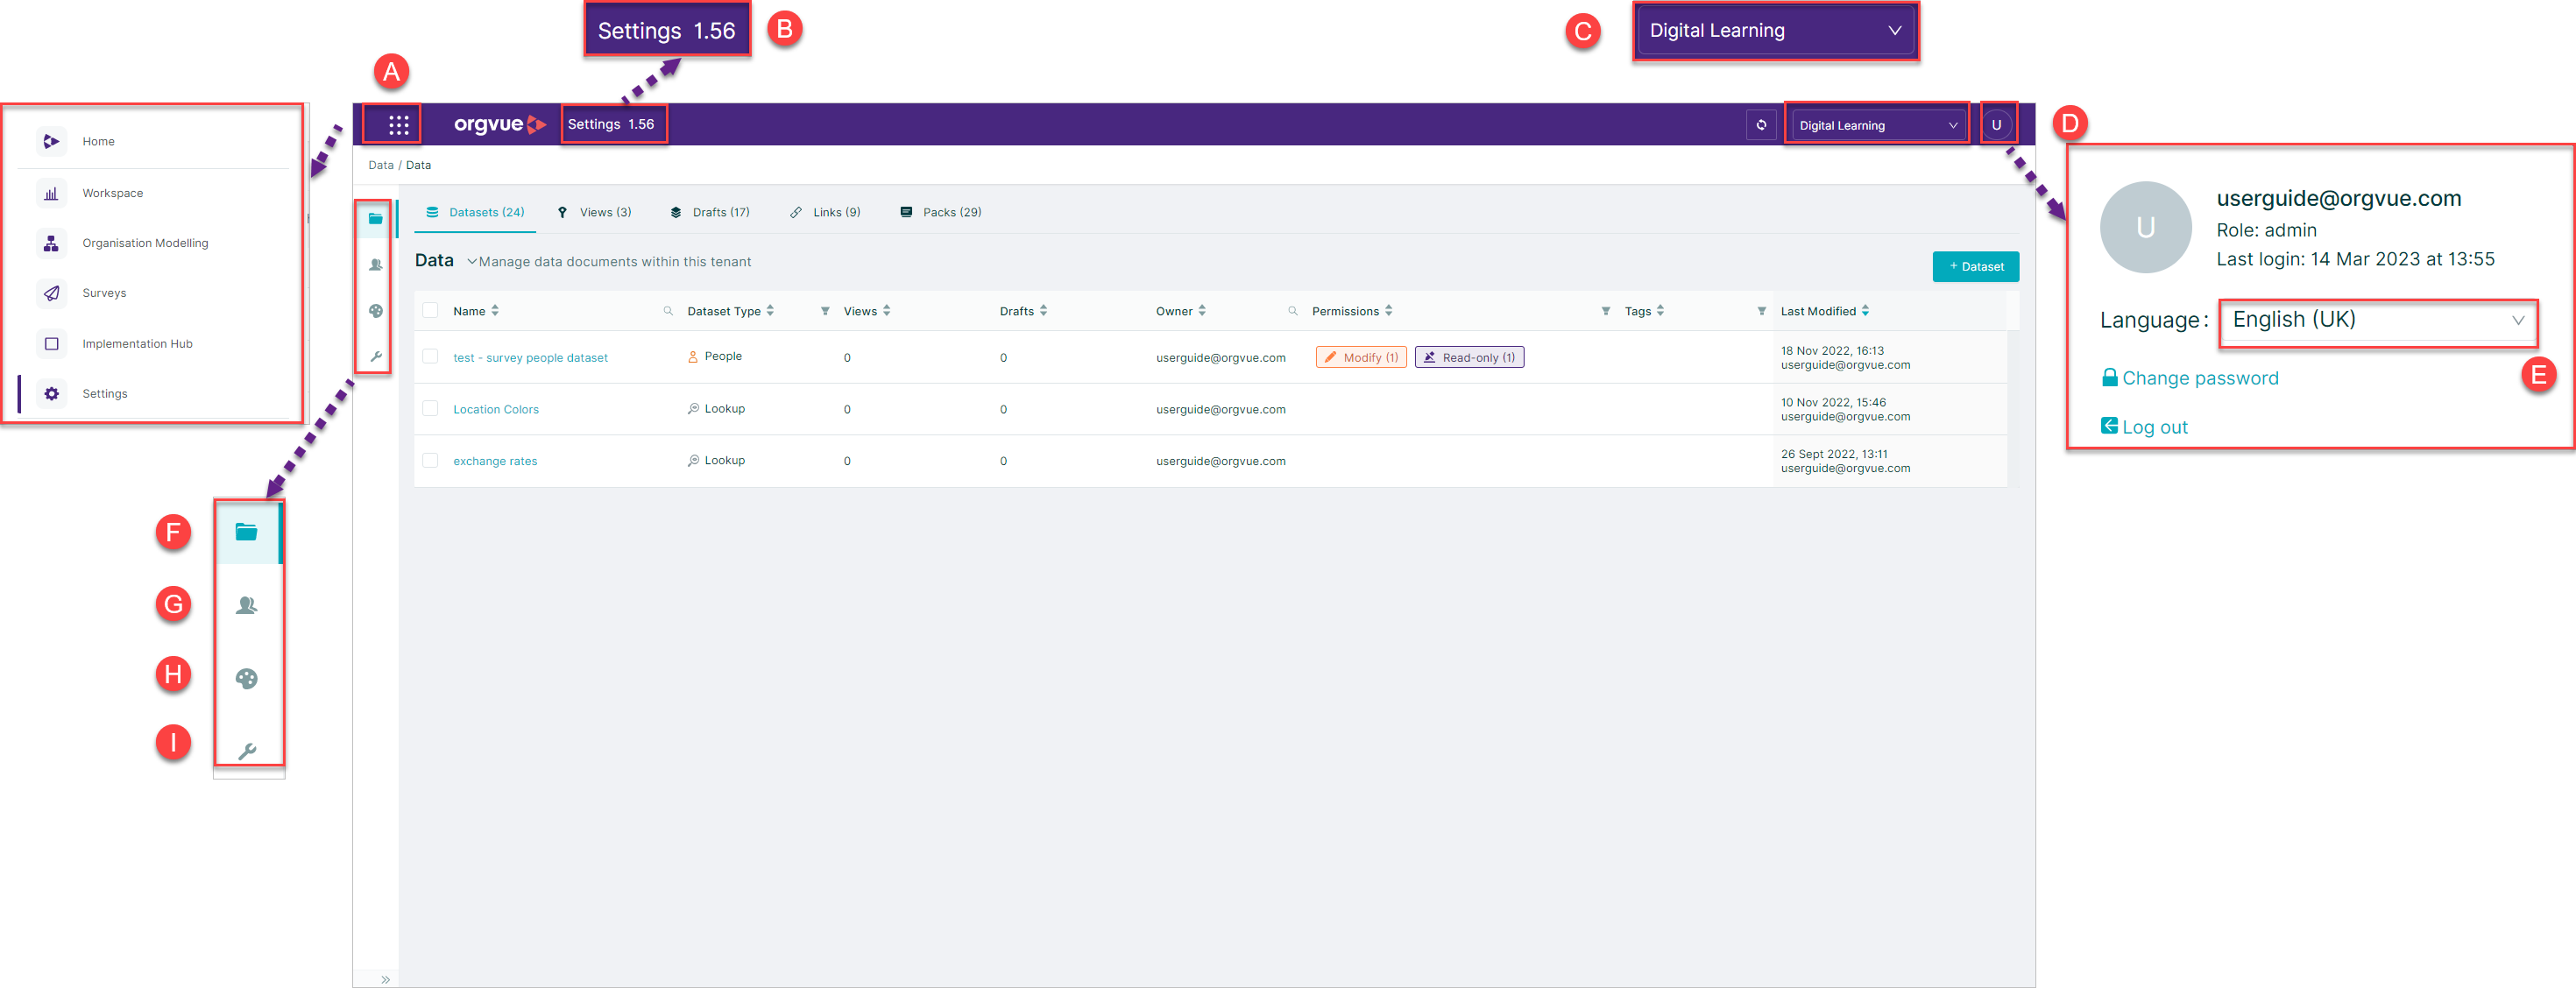
- A. Menu icon
- B. Release Version Number
- C. Tenant selection
- D. Account Information
- E. Locale
- F. Data Button
- F. Users Admin Only
- G. Color palettes Admin Only
- H. Manage Updates
Menu
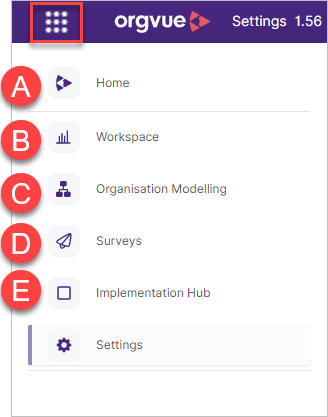
From the menu button you can:
- A. Access Orgvue Home
- B. Access Workspace application
- C. Access Org Modelling
- D. Access Survey Admin
- D. Access Implementation Hub
Tenant Selection
If you have more than one Orgvue tenant available to use then it is possible to switch between these tenants without having to log in separately by:
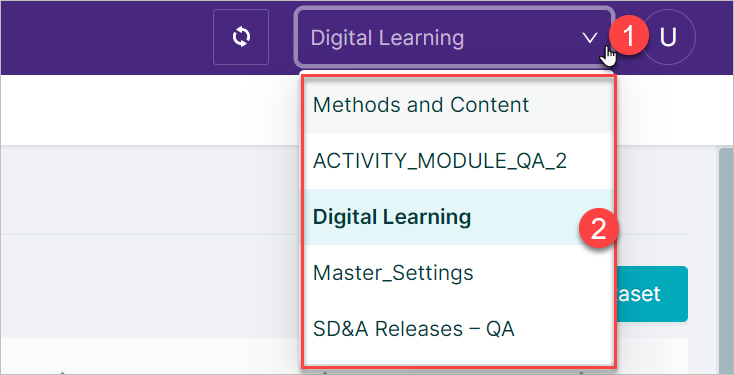
- Selecting the dropdown icon on the tenant selector
- Selecting the required tenant from the list
Account Information
Clicking the single letter icon will open the account information panel which shows:
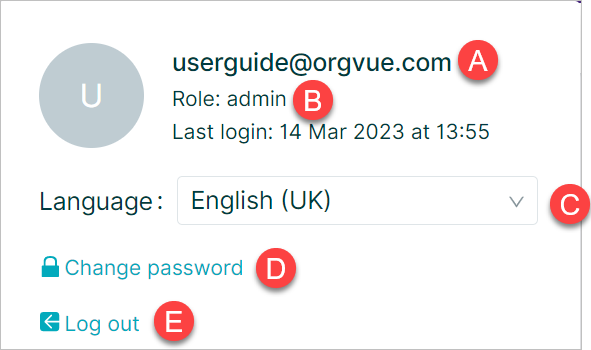
- A. Logon ID
- B. Roles assigned to logon ID
- C. Locale Menu
- D. Change Password
- E. Log out option
Locale menu
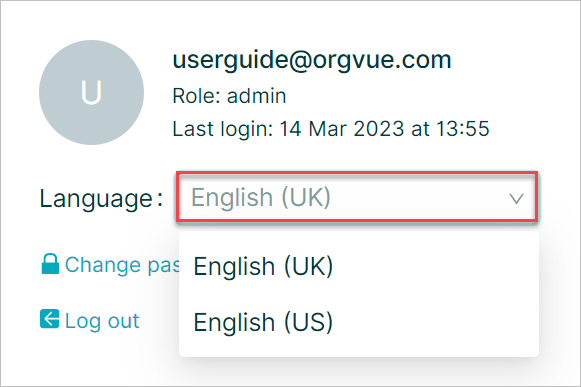
From the Locale button you can switch your language preferences between English (UK) and English (US)
This option will change the format of any date Properties you select and Orgvue will expect and prompt any date entries to be entered in this format:
- MM / DD / YYYY for US, and
- DD / MM / YYYY for UK
URL linking to pages
To make it easier to access the relevant area of Settings and share with other users, you can link straight to a specific page in settings with a URL
For example:
{Orgvue URL}/app/configui/{version number (1.30+)/?tenantId={TENANT ID}&page=/data/datasets
Will link directly to the Dataset List
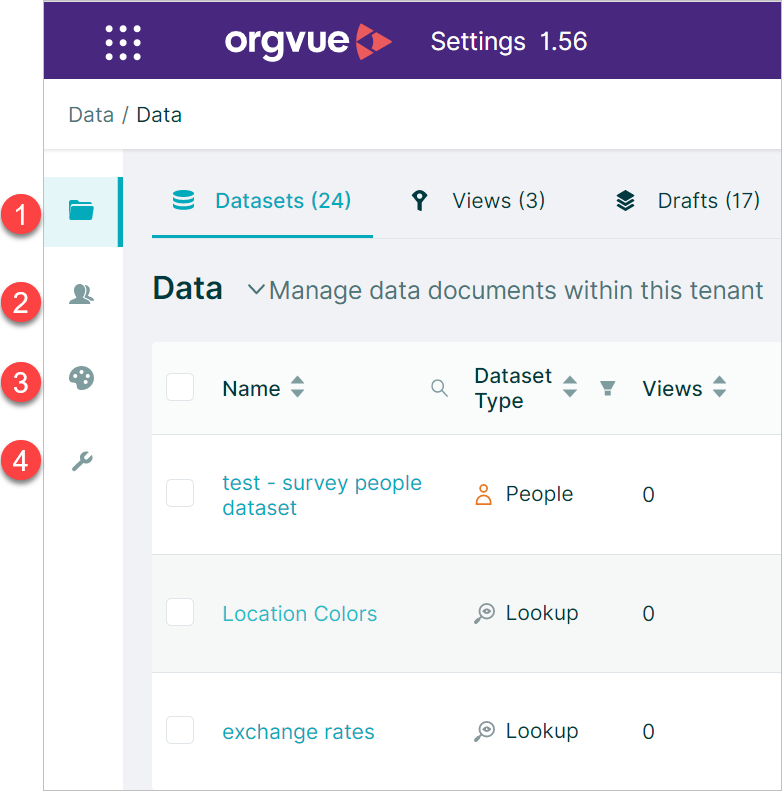
Navigation Sidebar
The Navigation Sidebar is located on the left side of the Settings homescreen and contains links to:
Navigation Bar Expand
By default, the Navigation Sidebar will be collapsed so that just the icons are shown
However, the button at the bottom of the bar may be used to switch between:
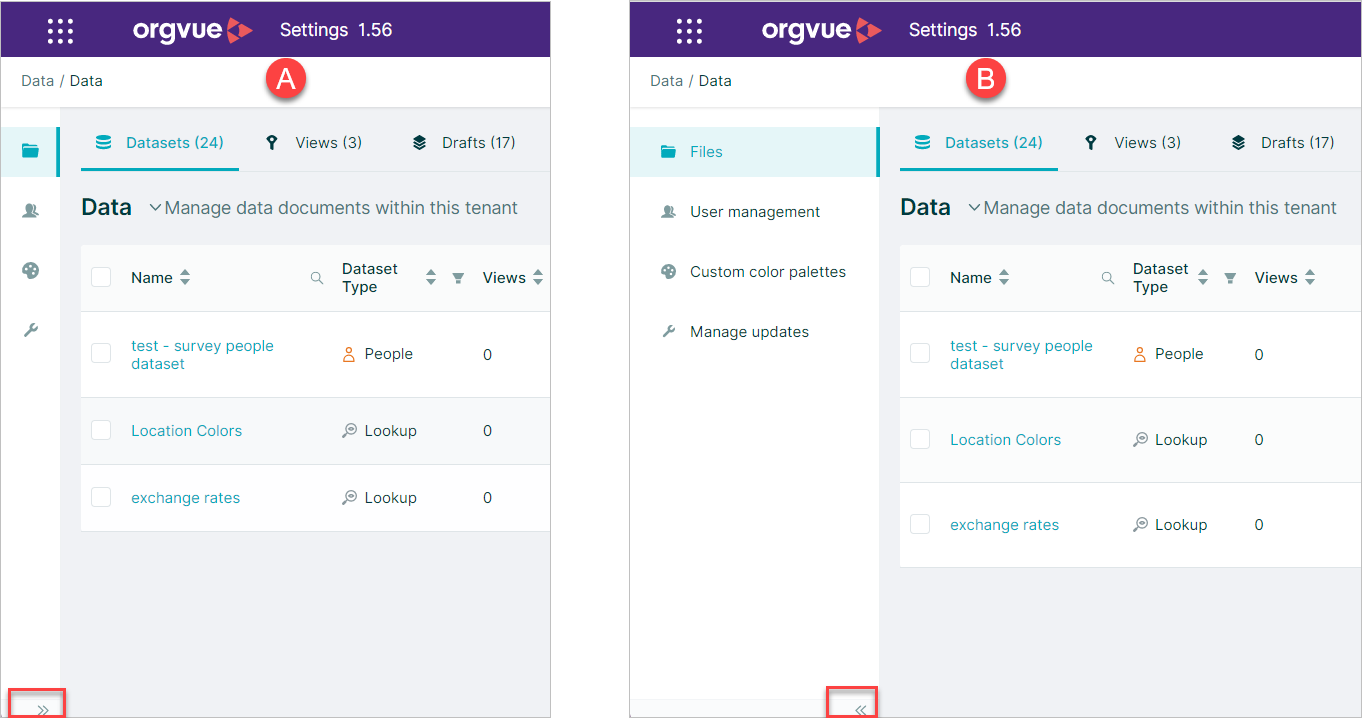
- A. Collapsed
- B. Expanded