
Links Dataset
Settings allows the linking of two datasets together by a value or values creating a Links Dataset in the process
Once the Links Dataset is created, it can be managed and edited through Settings, which provides the ability to update and delete the Links Dataset
Links Dataset List
The Links dataset list can be accessed from the Dataset List screen by selecting the links tab
It contains:
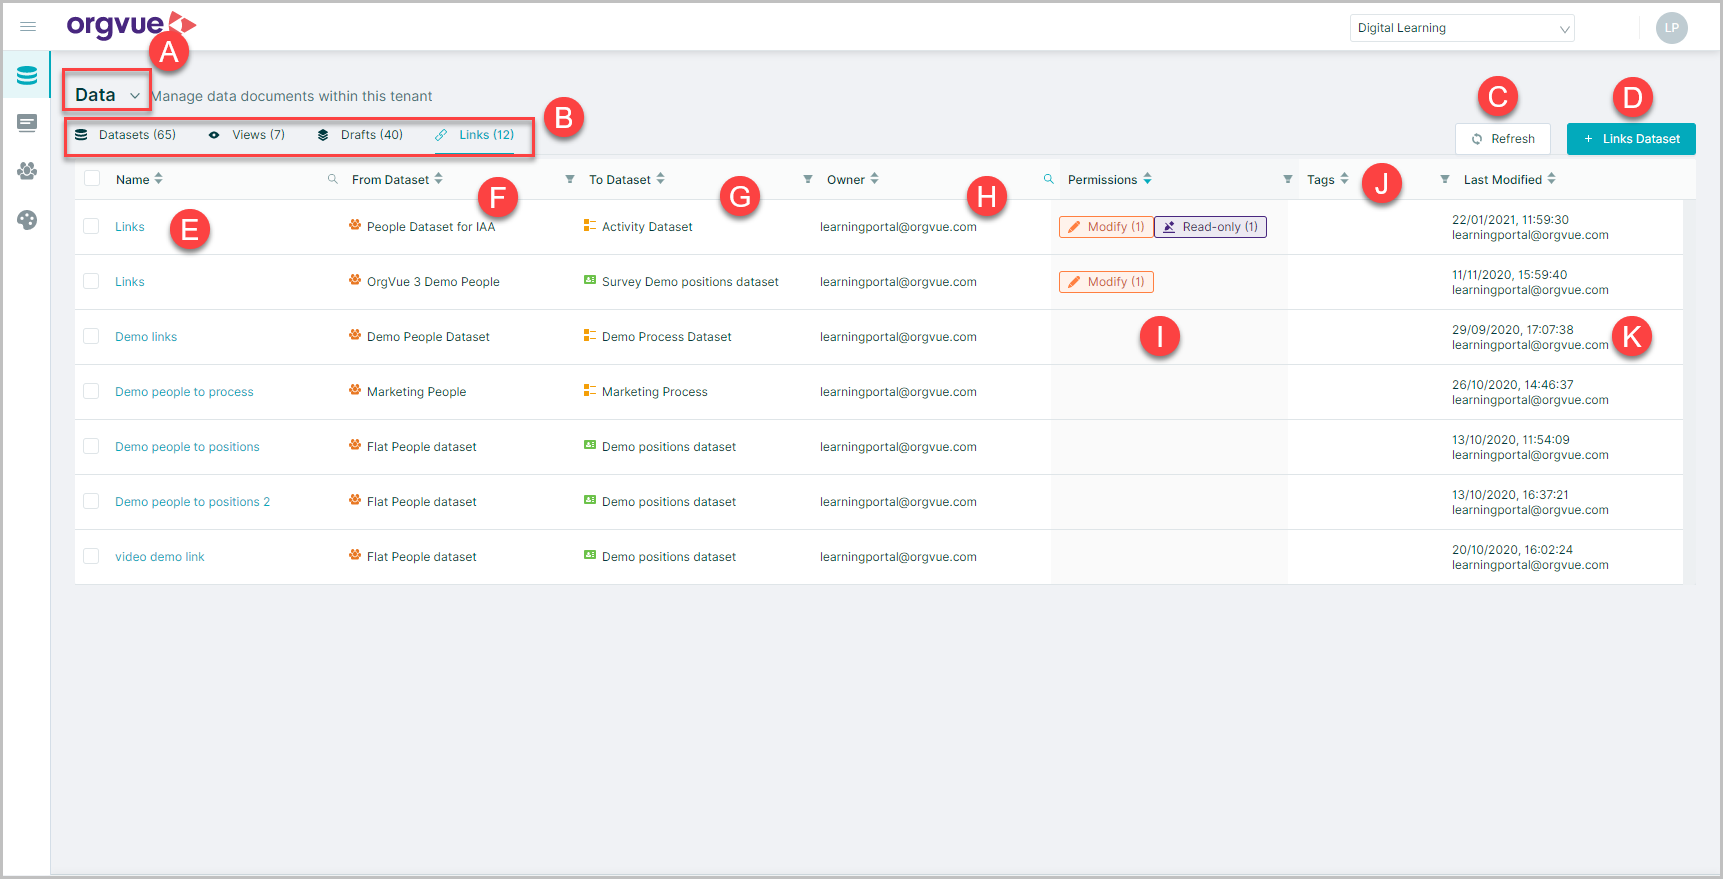
- A. Dropdown menu to select Filtered Dataset List
- B. Document Type: Select the Dataset List to display
- C. Refresh: Refreshes the view of the available datasets with updated detail
- D. Add Links Dataset
- E. Name: Select Dataset name to open Links Metadata page
- F. From Dataset: The name of the dataset linked from
- G. To Dataset: The name of the dataset linked to
- H. Owner: Login ID of dataset owner
- I. Permissions: Hover over the permission icon for details of roles with permission level applied
- J. Tags: Any tags added will show here
- K. Last Modified: Shows date, time and login ID to last modify the dataset
Add Links Dataset
To create a link between two datasets, a new empty link dataset must be created
From the Links Dataset List select the + Links Dataset button
Create Link
This will open a page where you will be required to enter the following information to create the link between two existing datasets:
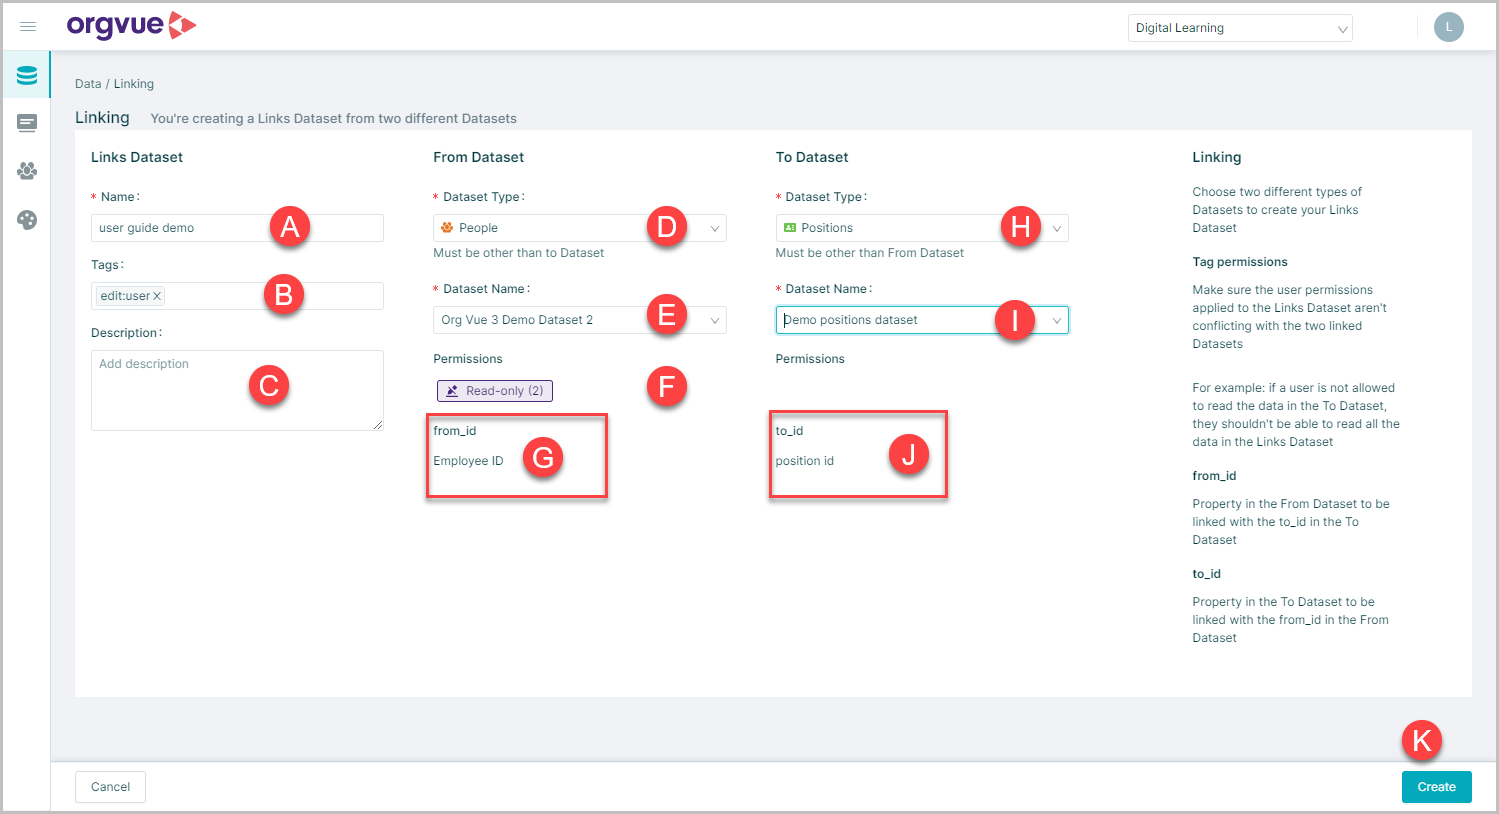
- A. Name*: The name of the link dataset which cannot have the same name as an existing Links Dataset that the user has access to
- B. Tags: Dataset tags applied to the new Links Dataset that can be used for permissions or grouping of datasets
- C. Description: User specific description that can be entered if required
- D. From Dataset Type*: Select from dropdown list
- E. From Dataset Name*: Filtered based on the dataset type, returns the list of all the datasets under the selected type the user has access to
- F. Permissions: Any permission tags applied to selected dataset will be displayed
- G.
from_id: Once the dataset type and name are selected, this field will be autopopulated with the ID property of the From dataset - H. To Dataset Type*: Select from dropdown list
- I. To Dataset Name*: Filtered based on the dataset type, returns the list of all the datasets under the selected type the user has access to
- J.
to_id: Once the dataset type and name are selected, this field will be autopopulated with the ID property of the To dataset - K. Create Button: Once these fields have been completed, selecting the `Create button completes the creation of the link between the two datasets
*Mandatory field
Note: It is not possible to link two datasets together of the same type
Additionally, the following types are unable to be linked to any other Dataset: Links, Trees, Survey, Users, Dimension, Reporting, Analytics, Usage and Configuration
Empty Links
Once the link between the two datasets is created a confirmation screen is shown with three options:
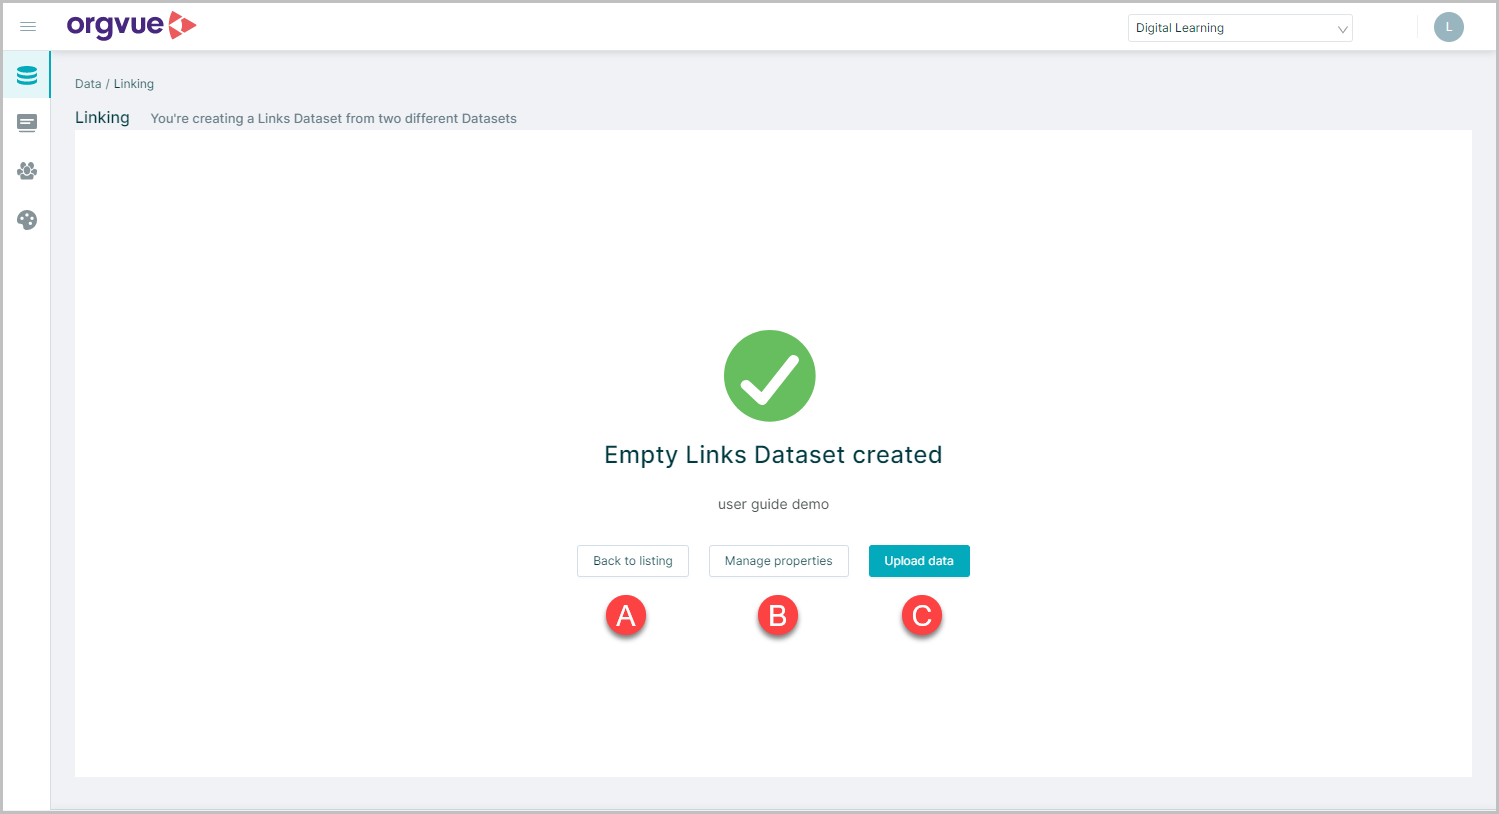
- A.
Back to listing: Returns to Links Dataset List - B.
Manage properties: Opens the Property Manager screen for created Links Dataset - C.
Upload data: Starts the process to Upload Links Data
Upload Links Dataset
Once the link dataset has been created, it is then possible to upload the links data from a file
This may be done from either the Links Metadata page or from the confirmation of Empty Links Created screen
File format
Upload file may be .csv or .xlsx format and must contain the following property columns:
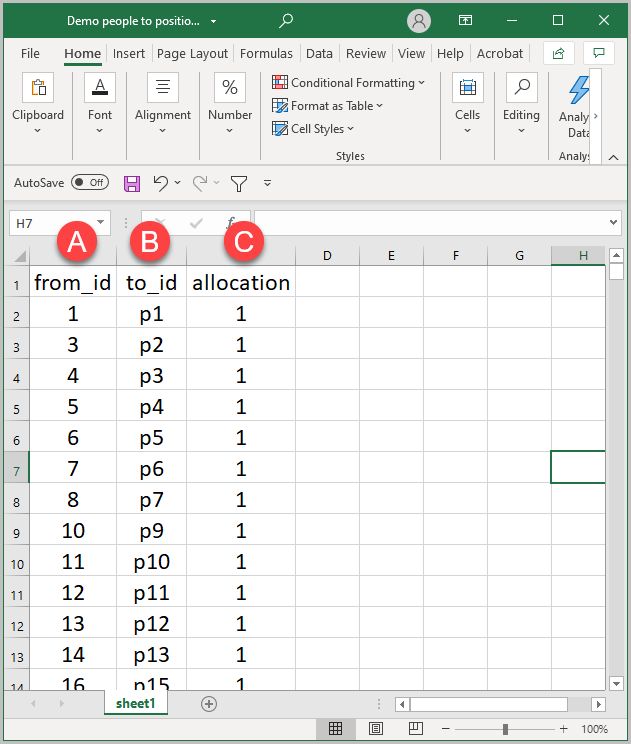
- A. from_id : ID property value of node in From Dataset
- B. to_id : ID Property value of node in To Dataset
- C. allocation : Value to link the From and To nodes
Important property headers are case-sensitive
Select File
There are three methods for uploading data into Settings
File may be loaded in .csv or .xlsx format
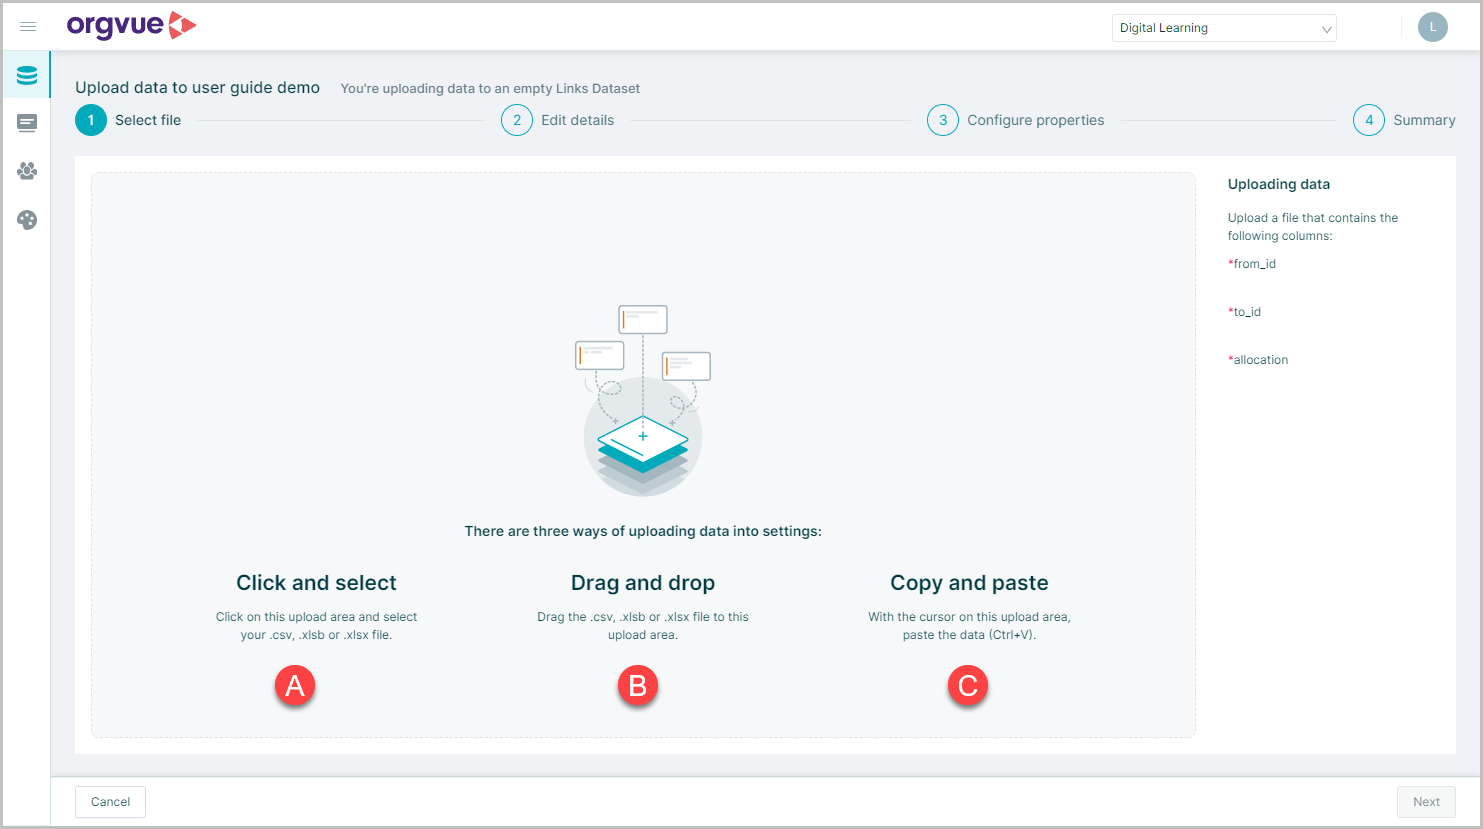
For more detail on the three methods select any of the links
- A. Click and Select
- B. Drag and Drop
- C. Copy and Paste
Select Next to move to Edit Details screen
Edit details
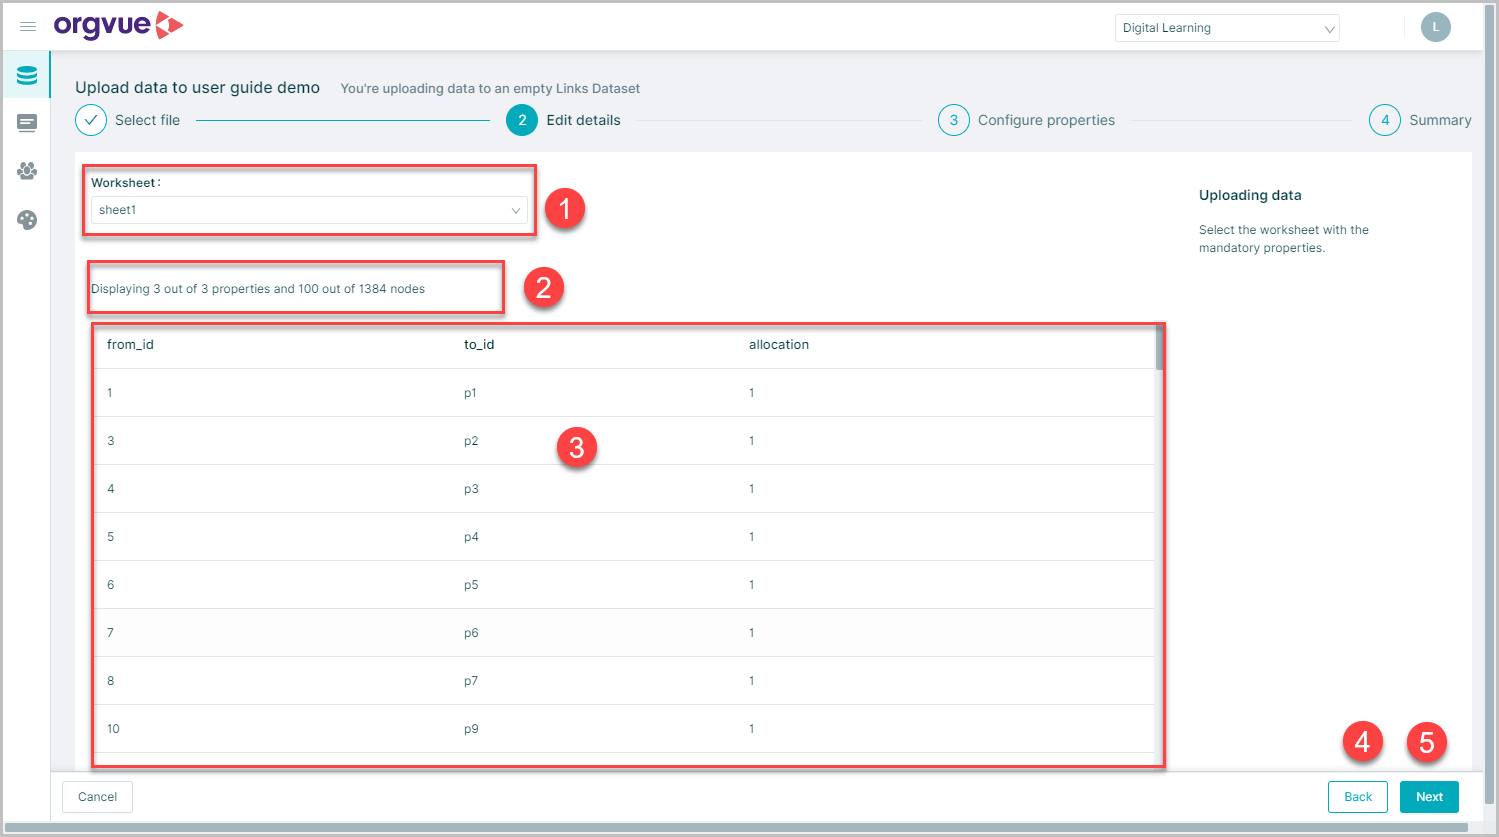
- Select the required worksheet in the upload file if more than one exists
- Confirmation will be provided of the number of properties and nodes in the upload file
- A sample of the uploaded data will be shown
- Use the
Backto return to Select File to upload an alternative - Select
Nextto continue to Configure properties screen
Note: The file will be validated in this step for the required columns, it will prevent progress to the next step and display a warning if there are missing properties
Configure Properties

In stage 3 of the data upload process, it is possible to select or deselect any additional properties that are present in the upload file and also change the property type for the additional properties
The from_id and to_id properties are mandatory and cannot be deselected, and property type cannot be changed
The allocation property is also mandatory and cannot be unselected in stage 3, but the property type can be changed if required
Once any changes have been made, select the upload button to complete the process
Summary
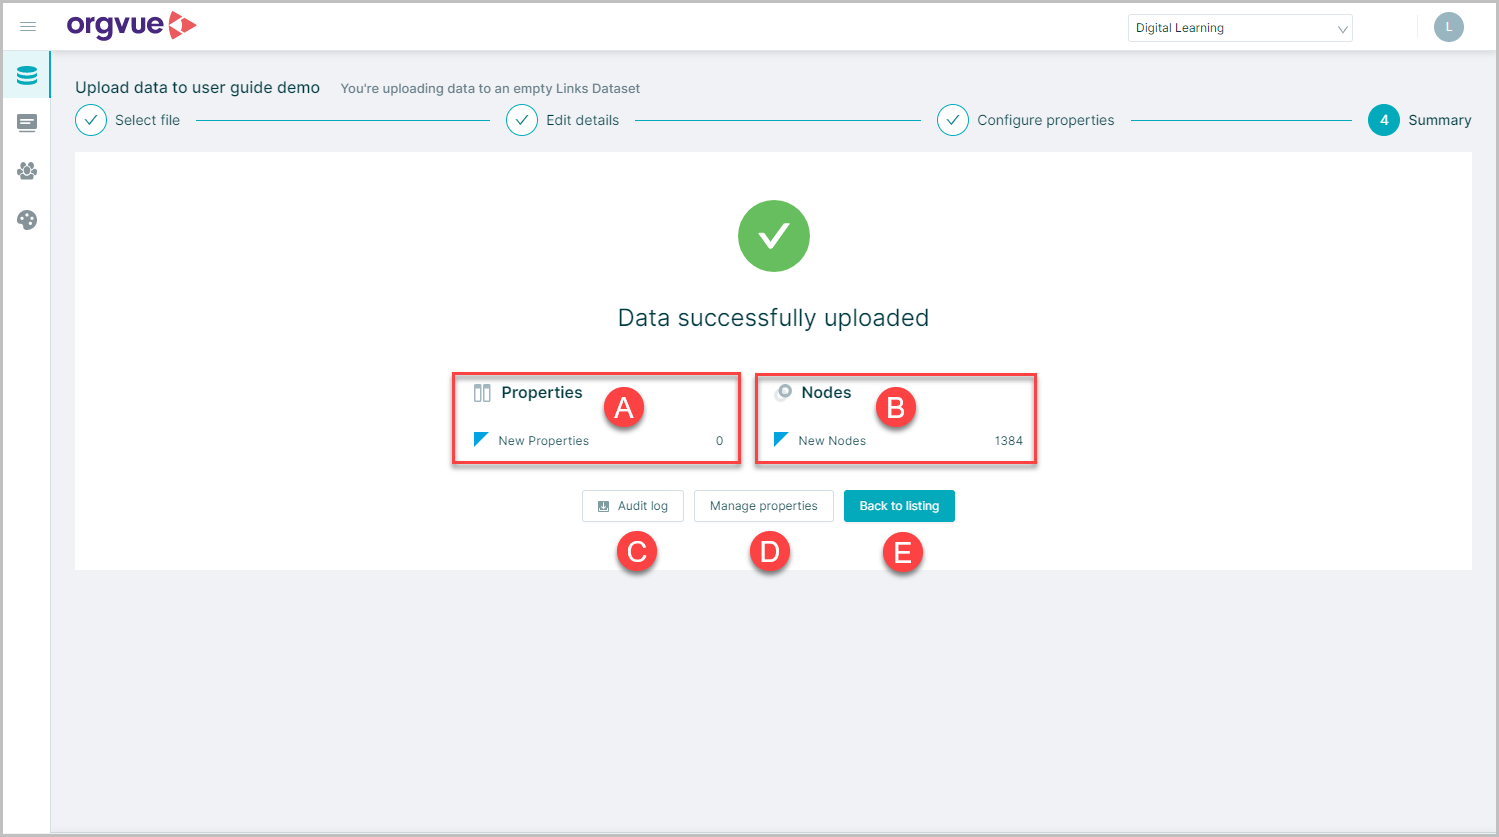
On the final summary screen a message is displayed to confirm Data successfully uploaded
The following is also shown:
- A. Number of new properties in file
- B. Number of new Nodes in File
- C.
Audit Log: View the Audit log for uploaded file - D.
Manager properties: Opens the Property Manager screen for the Links Dataset - E.
Back to listing: Returns to Links Dataset List
Link ID
Once the upload process is complete, a new property link_id, is automatically created within the Links Dataset
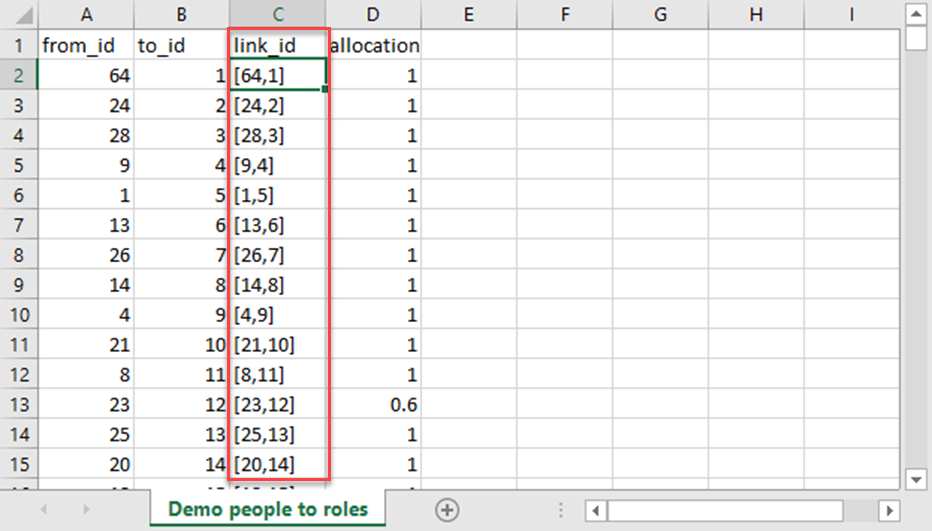
This property is a combination of the from_id and the to_id in the format [from_id,to_id] and represents the unique identity of the link between the datasets
Links Metadata
The Links metadata page can be opened for any links dataset by selecting the Links Dataset name from the Links Dataset List
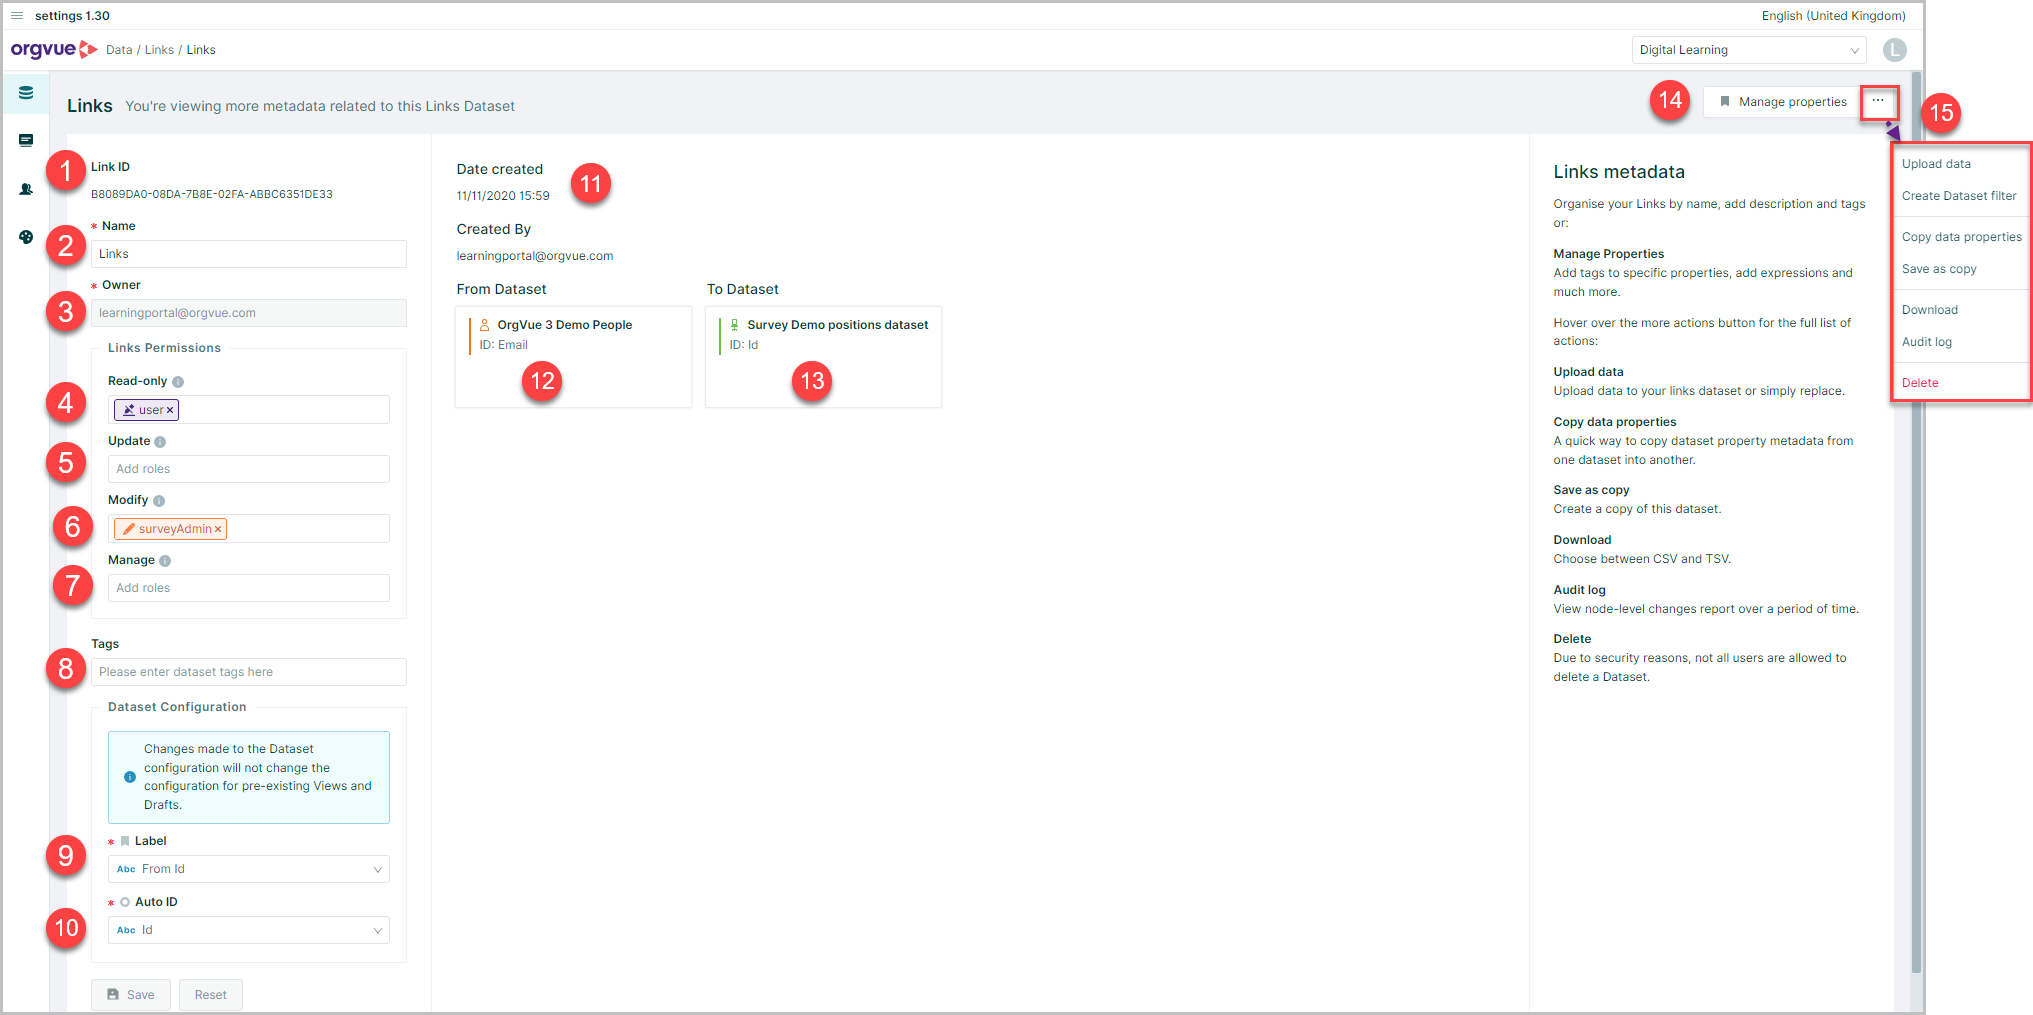
It contains:
- Link Dataset ID: Non-amendable field
- Name: This can be amended
- Owner: Non-amendable field Links Permissions
- Read Only*: Listed roles have read only access, click into window to select from existing roles to add or type new role name
- Update*: Listed roles have view and update access to dataset, click into window to select from existing roles to add or type new role name
- Modify*: Listed roles have edit access to dataset, click into window to select from existing roles to add or type new role name
- Manage*: Listed roles have edit access and the ability to create views and drafts from dataset, click into window to select from existing roles to add or type new role name
- Tags: Free text box to add any Dataset tags See Tags for further details
- Label: See Label Property for more details
- Auto ID: See Link ID for more details
- Date Created / Created By: Non-amendable for information only
- From Dataset: Dataset name and ID property used for
fromdataset - To Dataset: Dataset name and ID property used for
todataset - Manage Properties
- More detail Menu, Open to select from:
* Dataset Permissions: See Dataset Permissions for more detail